HP ProOne 600 Maintenance & Service Guide HP ProOne 600 G1 All-in-One - Page 99
Front bezel, Remove the power supply see
 |
View all HP ProOne 600 manuals
Add to My Manuals
Save this manual to your list of manuals |
Page 99 highlights
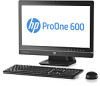
Front bezel Description Front bezel Spare part number 732487-001 The front bezel is located on the front of the computer and is secured to the main system bracket with eight Torx screws. Replacement bezels include the webcam shutter and capacitive sensor board. On models that do not include a webcam, you must remove the shutter and install the webcam insert (Webcam assembly kit) into the slot in which the webcam would otherwise be installed. To remove the front bezel: 1. Prepare the computer for disassembly (see Preparing to disassemble the computer on page 33). 2. Remove the access panel (see Access panel on page 37). 3. Remove the stand (see Stand on page 39). 4. Remove the lower panel (see Lower panel on page 42). 5. Remove the optical drive (see Replacing the optical disc drive on page 47). 6. Remove the VESA mounting adapter (see VESA mounting adapter on page 43). 7. Remove the power supply (see Power supply on page 75). 8. Remove the side panels (see Side panels on page 73). 9. Remove the speakers (see Speakers on page 71). 10. Remove the power button board (see Power button board on page 87). Front bezel 89
-
 1
1 -
2
-
3
-
4
-
5
-
6
-
7
-
8
-
9
-
10
-
11
-
12
-
13
-
14
-
15
-
16
-
17
-
18
-
19
-
20
-
21
-
22
-
23
-
24
-
25
-
26
-
27
-
28
-
29
-
30
-
31
-
32
-
33
-
34
-
35
-
36
-
37
-
38
-
39
-
40
-
41
-
42
-
43
-
44
-
45
-
46
-
47
-
48
-
49
-
50
-
51
-
52
-
53
-
54
-
55
-
56
-
57
-
58
-
59
-
60
-
61
-
62
-
63
-
64
-
65
-
66
-
67
-
68
-
69
-
70
-
71
-
72
-
73
-
74
-
75
-
76
-
77
-
78
-
79
-
80
-
81
-
82
-
83
-
84
-
85
-
86
-
87
-
88
-
89
-
90
-
91
-
92
-
93
-
 94
94 -
 95
95 -
 96
96 -
 97
97 -
 98
98 -
 99
99 -
 100
100 -
 101
101 -
 102
102 -
 103
103 -
 104
104 -
105
-
106
-
107
-
108
-
109
-
110
-
111
-
112
-
113
-
114
-
115
-
116
-
117
-
118
-
119
-
120
-
121
-
122
-
123
-
124
-
125
-
126
-
127
-
128
-
129
-
130
-
131
-
132
-
133
-
134
-
135
-
136
-
137
-
138
-
139
-
140
-
141
-
142
-
143
-
144
-
145
-
146
-
147
-
148
-
149
-
150
-
151
-
152
-
153
-
154
-
155
-
156
-
157
-
158
-
159
-
160
-
161
-
162
-
163
-
164
-
165
-
166
-
167
-
168
-
169
-
170
-
171
-
172
-
173
-
174
-
175
-
176
-
177
-
178
-
179
-
180
-
181
-
182
-
183
-
184
-
185
-
186
-
187
-
188
-
189
-
190
-
191
-
192
-
193
-
194
-
195
-
196
-
197
-
198
-
199
-
200
-
201
-
202
 |
 |
