HP Vectra VE 5/xx hp business pcs, remote software deployment, setup guide for - Page 30
E:\RIS\Setup\English\Images., Win2000.pro, Computer, Images
 |
View all HP Vectra VE 5/xx manuals
Add to My Manuals
Save this manual to your list of manuals |
Page 30 highlights
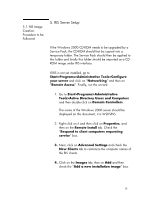
5.2. RIS Image Customization: OEM Drivers The RIS Setup Wizard creates an RIS image in the drive letter configured during RIS installation. In this example, it is E: and the RIS images are stored in E:\RIS\Setup\English\Images. In this folder, there should be a "Win2000.pro" folder or the equivalent folder name entered when prompted for the RIS directory name. Go to this folder, double click on My Computer and browse through the "Images" folder described above. The procedure to install an OEM driver is described at: How to Add Third-Party OEM Network Adapters to RIS Installations (Q246184). Users should ensure that they follow the Network Adapter installation procedure closely, as the client side of the RIS will not work if the RIS image does not contain a driver that matches the RIS client's Network Adapter. Note that if the Network Adapter is embedded in the RIS image OS, this procedure is not required. To install network drivers into the RIS image: 1. Download the Windows 2000 network driver(s) that match the RIS client's hardware(s). 2. Under E:\RIS\Setup\English\Images\Win2000.pro create a folder called $OEM$. 3. Under the $OEM$ folder, create a folder called $1. 4. Under the $1 folder, create a folder called Drivers. 5. Under the Drivers folder, create a folder called NIC. 6. Under the NIC folder, copy all the Windows 2000 driver files downloaded from hp's support web site. 7. Copy all .inf and .sys files from $OEM$\$1\Drivers\Nic to the I386 folder (in the [...]\win2000.pro folder). Users can 30
-
 1
1 -
2
-
3
-
4
-
5
-
6
-
7
-
8
-
9
-
10
-
11
-
12
-
13
-
14
-
15
-
16
-
17
-
18
-
19
-
20
-
21
-
22
-
23
-
24
-
 25
25 -
 26
26 -
 27
27 -
 28
28 -
 29
29 -
 30
30 -
 31
31 -
 32
32 -
 33
33
 |
 |