Hitachi DZ-BX35A Owners Guide - Page 31
Turning DVD Video Camera/Recorder On
 |
View all Hitachi DZ-BX35A manuals
Add to My Manuals
Save this manual to your list of manuals |
Page 31 highlights
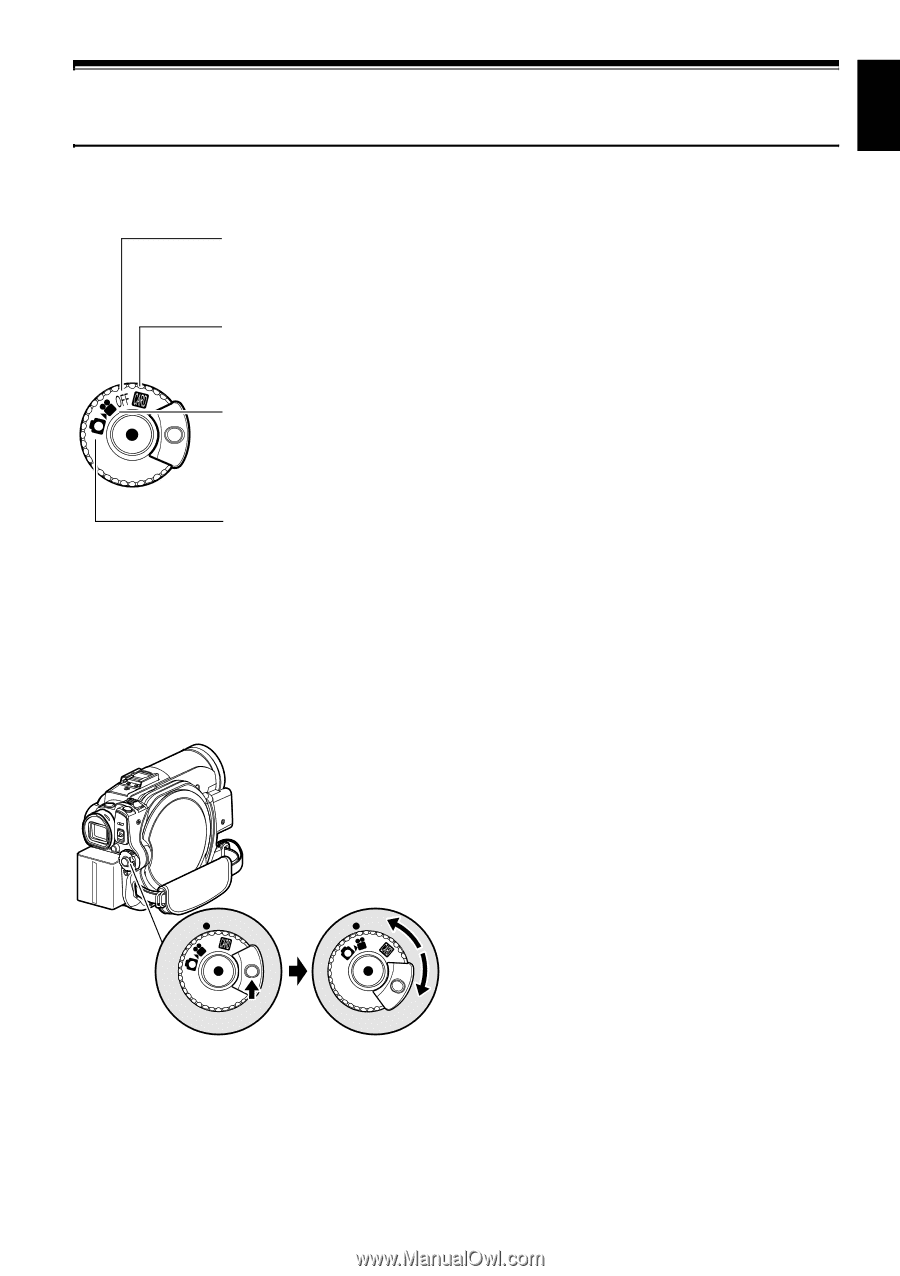
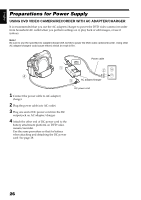
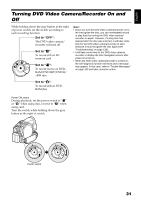
English Turning DVD Video Camera/Recorder On and Off While holding down the gray button at the right of power switch, set the switch according to each recording function: Set to "OFF": The DVD video camera/ recorder will turn off Set to "P": To record still on SD memory card Set to "O": To record movie on DVDRAM/DVD-RW/DVD-R/ +RW disc Set to "N": To record still on DVDRAM disc Note: • Once you turn the DVD video camera/recorder on to let it recognize the disc, you can immediately record or play back by turning the DVD video camera/ recorder on again. However, if a long time has elapsed after the disc was inserted, it will take some time for the DVD video camera/recorder to start because it must recognize the disc again (see "Troubleshooting" on page 139). • It will take some time for the DVD video camera/ recorder to display the Disc Navigation screen after power is turned on. • When the DVD video camera/recorder is turned on, the self-diagnosis function will work and a message may appear. In this case, refer to "Trouble Messages" on page 133 and take corrective action. Power ON status During playback, set the power switch to "O" or "N" when using disc, or set it to "P" when using card. Turn the switch while holding down the gray button at the right of switch. OFF OFF Power switch 31
-
 1
1 -
2
-
3
-
4
-
5
-
6
-
7
-
8
-
9
-
10
-
11
-
12
-
13
-
14
-
15
-
16
-
17
-
18
-
19
-
20
-
21
-
22
-
23
-
24
-
25
-
 26
26 -
 27
27 -
 28
28 -
 29
29 -
 30
30 -
 31
31 -
 32
32 -
 33
33 -
 34
34 -
 35
35 -
 36
36 -
37
-
38
-
39
-
40
-
41
-
42
-
43
-
44
-
45
-
46
-
47
-
48
-
49
-
50
-
51
-
52
-
53
-
54
-
55
-
56
-
57
-
58
-
59
-
60
-
61
-
62
-
63
-
64
-
65
-
66
-
67
-
68
-
69
-
70
-
71
-
72
-
73
-
74
-
75
-
76
-
77
-
78
-
79
-
80
-
81
-
82
-
83
-
84
-
85
-
86
-
87
-
88
-
89
-
90
-
91
-
92
-
93
-
94
-
95
-
96
-
97
-
98
-
99
-
100
-
101
-
102
-
103
-
104
-
105
-
106
-
107
-
108
-
109
-
110
-
111
-
112
-
113
-
114
-
115
-
116
-
117
-
118
-
119
-
120
-
121
-
122
-
123
-
124
-
125
-
126
-
127
-
128
-
129
-
130
-
131
-
132
-
133
-
134
-
135
-
136
-
137
-
138
-
139
-
140
-
141
-
142
-
143
-
144
-
145
-
146
-
147
-
148
-
149
-
150
-
151
-
152
-
153
-
154
-
155
-
156
-
157
-
158
-
159
-
160
-
161
-
162
-
163
-
164
-
165
-
166
 |
 |