Hitachi NT65GS Instruction Manual - Page 18
Accessories, Standard Accessories, Optional Accessories, Applications, Charging Method - nose cap
 |
UPC - 717709010864
View all Hitachi NT65GS manuals
Add to My Manuals
Save this manual to your list of manuals |
Page 18 highlights
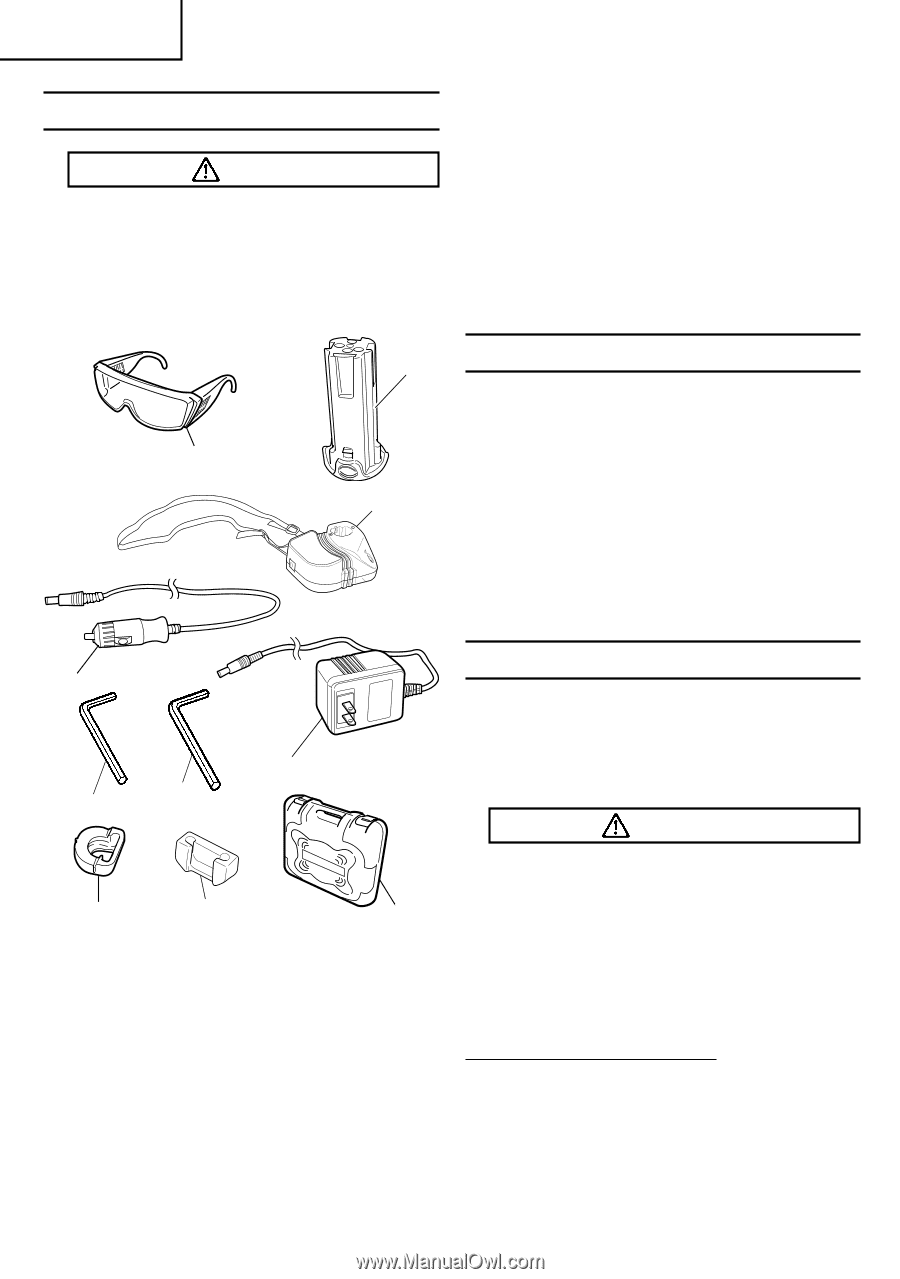
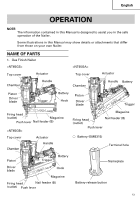
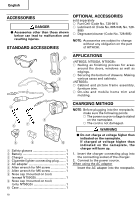
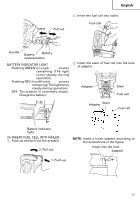
English ACCESSORIES DANGER ⅷ Accessories other than those shown below can lead to malfunction and resulting injuries. STANDARD ACCESSORIES OPTIONAL ACCESSORIES sold separately ⅜ Fuel Cell (Code No. 728-981) ⅜ Lubricant oil (Code No. 885-546, No. 728- 986) ⅜ Degreaser/cleaner (Code No. 728-985) NOTE: Accessories are subject to change without any obligation on the part of HITACHI. 2 APPLICATIONS ⅜ Nailing as finishing process for areas around the doors, windows as well as 1 edgings. ⅜ Securing the bottom of drawers. Making 3 various cases and cabinets. ⅜ Cabinet and picture frame assembly, furniture trim. ⅜ On-site and mobile home trim and molding. 4 5 6 7 8 9 0 1 Safety glasses 1 2 Battery 1 3 Charger 1 4 Cigarette lighter connecting plug ........ 1 5 AC adapter 1 6 Allen wrench for M4 screw 1 7 Allen wrench for M5 screw 1 8 Nose cap (mounted on tool) (except NT50GS 1 9 Nose cap (mounted on tool) (only NT50GS 1 0 Case 1 CHARGING METHOD NOTE: Before plugging into the receptacle, make sure the following points. ⅜ The power source voltage is stated on the nameplate. ⅜ The cord is not damaged. WARNING ⅷ Do not charge at voltage higher than indicated on the nameplate. If charged at voltage higher than indicated on the nameplate, the charger will burn up. 1. Insert the charger connecting plug into the connecting socket of the charger. 2. Connect to the power source. When using the AC adapter Insert the AC adapter into the receptacle. 18
-
 1
1 -
2
-
3
-
4
-
5
-
6
-
7
-
8
-
9
-
10
-
11
-
12
-
 13
13 -
 14
14 -
 15
15 -
 16
16 -
 17
17 -
 18
18 -
 19
19 -
 20
20 -
 21
21 -
 22
22 -
 23
23 -
24
-
25
-
26
-
27
-
28
-
29
-
30
-
31
-
32
-
33
-
34
-
35
-
36
-
37
-
38
-
39
-
40
-
41
-
42
-
43
-
44
-
45
-
46
-
47
-
48
-
49
-
50
-
51
-
52
-
53
-
54
-
55
-
56
-
57
-
58
-
59
-
60
-
61
-
62
-
63
-
64
-
65
-
66
-
67
-
68
-
69
-
70
-
71
-
72
-
73
-
74
-
75
-
76
-
77
-
78
-
79
-
80
-
81
-
82
-
83
-
84
-
85
-
86
-
87
-
88
-
89
-
90
-
91
-
92
-
93
-
94
-
95
-
96
-
97
-
98
-
99
-
100
-
101
-
102
-
103
-
104
-
105
-
106
-
107
-
108
-
109
-
110
-
111
-
112
 |
 |