Hitachi NT65GS Instruction Manual - Page 28
Adjusting The Nailing, Depth, Using The Hook - fuel cell
 |
UPC - 717709010864
View all Hitachi NT65GS manuals
Add to My Manuals
Save this manual to your list of manuals |
Page 28 highlights
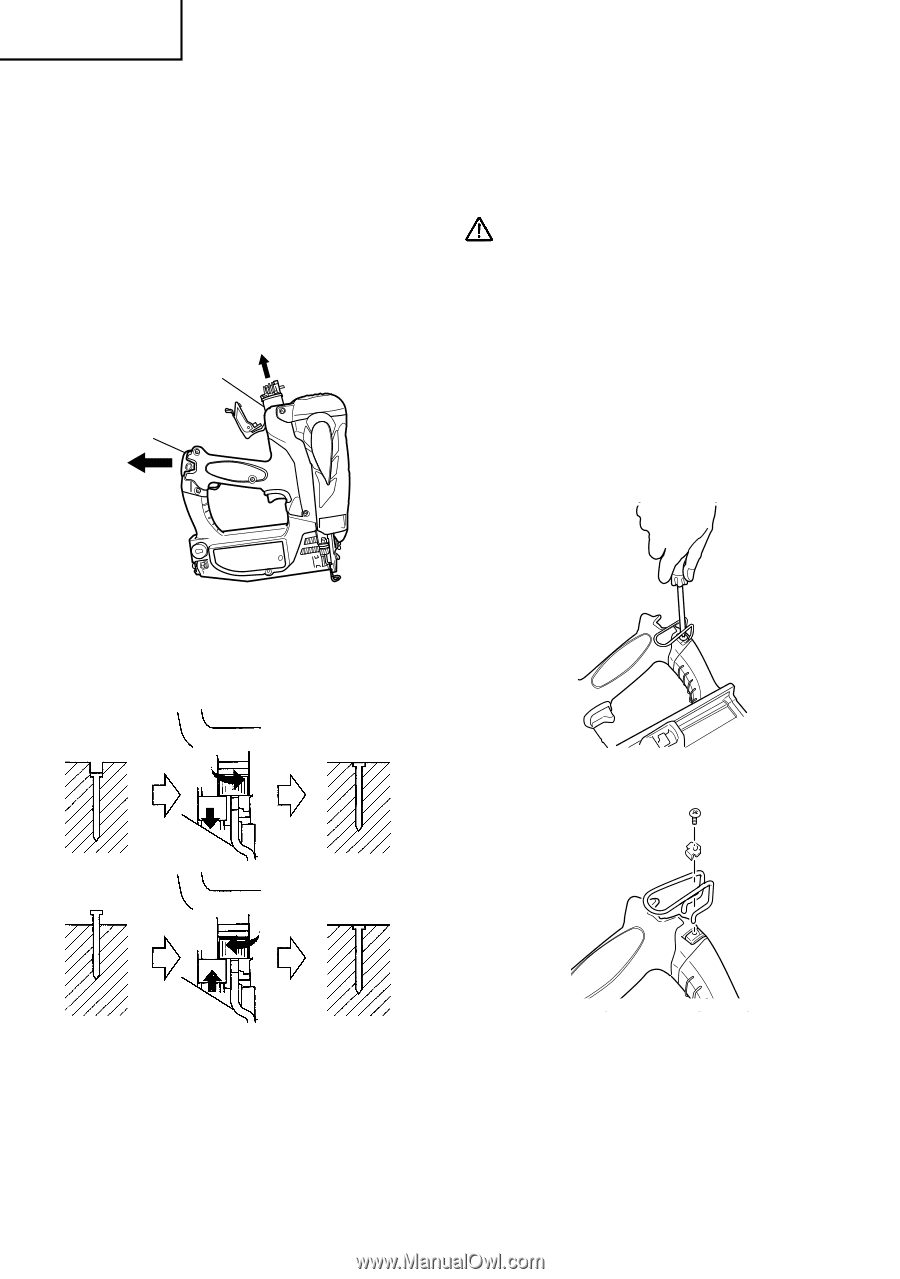
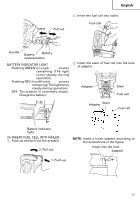
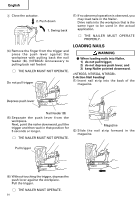
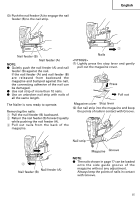
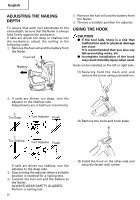
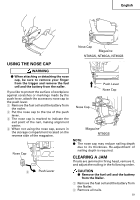
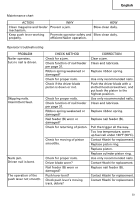
English ADJUSTING THE NAILING DEPTH 5 Remove the fuel cell and the battery from the Nailer. 6 Choose a suitable position for adjuster. To assure that each nail penetrates to the same depth, be sure that the Nailer is always held firmly against the workpiece. If nails are driven too deep or shallow into the workpiece, adjust the nailing in the following order. 1 Remove the fuel cell and the battery from the Nailer. Fuel cell USING THE HOOK CAUTION ⅷ If the tool falls, there is a risk that malfunction and/or physical damage can occur. It is recommended that you also use fall-preventing wires, etc. ⅷ Incomplete installation of the hook may result in bodily injury when used. Battery Hook can be installed on the left or right side. (1) Securely hold the main unit and remove the screw using a screwdriver. 2 If nails are driven too deep, turn the adjuster to the shallow side. Adjustments are in half-turn increments. 2 Too Deep Turn Adjuster Flush (2) Remove the hook and hook plate. 2 Too Shallow Turn Adjuster Flush If nails are driven too shallow, turn the adjuster to the deep side. 3 Stop turning the adjuster when a suitable position is reached for a nailing test. 4 Connect the fuel cell and the battery to the Nailer. ALWAYS WEAR SAFETY GLASSES. Perform a nailing test. 28 (3) Install the hook on the other side and securely fasten with screw.
-
 1
1 -
2
-
3
-
4
-
5
-
6
-
7
-
8
-
9
-
10
-
11
-
12
-
13
-
14
-
15
-
16
-
17
-
18
-
19
-
20
-
21
-
22
-
 23
23 -
 24
24 -
 25
25 -
 26
26 -
 27
27 -
 28
28 -
 29
29 -
 30
30 -
 31
31 -
 32
32 -
 33
33 -
34
-
35
-
36
-
37
-
38
-
39
-
40
-
41
-
42
-
43
-
44
-
45
-
46
-
47
-
48
-
49
-
50
-
51
-
52
-
53
-
54
-
55
-
56
-
57
-
58
-
59
-
60
-
61
-
62
-
63
-
64
-
65
-
66
-
67
-
68
-
69
-
70
-
71
-
72
-
73
-
74
-
75
-
76
-
77
-
78
-
79
-
80
-
81
-
82
-
83
-
84
-
85
-
86
-
87
-
88
-
89
-
90
-
91
-
92
-
93
-
94
-
95
-
96
-
97
-
98
-
99
-
100
-
101
-
102
-
103
-
104
-
105
-
106
-
107
-
108
-
109
-
110
-
111
-
112
 |
 |