Hitachi NT65MA3 Instruction Manual - Page 18
Replace the O-ring., the Driver Blade.
 |
UPC - 717709011281
View all Hitachi NT65MA3 manuals
Add to My Manuals
Save this manual to your list of manuals |
Page 18 highlights
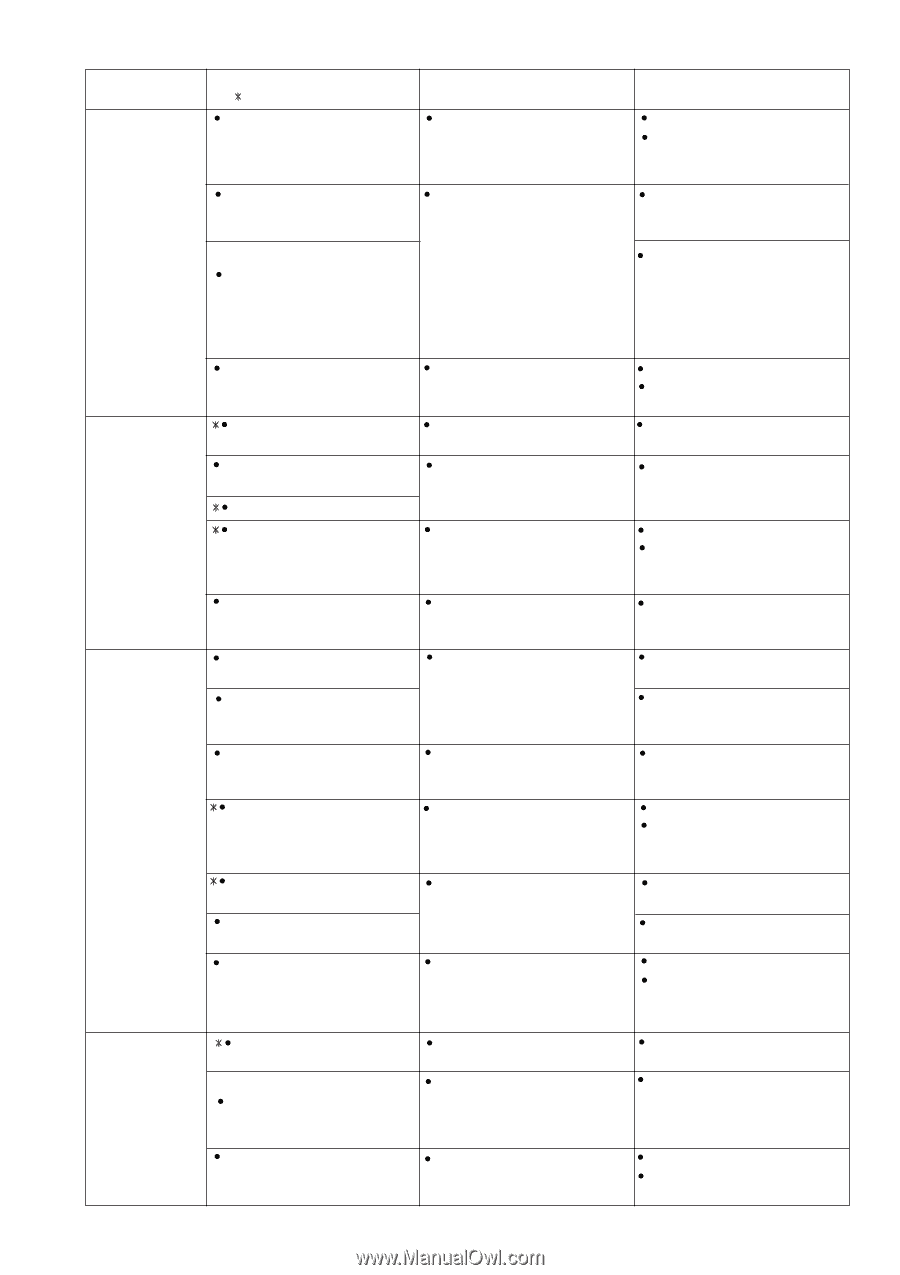
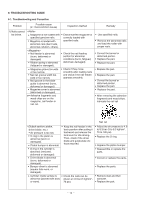
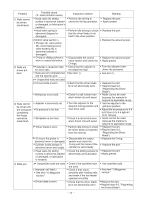
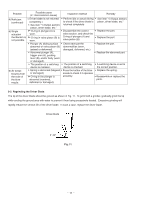
Problem 1) Nails cannot be driven. (continued) Possible cause ( : most-common cause) Head valve (A) sliding surface is abnormal (seized or damaged, or lubrication is needed.) Head valve spring is abnormal (fatigued or damaged). Plunger (A), valve piston (B), valve bushing (A) or valve bushing (B) is abnormal (seized or damaged). O-ring or sliding surface is worn or needs lubrication. 2) Nails are driven but bent. Adjuster is raised too high for short nails. Nails are not completely fed into the injection port. Unspecified nails are used. Driver blade is worn. Workpiece is too hard. 3) Nails cannot be driven into the workpiece completely: the heads cannot be made flush. Adjuster is incorrectly set. Air pressure is too low. Workpiece is too hard. Driver blade is worn. 4) Nails jam. O-ring in the piston is abnormal (worn or damaged). Cylinder inside surface is abnormal (worn and rough). Head valve (A) sliding surface is abnormal (seized or damaged, or lubrication is needed). Unspecified nails are used. < Improper nail feed > See item "1) Magazine section." Driver blade is worn. Inspection method Perform idle driving to check the driving operation. Perform idle driving to check that the driver blade is not held in the down position. Disassemble the control valve section and check the O-rings. Check that the adjuster is not raised too high. See item 1). Check that the driver blade tip is not abnormally worn. Check if a nail is bent even when driven into soft wood. Turn the adjuster to the deepest driving position and then drive nails. Check if a nail is bent even when driven into soft wood. Perform idle driving to check the driver blade is projected from the nose tip. Disassemble the output section and check the O-ring and the inside of the cylinder for abnormality. Check the sliding surface for abnormality and lubrication. Check if the specified nails are used. Check if they move smoothly after loading nails, and check if the nail feeder operates smoothly. Check that the driver blade tip is not abnormally worn. Remedy Replace the part. Apply grease. Replace the part. Replace the abnormal part. Replace the abnormal part. Apply grease. Turn the adjuster lower (lower the pressure). See item 1). Replace the part. Regrind (see 9-2, "Regrinding the Driver Blade"). Nailer cannot be used because the material is beyond its applicable range. Set the adjuster to the optimum position. Adjust the air pressure to 4.9 to 8.3 bar (5 to 8.5 kgf/cm2, 70 to 120 psi) Nailer cannot be used because the material is beyond its applicable range. Replace the part. Regrind (see 9-2, "Regrinding the Driver Blade"). Replace the O-ring. Replace the part. Replace the part. Apply grease. Use specified nails. See item "1) Magazine section." Replace the part. Regrind (see 9-2, "Regrinding the Driver Blade"). --- 15 ---
-
 1
1 -
2
-
3
-
4
-
5
-
6
-
7
-
8
-
9
-
10
-
11
-
12
-
 13
13 -
 14
14 -
 15
15 -
 16
16 -
 17
17 -
 18
18 -
 19
19 -
 20
20 -
 21
21 -
 22
22 -
 23
23 -
24
-
25
-
26
-
27
-
28
-
29
-
30
-
31
-
32
-
33
-
34
-
35
-
36
-
37
 |
 |