Honeywell HJC5000 User Guide - Page 38
Step 3: Set and Con for an Ethernet Connection
 |
View all Honeywell HJC5000 manuals
Add to My Manuals
Save this manual to your list of manuals |
Page 38 highlights
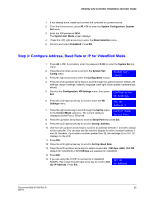
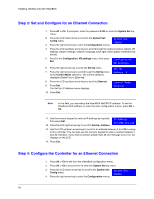
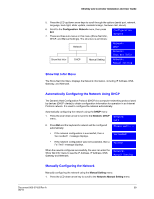
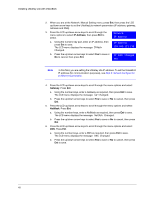
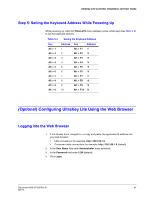
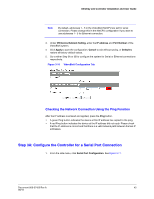
Installing UltraKey Lite with VideoBloX Step 3: Set and Configure for an Ethernet Connection 1. Press Alt > Clr. If prompted, enter the password 3434 to enter the System Set top menu. 2. Press the LCD down arrow to scroll to the System Set: Config menu. 3. Press the right arrow key to enter the Configuration menus. System Set: CONFIG 4. Press the LCD up/down arrow keys to scroll through the options (restore default, VB settings, maxpro settings, network, language, back light, slider update, hardware test, about). 5. Scroll to the Configuration: VB settings menu, then press Ent. Configuration VB Settings 6. Press the right arrow key to enter the Set Up menu. 7. Press the right arrow key to scroll through the Set Up menu to the Control Mode submenu. The current setting is displayed (Serial Port or Ethernet). 8. Press the LCD up/down arrow keys to scroll to Ethernet. 9. Press Ent. The Set Up: IP Address menu displays. 10. Press Ent. Set Up Address 4 Control Mode: Ethernet Note In this field, you are setting the VideoBloX NetCPU IP address. To set the UltraKey Lite IP address or enter the main configuration menus, press Alt > Clr. 11. Use the numeric keypad to enter an IP address as required, then press Ent. 12. Press the LCD right arrow key to scroll to Set Up: Address. IP Address 159.099.251.230 13. Use the LCD up/down arrow keys to scroll to an address between 1 and 32 to assign to the controller. You can also use the numeric keypad to enter a number between 1 and 32. However, if you enter a number greater than 32, the message Invalid ID displays on the LCD. 14. Press Ent. Step 4: Configure the Controller for an Ethernet Connection 1. Press Alt > Clr to exit from the VideoBloX configuration menu. 2. Press Alt > Clr a second time to enter the System Set top menu. 3. Press the LCD down arrow key to scroll to the System Set: Config menu. 4. Press the right arrow key to enter the Configuration menus. System Set: CONFIG 38
-
 1
1 -
2
-
3
-
4
-
5
-
6
-
7
-
8
-
9
-
10
-
11
-
12
-
13
-
14
-
15
-
16
-
17
-
18
-
19
-
20
-
21
-
22
-
23
-
24
-
25
-
26
-
27
-
28
-
29
-
30
-
31
-
32
-
 33
33 -
 34
34 -
 35
35 -
 36
36 -
 37
37 -
 38
38 -
 39
39 -
 40
40 -
 41
41 -
 42
42 -
 43
43 -
44
-
45
-
46
-
47
-
48
-
49
-
50
-
51
-
52
-
53
-
54
-
55
-
56
-
57
-
58
-
59
-
60
-
61
-
62
-
63
-
64
-
65
-
66
-
67
-
68
-
69
-
70
-
71
-
72
 |
 |