Honeywell HJK7000 User Guide - Page 33
Step 2: Con Port Settings, Alt + Clr + Home, Settings, MAXPRO, Hardware Config, Port Settings
 |
View all Honeywell HJK7000 manuals
Add to My Manuals
Save this manual to your list of manuals |
Page 33 highlights
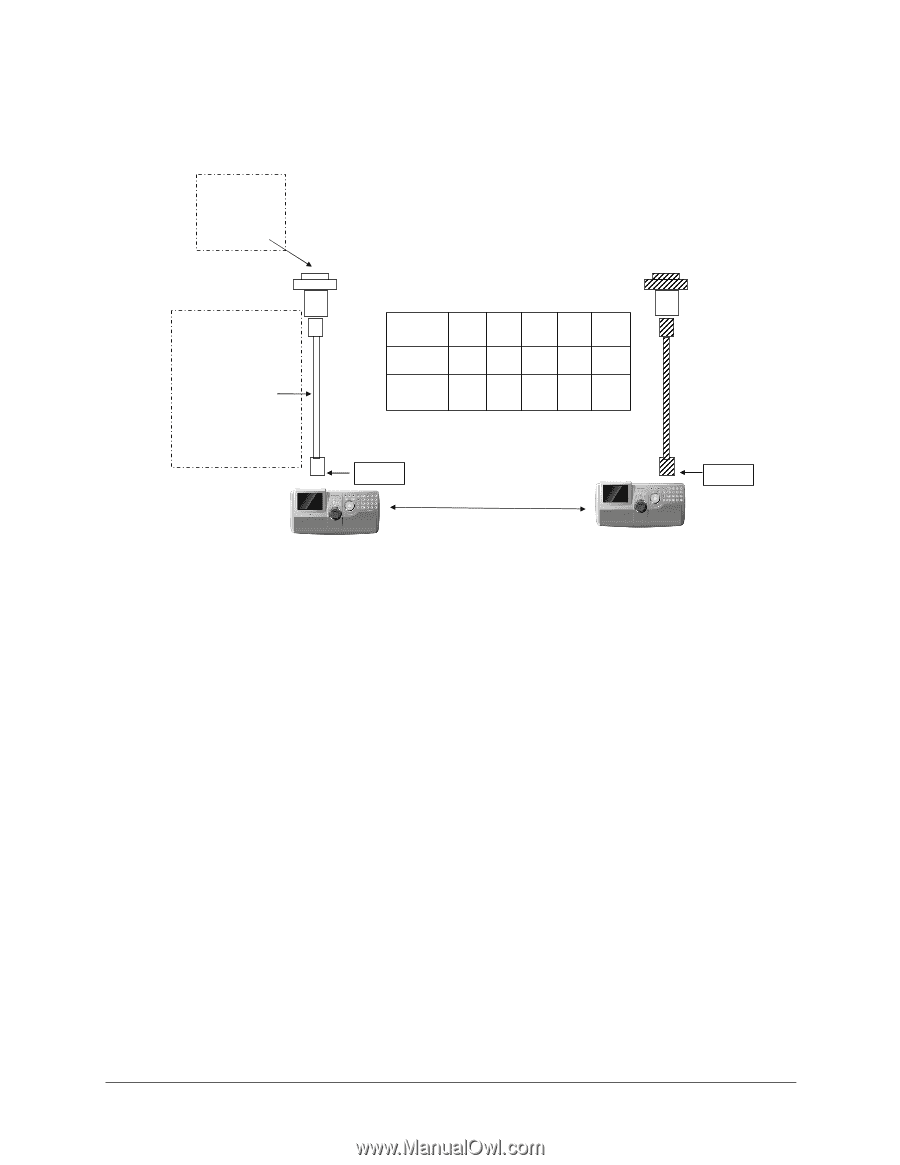
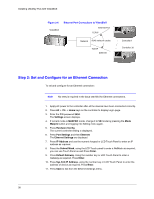
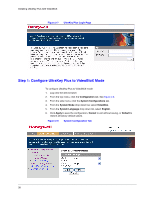
UltraKey Plus Controller Installation and User Guide Figure 2-5 VideoBloX Serial Port RS422 Connection Example VB master: 1--RS422_TX - 2--RS422_TX + 3--RS422_RX + 4--RS422_RX - 5--GND VIdeoBlox Master Connections VideoBloX Serial Port (RS422) RJ45 define: 1--RS485_2+/RS422_2_TX+/ RS422_1_RX+ 2--RS485_2-/RS422_2_TX-/ RS422_1_RX3-NC 4--RS232RX 5--RS232GND 6--RS232TX 7--RS485_1-/RS422_1_TX8--RS485_1+/RS422_1_TX+ *RS485_2/RS422_2_TX and RS232 use same UART_AC 5 RJ45 to DB9 Male 1 RJ45 Network Cable PI NOUT 5 RJ45 DB9 3 PSU TX+ TX- GND RX- RX+ #1 #2 #5 #7 #8 #2 #1 #5 #4 #3 5 RJ45 to DB9 Male 1 RJ45 Network Cable 3 PSU Controller 1 Controller 32 Step 2: Configure Port Settings To configure port settings: 1. Apply AC power to the controller after all the devices have been connected correctly. 2. Press Alt + Clr + Home keys on the controller to display the Login page. 3. Enter the PIN password 3434. The Settings screen displays. 4. If current mode is MAXPRO mode, change it to VB mode by pressing the Mode Maxpro button and logging into the Settings menu again. 5. Press Hardware Config. The current controller setting is displayed. 6. Press Port Settings and then COM1. The Serial Setting menu displays where you can see these COM1 settings - serial port mode, baud rate, databit, parity and stop bit. 7. Press Type to change the current type displayed on the screen. Select RS422. 8. Press Baudrate to select a baud rate: 1200 bps, 1800, 2400, 4800, 9600, 19200, or 57600. Document 800-02573 Rev B 33 11/2009
-
 1
1 -
2
-
3
-
4
-
5
-
6
-
7
-
8
-
9
-
10
-
11
-
12
-
13
-
14
-
15
-
16
-
17
-
18
-
19
-
20
-
21
-
22
-
23
-
24
-
25
-
26
-
27
-
 28
28 -
 29
29 -
 30
30 -
 31
31 -
 32
32 -
 33
33 -
 34
34 -
 35
35 -
 36
36 -
 37
37 -
 38
38 -
39
-
40
-
41
-
42
-
43
-
44
-
45
-
46
-
47
-
48
-
49
-
50
-
51
-
52
-
53
-
54
-
55
-
56
-
57
-
58
-
59
-
60
-
61
-
62
-
63
-
64
-
65
-
66
-
67
-
68
-
69
-
70
-
71
-
72
-
73
-
74
 |
 |