Honeywell HJK7000 User Guide - Page 62
Checking the Hardware, User Menus, Settings, Check Hardware, Joystick, Slider, menus, Top Text, Enter
 |
View all Honeywell HJK7000 manuals
Add to My Manuals
Save this manual to your list of manuals |
Page 62 highlights
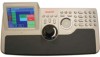
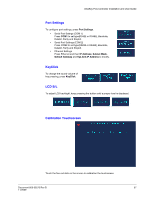
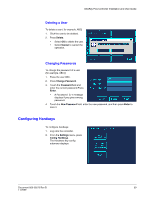
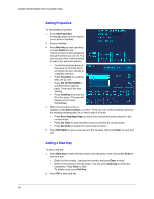
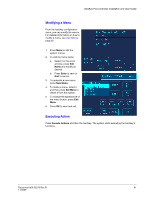
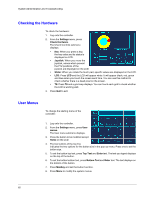
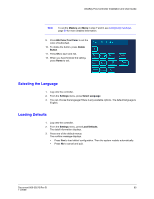
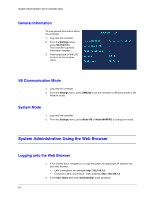
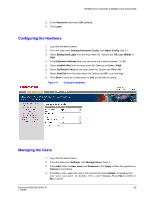
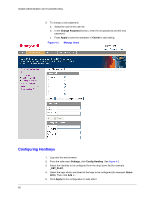
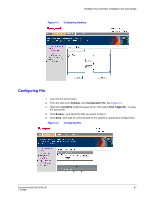
System Administration and Troubleshooting Checking the Hardware To check the hardware: 1. Log onto the controller. 2. From the Settings menu, press Check Hardware. The Check Controls submenu displays. • Key: When you press a key, the key value and its status is displayed on LCD. • Joystick: When you move the joystick, values which present the PTZ positions of the joystick are displayed on the LCD. • Slider: When you rotate the touch pad, specific values are displayed on the LCD. • LCD: Press LCD and the LCD will appear white. It will appear black, red, green and blue when you touch the screen each time. You can use this method to check whether there is a dead pixel on the screen. • TS: Press TS and a grid-map displays. You can touch each grid to check whether the LCD is working well. 3. Press Quit to exit. User Menus To change the starting menu of the controller: 1. Log onto the controller. 2. From the Settings menu, press User menus. The User menu submenu displays. 3. Press the button to be modified except Home on the LCD. 4. The two buttons of the top line indicates the two options for the button size in the pop up menu. Press one to set the button size. 5. To set the button top text, press Top Text and Enter text. The text you typed displays on the top of the button. 6. To set the button bottom text, press Bottom Text and Enter text. The text displays on the bottom of the button. 7. Press MaxKey and set the button function. 8. Press Menu to modify the system menus. 62
-
 1
1 -
2
-
3
-
4
-
5
-
6
-
7
-
8
-
9
-
10
-
11
-
12
-
13
-
14
-
15
-
16
-
17
-
18
-
19
-
20
-
21
-
22
-
23
-
24
-
25
-
26
-
27
-
28
-
29
-
30
-
31
-
32
-
33
-
34
-
35
-
36
-
37
-
38
-
39
-
40
-
41
-
42
-
43
-
44
-
45
-
46
-
47
-
48
-
49
-
50
-
51
-
52
-
53
-
54
-
55
-
56
-
 57
57 -
 58
58 -
 59
59 -
 60
60 -
 61
61 -
 62
62 -
 63
63 -
 64
64 -
 65
65 -
 66
66 -
 67
67 -
68
-
69
-
70
-
71
-
72
-
73
-
74
 |
 |