IBM 8668 Hardware Maintenance Manual - Page 56
System reliability considerations, Working inside a server with power on, Installing components
 |
UPC - 087944723158
View all IBM 8668 manuals
Add to My Manuals
Save this manual to your list of manuals |
Page 56 highlights
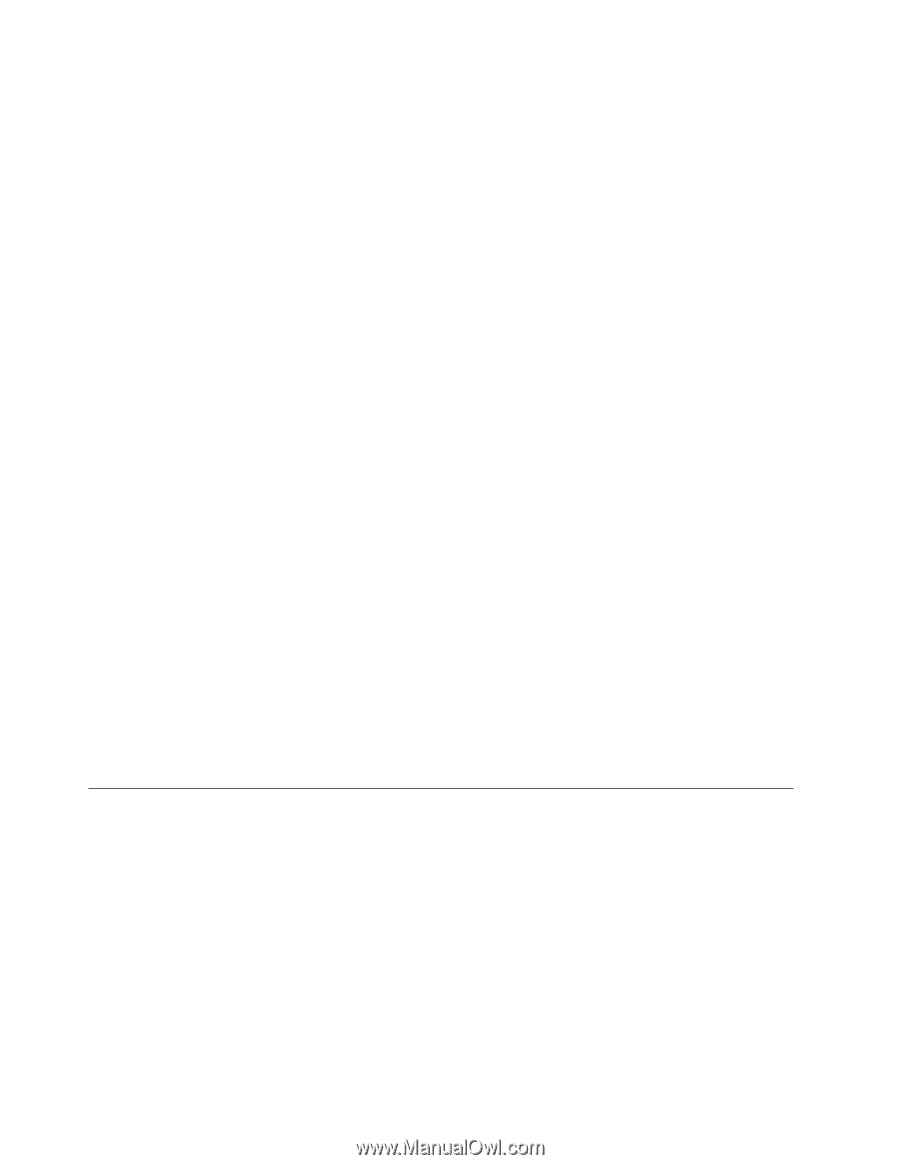
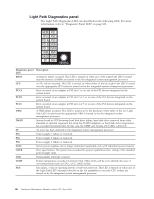
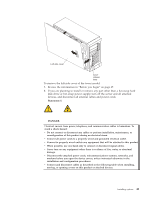
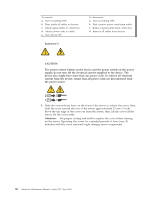
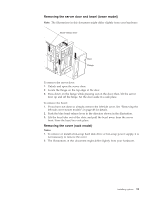
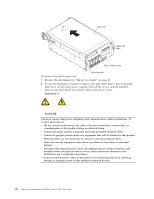
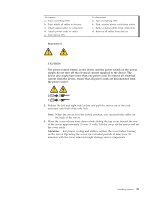
System reliability considerations To help ensure proper cooling and system reliability, make sure: v Each of the drive bays has either a drive or a filler panel installed. v Each of the power supply bays has either a power supply or a filler panel installed. v The cover is in place during typical operations, or is removed for no longer than 30 minutes while the server is operating. Note: On the tower model only, the front door can be removed permanently without affecting system reliability. v There is space around the server to enable the server cooling system to work properly. - On a tower model, leave approximately 127 mm (5 inches) of space around the front and rear of the server. - On a rack model, refer to the documentation that comes with the rack. v A removed hot-swap drive is replaced within two minutes of removal. v Cables for optional adapters are routed according to the instructions provided with the adapters. v A failed fan must be replaced immediately. Working inside a server with power on The server is designed to operate safely while turned on with the cover removed, such as when you set the password-override switch. Follow these guidelines when you work inside a server that is turned on: v Avoid loose-fitting clothing on your forearms. Button long-sleeved shirts before working inside the server; do not wear cuff links while you are working inside the server. v Do not allow your necktie or scarf to hang inside the server. v Remove jewelry, such as bracelets, rings, necklaces, and loose-fitting wrist watches. v Remove items from your shirt pocket (such as pens or pencils) that could fall into the server as you lean over it. v Take care to avoid dropping any metallic objects, such as paper clips, hair pins, or screws, into the server. Installing components The following sections describe how to access certain components inside the server. Removing the cover, door, and bezel The following sections describe how to remove the cover, the door (for tower models), and the bezel. Removing the left-side cover (tower model) Notes: 1. To remove or install a hot-swap hard disk drive or hot-swap power supply, it is not necessary to remove the cover. 2. The illustrations in this document might differ slightly from your hardware. 48 Hardware Maintenance Manual: xSeries 232, Type 8668
-
 1
1 -
2
-
3
-
4
-
5
-
6
-
7
-
8
-
9
-
10
-
11
-
12
-
13
-
14
-
15
-
16
-
17
-
18
-
19
-
20
-
21
-
22
-
23
-
24
-
25
-
26
-
27
-
28
-
29
-
30
-
31
-
32
-
33
-
34
-
35
-
36
-
37
-
38
-
39
-
40
-
41
-
42
-
43
-
44
-
45
-
46
-
47
-
48
-
49
-
50
-
 51
51 -
 52
52 -
 53
53 -
 54
54 -
 55
55 -
 56
56 -
 57
57 -
 58
58 -
 59
59 -
 60
60 -
 61
61 -
62
-
63
-
64
-
65
-
66
-
67
-
68
-
69
-
70
-
71
-
72
-
73
-
74
-
75
-
76
-
77
-
78
-
79
-
80
-
81
-
82
-
83
-
84
-
85
-
86
-
87
-
88
-
89
-
90
-
91
-
92
-
93
-
94
-
95
-
96
-
97
-
98
-
99
-
100
-
101
-
102
-
103
-
104
-
105
-
106
-
107
-
108
-
109
-
110
-
111
-
112
-
113
-
114
-
115
-
116
-
117
-
118
-
119
-
120
-
121
-
122
-
123
-
124
-
125
-
126
-
127
-
128
-
129
-
130
-
131
-
132
-
133
-
134
-
135
-
136
-
137
-
138
-
139
-
140
-
141
-
142
-
143
-
144
-
145
-
146
-
147
-
148
-
149
-
150
-
151
-
152
-
153
-
154
-
155
-
156
-
157
-
158
-
159
-
160
-
161
-
162
-
163
-
164
-
165
-
166
-
167
-
168
-
169
-
170
-
171
-
172
-
173
-
174
-
175
-
176
-
177
-
178
 |
 |