IBM HS40 Hardware Maintenance Manual - Page 60
Important
 |
UPC - 000435160188
View all IBM HS40 manuals
Add to My Manuals
Save this manual to your list of manuals |
Page 60 highlights
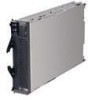
Important: If you are installing only one I/O expansion card in the blade server, it must be installed in I/O expansion card location 2. The following illustration shows how to install an I/O expansion card on the blade server. The same procedure is used to install an expansion card in either I/O expansion card location; however, the illustration shows installing an expansion card only in I/O expansion card location 2. I/O expansion card Screws Screws I/O expansion card tray Screws Complete the following steps to install an I/O expansion card: 1. Review the safety information beginning on page 109 and "Installation guidelines" on page 33. 2. Shut down the operating system, turn off the blade server, and remove the blade server from the BladeCenter unit (see "Removing the blade server from the BladeCenter unit" on page 39 for information). 3. Carefully lay the blade server on a flat, nonconductive surface. 4. Open the blade server cover (see "Opening the blade server cover" on page 40 for instructions), and lift it off the blade server. 5. Remove the two screws near connector J8H1 (or connector J4H1, if you are installing an I/O expansion card in I/O expansion location 1) that secure the I/O board to the chassis, as shown in the illustration. 6. Install the I/O expansion card: a. Install the I/O expansion card tray. Secure the tray to the I/O board with the four long screws from the option kit, as shown in the illustration. b. Orient the I/O expansion card as shown in the illustration. c. Slide the notch in the narrow end of the card into the raised hook on the tray; then, gently pivot the wide end of the card into the I/O expansion card connectors, as shown in the illustration. 50 BladeCenter HS40 Type 8839: Hardware Maintenance Manual and Troubleshooting Guide
-
 1
1 -
2
-
3
-
4
-
5
-
6
-
7
-
8
-
9
-
10
-
11
-
12
-
13
-
14
-
15
-
16
-
17
-
18
-
19
-
20
-
21
-
22
-
23
-
24
-
25
-
26
-
27
-
28
-
29
-
30
-
31
-
32
-
33
-
34
-
35
-
36
-
37
-
38
-
39
-
40
-
41
-
42
-
43
-
44
-
45
-
46
-
47
-
48
-
49
-
50
-
51
-
52
-
53
-
54
-
 55
55 -
 56
56 -
 57
57 -
 58
58 -
 59
59 -
 60
60 -
 61
61 -
 62
62 -
 63
63 -
 64
64 -
 65
65 -
66
-
67
-
68
-
69
-
70
-
71
-
72
-
73
-
74
-
75
-
76
-
77
-
78
-
79
-
80
-
81
-
82
-
83
-
84
-
85
-
86
-
87
-
88
-
89
-
90
-
91
-
92
-
93
-
94
-
95
-
96
-
97
-
98
-
99
-
100
-
101
-
102
-
103
-
104
-
105
-
106
-
107
-
108
-
109
-
110
-
111
-
112
-
113
-
114
-
115
-
116
-
117
-
118
-
119
-
120
-
121
-
122
-
123
-
124
-
125
-
126
-
127
-
128
-
129
-
130
-
131
-
132
-
133
-
134
-
135
-
136
-
137
-
138
-
139
-
140
-
141
-
142
-
143
-
144
-
145
-
146
-
147
-
148
-
149
-
150
-
151
-
152
-
153
-
154
-
155
-
156
-
157
-
158
-
159
-
160
-
161
-
162
-
163
-
164
-
165
-
166
-
167
-
168
-
169
-
170
-
171
-
172
 |
 |
