IBM HS40 User Guide
IBM HS40 - BladeCenter - 8839 Manual
 |
UPC - 000435160188
View all IBM HS40 manuals
Add to My Manuals
Save this manual to your list of manuals |
IBM HS40 manual content summary:
- IBM HS40 | User Guide - Page 1
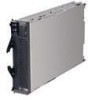
BladeCenter HS40 Type 8839 Installation and User's Guide Install options: • Drives • Microprocessors • Storage expansion unit • Memory • I/O expansion Welcome. . . Thank you for buying an IBM server. Your server is based on Enterprise X-Architecture, and it features superior performance, - IBM HS40 | User Guide - Page 2
Yes solved? No Use the troubleshooting information provided with your server to determine the cause of the problem and the action to take. Register your computer. Go to http://www.ibm.com/pc/register/ View information about IBM support line at http://www.ibm.com/services/sl/products/ or view - IBM HS40 | User Guide - Page 3
ERserver BladeCenter HS40 Type 8839 Installation and User's Guide - IBM HS40 | User Guide - Page 4
Note: Before using this information and the product it supports, read the general information in Appendix B, "IBM Statement of Limited Warranty Z125-4753-07 11/2002," on page 79 and Appendix C, Restricted Rights - Use, duplication or disclosure restricted by GSA ADP Schedule Contract with IBM Corp. - IBM HS40 | User Guide - Page 5
statements used in this document 8 What your IBM BladeCenter HS40 Type 8839 offers 8 Reliability, availability, and serviceability features 9 IBM Director 10 Major components of the BladeCenter HS40 Type 8839 blade server . . . . . 11 Processor board components 12 I/O board components 13 LED - IBM HS40 | User Guide - Page 6
problems 67 Troubleshooting charts 68 Memory problems 68 Microprocessor problems 68 Monitor problems 69 Mouse problems 70 Network connection problems 70 Option problems 71 Power problems 71 Service processor problems disposal 97 iv BladeCenter HS40 Type 8839: Installation and User's Guide - IBM HS40 | User Guide - Page 7
Battery return program 97 Electronic emission notices 98 Federal Communications Commission (FCC) statement 98 Industry Canada Class A emission compliance statement 98 Australia and New Zealand Class A statement 98 United Kingdom telecommunications safety requirement 98 European Union EMC - IBM HS40 | User Guide - Page 8
vi BladeCenter HS40 Type 8839: Installation and User's Guide - IBM HS40 | User Guide - Page 9
, leggere le Informazioni sulla Sicurezza. Les sikkerhetsinformasjonen (Safety Information) før du installerer dette produktet. Antes de instalar este produto, leia as Informações sobre Segurança. © Copyright IBM Corp. 2004 vii - IBM HS40 | User Guide - Page 10
versions of the caution or danger statement in the IBM Safety Information book. For example, if a caution instructions. Read any additional safety information that comes with your server or optional device before you install the device. viii BladeCenter HS40 Type 8839: Installation and User's Guide - IBM HS40 | User Guide - Page 11
damage. v Disconnect the attached power cords, telecommunications systems, networks, and modems before you open the device covers, unless instructed otherwise in the installation and configuration procedures. v Connect and disconnect cables as described in the following table when installing, moving - IBM HS40 | User Guide - Page 12
, use only IBM Part Number 16G8095 When laser products (such as CD-ROMs, DVD drives, fiber optic devices, or transmitters) are installed, note exposure to hazardous laser radiation. There are no serviceable parts inside the device. v Use of BladeCenter HS40 Type 8839: Installation and User's Guide - IBM HS40 | User Guide - Page 13
Statement 4: ≥ 18 kg (39.7 lb) ≥ 32 kg (70.5 lb) CAUTION: Use safe practices when lifting. Statement 5: ≥ 55 kg (121.2 lb) CAUTION: The power control button on the device and the power switch on the power supply do not turn off the electrical current supplied to the device. The device also - IBM HS40 | User Guide - Page 14
information that is provided with your device for electrical specifications. Statement 21: CAUTION: Hazardous energy is present when the blade is connected to the power source. Always replace the blade cover before installing the blade. xii BladeCenter HS40 Type 8839: Installation and User's Guide - IBM HS40 | User Guide - Page 15
The IBM® BladeCenter™ HS40 Type 8839 blade server is based on the ERserver IBM Enterprise X-Architecture™ technologies1. Your HS40 blade server is a double-width blade-model server and can be installed in an IBM BladeCenter Type 8677 unit or IBM BladeCenter T Eserver Eserver Types - IBM HS40 | User Guide - Page 16
unit, write identifying information on a label and place the label on the BladeCenter unit bezel. The following illustration shows the placement of the label, just below the blade server, on the BladeCenter unit. CD CD CD User label 2 BladeCenter HS40 Type 8839: Installation and User's Guide - IBM HS40 | User Guide - Page 17
HS40 Type 8839 Hardware Maintenance Manual and Troubleshooting Guide This document contains information to help you solve BladeCenter HS40 problems yourself, and it contains information for service technicians. v BladeCenter Type 8677 Installation and User's Guide This document contains instructions - IBM HS40 | User Guide - Page 18
Maintenance Manual and Troubleshooting Guide This document contains information to help you solve BladeCenter T problems yourself, and information for service technicians. v BladeCenter Type 8677 Rack Installation Instructions This document contains instructions for installing the BladeCenter unit - IBM HS40 | User Guide - Page 19
features and specifications of your BladeCenter HS40 Type 8839 blade server operating in a non-NEBS/ETSI environment. Note: Power, cooling, removable-media drives, external ports, and advanced system management are provided by the IBM BladeCenter Type 8677 Eserver and IBM BladeCenter T Types - IBM HS40 | User Guide - Page 20
features and specifications of the BladeCenter T HS40 Type 8839 blade server operating in a NEBS/ETSI environment. Note: Power, cooling, removable-media drives, external ports, and advanced system management are provided by the IBM BladeCenter T Type 8720. Eserver Microprocessor: Supports up to - IBM HS40 | User Guide - Page 21
server in PDF and includes the IBM Documentation Browser to help you find information quickly. Hardware and software requirements The IBM BladeCenter and BladeCenter T Documentation CDs require the following minimum hardware and software: v Microsoft Windows NT 4.0 (with Service CD-ROM drive. The - IBM HS40 | User Guide - Page 22
with your blade server provides programs to help you set up your server and install a 32-bit Windows operating system. The ServerGuide program detects installed hardware options and provides the correct configuration programs and device drivers. For more 8 BladeCenter HS40 Type 8839: Installation - IBM HS40 | User Guide - Page 23
can diagnose and repair problems. Your server has the following RAS features: v Advanced Configuration and Power Interface (ACPI) v Automatic server restart v Built-in monitoring for temperature, voltage, hard disk drives, and flash drives v Chipkill memory v Customer-upgradeable basic input/output - IBM HS40 | User Guide - Page 24
(PFA) alerts v Service processor that communicates with the BladeCenter management module to enable remote blade server management v SDRAM with serial presence detect (SPD) and vital product data (VPD) v System error logging v VPD (includes information stored in nonvolatile memory for easier remote - IBM HS40 | User Guide - Page 25
.ibm.com/servers/eserver/xseries/systems_management/xseries_sm.html. This Web page presents an overview of IBM Systems Management and IBM Director. Major components of the BladeCenter HS40 Type 8839 blade server You must remove the blade server from the BladeCenter unit and remove the blade server - IBM HS40 | User Guide - Page 26
board components The following illustration shows the components on the processor board. DIMM socket 8 (J9H1) DIMM socket 7 (J9G1) DIMM socket 6 ( board) Control panel connector (J1A1) Microprocessor socket 4 Microprocessor socket 3 12 BladeCenter HS40 Type 8839: Installation and User's Guide - IBM HS40 | User Guide - Page 27
components The following illustration shows the components on the I/O board. J8H1 connector J4H1 connector Battery I/O expansion option 1 connectors I/O expansion option 2 connectors Flex-cable connectors (to processor board) Blade expansion connector (J3A1) Chapter 1. Introduction 13 - IBM HS40 | User Guide - Page 28
processor board and I/O board. You need to remove the blade server from the BladeCenter unit, open the cover, and press one of the light path diagnostics buttons to light any error LEDs that were lit during blade server socket 4 14 BladeCenter HS40 Type 8839: Installation and User's Guide - IBM HS40 | User Guide - Page 29
The following illustration shows the LEDs on the I/O board. Secondary IDE error LED (DS6H1) Primary IDE error LED (DS2H1) Board error (DS7A2) Processor board error LED (DS8A2) Light path diagnostics button (S8A1) Light path diagnostics LED (green) (DS8A1) BMC error LED (DS7B1) NMI error LED ( - IBM HS40 | User Guide - Page 30
. The default position is pins 1 and 2. See the blade server Hardware Maintenance Manual and Troubleshooting Guide on the IBM BladeCenter Documentation CD or the IBM BladeCenter T Documentation CD for more information. Note: If you start the blade server from the backup page because the primary BIOS - IBM HS40 | User Guide - Page 31
management module to do so). v You can turn on the blade server remotely by means of the service processor in the BladeCenter management module. v If your operating system supports the Wake on LAN feature and the blade server power-on LED is flashing slowly, the Wake on LAN feature can turn - IBM HS40 | User Guide - Page 32
press the CD/diskette/USB select button, you can use the management-module Web interface to see whether local control has been disabled on the blade server. 18 BladeCenter HS40 Type 8839: Installation and User's Guide - IBM HS40 | User Guide - Page 33
on LED: This green LED indicates the power status of the blade server in the following manner: v Flashing rapidly - The service processor on the blade server is handshaking with the BladeCenter management module. v Flashing slowly - The blade server has power but is not turned on. v Lit continuously - IBM HS40 | User Guide - Page 34
-module Web interface or through the IBM Director Console. Blade-error LED: When this amber LED is lit, it indicates that a system error has occurred in the blade server. The blade-error LED will turn off only after the error is corrected. 20 BladeCenter HS40 Type 8839: Installation and User's Guide - IBM HS40 | User Guide - Page 35
components.) See the instructions for removing or installing a specific hot-swap component for any additional procedures that you might have to perform before you remove or install the component. v For a list of supported options for your blade server, go to http://www.ibm.com/pc/compat/. System - IBM HS40 | User Guide - Page 36
blade server from the BladeCenter unit. Notes: 1. The illustrations in this document might differ slightly from your hardware. 2. Unless otherwise stated, references to the BladeCenter unit also apply to the BladeCenter T unit. Type 8677 22 BladeCenter HS40 Type 8839: Installation and User's Guide - IBM HS40 | User Guide - Page 37
T unit. Carefully set the bezel assembly aside in a safe place. (See the BladeCenter T Types 8720 and 8730 Installation and User's Guide for detailed instructions about removing the bezel assembly.) 3. Pull the blade server out of the bay. Spring-loaded doors farther back in the bay move into place - IBM HS40 | User Guide - Page 38
server bezel assembly: 1. Read the safety information beginning on page vii and "Installation guidelines" on page 21. 2. Open the blade server cover (see "Opening the blade server cover" for instructions) and lift it off the blade server. 24 BladeCenter HS40 Type 8839: Installation and User's Guide - IBM HS40 | User Guide - Page 39
the bezel assembly away from the blade server. 6. Store the bezel assembly in a safe place. Installing an IDE drive Your blade server has two connectors on the I/O board for installing an optional 2.5-inch HS20 IDE Hard Disk Drive or BladeCenter Flash Disk Drive. Each IDE connector is on a separate - IBM HS40 | User Guide - Page 40
" on page 24 for instructions). 5. Insert the riser card from the option kit into an IDE connector on the blade server I/O board. Important: IDE drives must be installed in the following order: IDE connector 1 first, then IDE connector 2. 26 BladeCenter HS40 Type 8839: Installation and User's Guide - IBM HS40 | User Guide - Page 41
that you must consider when installing DIMMs: v The processor board contains eight DIMM connectors and supports two-way memory interleaving. v The DIMM options supported for your blade server are 256 MB, 512 MB, 1 GB, and 2 GB. Your blade server supports a minimum of 512 MB and a maximum of 16 - IBM HS40 | User Guide - Page 42
the blade server cover" on page 24 for instructions) and lift it off the blade server. 5. Press the I/O-tray release and rotate the I/O-board tray open, as shown in the illustration. The I/O tray is hinged and will support itself in the open position. 6. Locate the DIMM connectors on the processor - IBM HS40 | User Guide - Page 43
b. Insert the DIMM by pressing the DIMM along the guides into the connector. Make sure that the retaining clips snap into in the server must be identical (including system bus speed). v For a list of microprocessors supported by your blade server, go to the ServerProven® list at http://www.ibm.com/pc - IBM HS40 | User Guide - Page 44
any tools or sharp objects to lift the locking lever on the microprocessor socket. Failure to do so might result in permanent damage to the processor board. 30 BladeCenter HS40 Type 8839: Installation and User's Guide - IBM HS40 | User Guide - Page 45
Failure to do so might result in permanent damage to the microprocessor, microprocessor socket, and processor board. Lever closed or Lever fully open Lever closed Lever fully open d. Center the microprocessor over the microprocessor socket. Align the triangle on the corner of the microprocessor - IBM HS40 | User Guide - Page 46
Touching the thermal grease will contaminate it. If the thermal grease becomes contaminated, contact your service technician. b. Align and place the heat sink on top of the microprocessor. Press to "Completing the installation" on page 44. 32 BladeCenter HS40 Type 8839: Installation and User's Guide - IBM HS40 | User Guide - Page 47
modules in I/O-module bays 3 and 4 on the BladeCenter unit both support the I/O expansion card network-interface type. For example, if you add an Ethernet expansion card to your blade server, the modules in I/O-module bays 3 and 4 on the BladeCenter unit must both be compatible with the Ethernet - IBM HS40 | User Guide - Page 48
for device-driver and configuration information to complete the installation of the I/O expansion card. Some documentation might also be on the IBM BladeCenter Documentation CD or the IBM BladeCenter T Documentation CD that comes with the blade server. 34 BladeCenter HS40 Type 8839: Installation and - IBM HS40 | User Guide - Page 49
is compatible with the BladeCenter HS40 Type 8839 blade server. See the ServerProven list at http://www.ibm.com/pc/compat/ or the Hardware Maintenance Manual and Troubleshooting Guide for your blade server on the IBM BladeCenter Documentation CD or the IBM BladeCenter T Documentation CD for more - IBM HS40 | User Guide - Page 50
a hot-swap SCSI hard disk drive or a filler panel. Complete the following steps to install the SCSI storage expansion unit: Note: The illustrations used in this procedure depict the installation process on a BladeCenter HS40 blade server in a BladeCenter Type 8677 unit. These illustrations might - IBM HS40 | User Guide - Page 51
7. Make sure that the air baffle covering microprocessor 1 and microprocessor 2, is positioned and pushed down so that both heat sink captive mounting screws are through the holes in the air baffle. Air baffle Microprocessor 1 and 4 heat sink captive mounting screws 8. Install the SCSI storage - IBM HS40 | User Guide - Page 52
only a SCSI storage expansion unit that is specified for use with the BladeCenter HS40 Type 8839 blade server. Compatible SCSI storage expansion units do not have a shield, as shown down onto the cover pins at the rear of the blade server. 38 BladeCenter HS40 Type 8839: Installation and User's Guide - IBM HS40 | User Guide - Page 53
with and connects to the blade expansion connector (J3A1) on the processor board. 9. Insert the combined blade and expansion unit into three adjacent BladeCenter unit bays. Note: When any blade server or option is in blade bay 7 through 14 (in the BladeCenter unit) or blade bay 5 through 8 (in the - IBM HS40 | User Guide - Page 54
the installation process on a BladeCenter HS40 blade server in a BladeCenter Type 8677 unit. These illustrations might differ slightly from your hardware. However, this installation process is the same regardless of the BladeCenter unit. 40 BladeCenter HS40 Type 8839: Installation and User's Guide - IBM HS40 | User Guide - Page 55
cooling, do not operate the BladeCenter unit for more than 1 minute without either a hot-swap hard disk drive or a filler panel installed drives. Replacing a SCSI hot-swap hard disk drive If a hard disk drive in the storage expansion unit fails, you can replace it without turning off the blade server - IBM HS40 | User Guide - Page 56
the installation process on a BladeCenter HS40 blade server in a BladeCenter Type 8677 unit. These illustrations might differ slightly from your hardware. However, this installation process is the same regardless of the BladeCenter unit. Hard disk drive Blade server Filler panel Storage expansion - IBM HS40 | User Guide - Page 57
off the blade server and remove the blade from the BladeCenter unit (see "Removing the blade server from the BladeCenter unit" on page 22 for instructions). 4. Open the blade server cover (see "Opening the blade server cover" on page 24 for instructions) and lift it off the blade server. 5. Locate - IBM HS40 | User Guide - Page 58
cooling and system reliability the air baffle must be correctly positioned and fully seated. 2. Close the blade server cover, unless you installed the SCSI storage expansion unit option (see "Closing the blade server cover" on page 46). 44 BladeCenter HS40 Type 8839: Installation and User's Guide - IBM HS40 | User Guide - Page 59
on the blade server (see "Turning on the blade server" on page 17). Note: Reinstall the bezel assembly on the BladeCenter T unit after you have finished installing the blade servers (see the BladeCenter T Types 8720 and 8730 Installation and User's Guide for detailed instructions about reinstalling - IBM HS40 | User Guide - Page 60
"Installing the blade server bezel assembly" on page 45 for instructions. 3. Before closing the cover, check that all components are installed and seated correctly and that you have not left loose tools or parts inside the blade server. 46 BladeCenter HS40 Type 8839: Installation and User's Guide - IBM HS40 | User Guide - Page 61
in the illustration, until it clicks into place. Installing the blade server in the BladeCenter unit Note: The illustrations used in this procedure depict the installation process on a BladeCenter HS40 blade server in a BladeCenter Type 8677 unit. These illustrations might differ slightly from your - IBM HS40 | User Guide - Page 62
power and is turned on. 9. Write identifying information on one of the user labels that comes with the blade server; then, place the label on the BladeCenter unit bezel just below the blade server, as shown in the following illustration. 48 BladeCenter HS40 Type 8839: Installation and User's Guide - IBM HS40 | User Guide - Page 63
, do so now. Note: Reinstall the bezel assembly on the BladeCenter T unit after you have finished installing the blade servers (see the BladeCenter T Types 8720 and 8730 Installation and User's Guide for detailed instructions about reinstalling the bezel assembly). However, if you installed an - IBM HS40 | User Guide - Page 64
-compatible switch modules on the BladeCenter unit. Network signals to and from the blade server or any I/O expansion cards are automatically routed to a same-network-interface switch module through circuitry in the BladeCenter unit. 50 BladeCenter HS40 Type 8839: Installation and User's Guide - IBM HS40 | User Guide - Page 65
Director products, depending on your blade server, see the IBM BladeCenter Planning and Installation Guide or the Eserver IBM BladeCenter T Planning and Installation Guide. You can obtain the Eserver planning guides from http://www.ibm.com/pc/support/. Using the Configuration/Setup Utility - IBM HS40 | User Guide - Page 66
management-module Web interface. You can enable the blade server to run without a diskette drive or keyboard. The Extensible Firmware Interface (EFI) start option should not be selected for any of the startup or boot device fields. 52 BladeCenter HS40 Type 8839: Installation and User's Guide - IBM HS40 | User Guide - Page 67
T Management Module User's Guide on the IBM BladeCenter T Documentation CD for information and instructions. v Save Settings Select this choice to save the changes you have made in the settings and exit from the Configuration/Setup Utility program. Chapter 4. Configuring your blade server 53 - IBM HS40 | User Guide - Page 68
Web site at http://www.ibm.com/pc/coupon/. The ServerGuide program has the following features to make setup easier: v An easy-to-use interface v Diskette-free setup, and configuration programs that are based on detected hardware 54 BladeCenter HS40 Type 8839: Installation and User's Guide - IBM HS40 | User Guide - Page 69
supported on all blade server models. The ServerGuide program requires a supported IBM blade server that is associated with an enabled startable (bootable) CD-ROM drive Checks the microcode (firmware) levels of a drivers for most adapters and devices v Provides diskette-free installation for supported - IBM HS40 | User Guide - Page 70
-system installation instructions from the IBM Support Web page: 1. Go to http://www.ibm.com/pc/support/. 2. In the Download section, click Downloads & drivers. 3. On the "Downloads and drivers" page, in the Brand field, select Servers. 4. In the Family field, select BladeCenter HS40. 5. Click - IBM HS40 | User Guide - Page 71
firmware. Download the latest firmware for your blade server service processor from the IBM Support Web site at http://www.ibm.com/pc/support/. Use the BladeCenter management-module Web interface to flash the service processor. The Web interface is described in the IBM BladeCenter Type 8677 - IBM HS40 | User Guide - Page 72
Ethernet controller to I/O-module bay for your blade server. Note: Other types of blade servers, such as the BladeCenter HS20 Type 8678 blade server, that are installed in the same BladeCenter unit as this BladeCenter HS40 Type 8839 blade server might have different Ethernet controller routing. See - IBM HS40 | User Guide - Page 73
the IBM Eserver BladeCenter Management Module Command-Line Interface User's Guide and the IBM BladeCenter Serial Over LAN Setup Guide for information and Eserver instructions. Configuring an IDE RAID Note: Configuring an IDE RAID only applies to a blade server that has two IDE hard disk drives - IBM HS40 | User Guide - Page 74
blade server, making sure that you install the correct IDE RAID device drivers (see Chapter 5, "Installing the operating system," on page 63 for instructions). The latest IDE RAID device drivers and NOS installation instructions for supported operating systems are available for download from the IBM - IBM HS40 | User Guide - Page 75
device drivers for supported operating systems are available for download from the IBM Support Web site at http://www.ibm.com/pc/support/. Deleting an IDE RAID array configuration Complete the following steps to delete an IDE RAID array configuration on your blade server: 1. Turn on the blade server - IBM HS40 | User Guide - Page 76
62 BladeCenter HS40 Type 8839: Installation and User's Guide - IBM HS40 | User Guide - Page 77
operating system installation instructions for Windows 2000 on the IBM Support Web page. Important: 1. The operating system in the blade server must provide USB support for the blade server to recognize and use the keyboard, mouse, CD-ROM drive, and diskette drive. The BladeCenter unit uses USB - IBM HS40 | User Guide - Page 78
list on the IBM Support Web page, select Servers. 3. Under Select your product, from the Family list, select your server model; then, select Continue. 4. From the View by document type list, select OS installation. The available installation instructions are displayed. 64 BladeCenter HS40 Type 8839 - IBM HS40 | User Guide - Page 79
correct the problem using the information in this section, see the BladeCenter HS40 Type 8839 Hardware Maintenance Manual and Troubleshooting Guide on the IBM BladeCenter Documentation CD or the IBM BladeCenter T Documentation CD that comes with your blade server, and the "Server Support" flowchart - IBM HS40 | User Guide - Page 80
indicating specific system problems are listed in the following tables. See "Diagnostics" in the BladeCenter HS40 Type 8839 Hardware Maintenance Manual and Troubleshooting Guide on the IBM BladeCenter Documentation CD or the IBM BladeCenter T Documentation CD that comes with your blade server for - IBM HS40 | User Guide - Page 81
appear during POST. See the "Diagnostics" in the BladeCenter HS40 Type 8839 Hardware Maintenance Manual and Troubleshooting Guide on the IBM BladeCenter Documentation CD or the IBM BladeCenter T Documentation CD that comes with your blade server for more information about the POST error messages - IBM HS40 | User Guide - Page 82
solutions. See the BladeCenter HS40 Type 8839 Hardware Maintenance Manual and Troubleshooting Guide on the IBM BladeCenter Documentation CD or the IBM BladeCenter T Documentation CD for more detailed troubleshooting charts. If you cannot find the problem in the troubleshooting charts, run the - IBM HS40 | User Guide - Page 83
and testing instructions. If you still cannot find the problem, try using the monitor with another blade server. If the problem remains, see the IBM BladeCenter Type 8677 Hardware Maintenance Manual and Troubleshooting Guide on the IBM BladeCenter Documentation CD or the IBM BladeCenter T Types 8720 - IBM HS40 | User Guide - Page 84
CD or the IBM BladeCenter T Types 8720 and 8730 Hardware Maintenance Manual and Troubleshooting Guide on the IBM BladeCenter T Documentation CD for details. v The settings in the switch module are appropriate for the blade server (settings in the switch module are blade server specific). If you - IBM HS40 | User Guide - Page 85
option comes with its own test instructions, use those instructions to test the option. If the problem remains, call for service. Power problems Symptom The blade server does not turn on. Suggested action 1. Make sure that: a. The power LED on the front of the BladeCenter unit is lit. b. The LEDs - IBM HS40 | User Guide - Page 86
Service processor problems Symptom Suggested action The service processor reports Shut down the operating system and turn off the blade server; then, remove the a general monitor failure. blade server from the BladeCenter unit, wait for 30 seconds, reinstall the blade server in the BladeCenter - IBM HS40 | User Guide - Page 87
tray open. The I/O tray is hinged and will support itself in the open position. 7. Press and hold the light path diagnostics button on the processor board to relight the processor board LEDs that were lit before you removed the blade server from the BladeCenter unit. The LEDs will remain lit for as - IBM HS40 | User Guide - Page 88
has failed. If the problem remains, have the blade server serviced. Replace the blade server cover, reinsert the blade server in the BladeCenter unit, and then restart the server. If the problem remains, have the blade server serviced. 74 BladeCenter HS40 Type 8839: Installation and User's Guide - IBM HS40 | User Guide - Page 89
interrupt error) The service processor has failed. If the problem remains, have the blade server serviced. Replace the blade server cover, reinsert the blade server in the BladeCenter unit, and then restart the server. If the problem remains, have the blade server serviced. A system board has - IBM HS40 | User Guide - Page 90
76 BladeCenter HS40 Type 8839: Installation and User's Guide - IBM HS40 | User Guide - Page 91
Maintenance Manual at the IBM Support Web site. v Go to the IBM Support Web site at http://www.ibm.com/pc/support/ to check for technical information, hints, tips, and new device drivers. You can solve many problems without outside assistance by following the troubleshooting procedures that IBM - IBM HS40 | User Guide - Page 92
U.S. and Canada, call 1-800-IBM-SERV (1-800-426-7378). In the U.S. and Canada, hardware service and support is available 24 hours a day, 7 days a week. In the U.K., these services are available Monday through Friday, from 9 a.m. to 6 p.m. 78 BladeCenter HS40 Type 8839: Installation and User's Guide - IBM HS40 | User Guide - Page 93
and workmanship and 2) conforms to IBM's Official Published Specifications ("Specifications") which are available on request. upgrades involve the removal of parts and their return to IBM. A part that replaces a removed part will assume the warranty service status of the removed part. Unless IBM - IBM HS40 | User Guide - Page 94
or from other electronic media, and following the instructions that IBM provides. If your problem can be resolved with a Customer Replaceable Unit ("CRU") (e.g., keyboard, mouse, speaker, memory, hard disk drive and other easily replaceable parts), IBM will ship these parts to you for replacement - IBM HS40 | User Guide - Page 95
to fulfill its obligations under this Statement of Limited Warranty (which may include shipping the Machine for such processing to other IBM service locations around the world), and (c) ensure that such processing complies with any laws applicable to such Personal Data. Limitation of Liability - IBM HS40 | User Guide - Page 96
law principles. THESE WARRANTIES GIVE YOU SPECIFIC LEGAL RIGHTS AND YOU MAY ALSO Service: The following is added to this Section: To obtain warranty service from IBM in Canada or the United States, call 1-800-IBM-SERV (426-7378). CANADA 82 BladeCenter HS40 Type 8839: Installation and User's Guide - IBM HS40 | User Guide - Page 97
or physical harm to real property and tangible personal property caused by IBM's negligence; and Governing Law: The following replaces "laws of the in accordance with the Arbitration Rules of Singapore International Arbitration Center ("SIAC Rules") then in effect. The arbitration award shall - IBM HS40 | User Guide - Page 98
property will be limited to that caused by IBM's negligence; and 2. as to any other actual damage arising in any situation involving nonperformance by IBM pursuant to, or in any way related to accordance with the principle of mutual trust. 84 BladeCenter HS40 Type 8839: Installation and User's Guide - IBM HS40 | User Guide - Page 99
Consumer Guarantees Act 1993 will not apply in respect of any goods which IBM provides, if you require the goods for the purposes of a business as chairman shall be filled by the president of the Philippine Dispute Resolution Center, Inc. Other vacancies shall be filled by the respective nominating - IBM HS40 | User Guide - Page 100
Statement of Limited Warranty apply to Machines purchased from IBM or an IBM reseller. Hot to Obtain Warranty Service: If you purchase a Machine in Austria, Belgium, , Tajikistan, Turkmenistan, Ukraine, Uzbekistan, and FR Yugoslavia; 2) 86 BladeCenter HS40 Type 8839: Installation and User's Guide - IBM HS40 | User Guide - Page 101
. Arbitration: The following is added under this heading: In Albania, Armenia, Azerbaijan, Belarus, Bosnia-Herzegovina, Bulgaria, Croatia, Georgia, Hungary, Kazakhstan, Kyrgyzstan, FYR Macedonia, Moldova, Appendix B. IBM Statement of Limited Warranty Z125-4753-07 11/2002 87 - IBM HS40 | User Guide - Page 102
International Arbitral Center of IBM is at fault) or of such cause, for a maximum amount equal to the charges you paid for the Machine. For purposes of this item, the term "Machine" includes Machine Code and Licensed Internal Code ("LIC"). 88 BladeCenter HS40 Type 8839: Installation and User's Guide - IBM HS40 | User Guide - Page 103
replaces the first sentence of the first paragraph of this section: The warranty for an IBM Machine covers the functionality of the Machine for its normal use and the Machine's conformity to its Specifications. The following paragraphs are added to this section: The warranty period for Machines is - IBM HS40 | User Guide - Page 104
warranty for an IBM Machine covers the functionality of the Machine for its normal use and the Machine's conformity to its Specifications. The following apply. What IBM Will Do to Correct Problems: The following is added to this section: 90 BladeCenter HS40 Type 8839: Installation and User's Guide - IBM HS40 | User Guide - Page 105
Sale of Goods Act 1893 or the Sale of Goods and Supply of Services Act 1980 are hereby excluded. Limitation of Liability: The following replaces the terms act, statement, omission, or negligence on the part of IBM in connection with, or in relation to, the subject matter of this Statement of - IBM HS40 | User Guide - Page 106
damage to your tangible property resulting from the negligence of IBM. 3. IBM's entire liability for actual damages for any one Default will not in any event, except as provided in items 1 and 2 above, exceed the greater of 1) Pounds 92 BladeCenter HS40 Type 8839: Installation and User's Guide - IBM HS40 | User Guide - Page 107
either Hong Kong or Macau Special Administrative Region of China. Machine - IBM BladeCenter HS40 Type 8839 Eserver Country or Region of Purchase Warranty Period Type of Warranty Service* Worldwide 3 years 1 and 2 * See "Types of Warranty Service" for the legend and explanations of warranty - IBM HS40 | User Guide - Page 108
service is called ThinkPad® EasyServ or EasyServ in some countries. The IBM Machine Warranty World Wide Web site at http://www.ibm.com/servers/support/machine_warranties/ provides a worldwide overview of IBM Kingdom -- 01475-555-055 94 BladeCenter HS40 Type 8839: Installation and User's Guide - IBM HS40 | User Guide - Page 109
to evaluate and verify the operation of any non-IBM product, program, or service. IBM may have patents or pending patent applications covering subject license inquiries, in writing, to: IBM Director of Licensing IBM Corporation North Castle Drive Armonk, NY 10504-1785 U.S.A. INTERNATIONAL BUSINESS - IBM HS40 | User Guide - Page 110
Processor speeds indicate the internal clock speed of the microprocessor; other factors also affect application performance. CD-ROM drive speeds list the variable read rate. Actual speeds vary and are often less than the maximum possible. 96 BladeCenter HS40 Type 8839: Installation and User's Guide - IBM HS40 | User Guide - Page 111
of all hard disk drive bays with the largest currently supported drives available from IBM. Maximum memory may require replacement of the standard memory with an optional memory module. IBM makes no representation or warranties regarding non-IBM products and services that are ServerProven, including - IBM HS40 | User Guide - Page 112
not installed and used in accordance with the instruction manual, may cause harmful interference to radio communications. must be used in order to meet FCC emission limits.IBM is not responsible for any radio or television interference caused BladeCenter HS40 Type 8839: Installation and User's Guide - IBM HS40 | User Guide - Page 113
responsibility for any failure to satisfy the protection requirements resulting from a nonrecommended modification of the product, including the fitting of non-IBM option cards. This product has been tested and found to comply with the limits for Class A Information Technology Equipment according to - IBM HS40 | User Guide - Page 114
100 BladeCenter HS40 Type 8839: Installation and User's Guide - IBM HS40 | User Guide - Page 115
55 features, blade server 8 filler blade 23 microprocessor heat sink 21 panel, hard disk drive bay 41 firmware updates 57 forgotten power-on password, bypassing 54 H hardware problems 65 hot-spare memory 27, 53 hot-swap devices drives 41 hot-swap drive installing 40, 41 I IBM Director 8, 10 - IBM HS40 | User Guide - Page 116
20 blade system error 20 control panel 18 I/O board 14 information 20 location 20 power-on 19 processor board 12, 14 Light Path Diagnostics 9 feature 72 table 74 LSI device drivers 39 M major components 11 memory hot-spare 27, 53 large-memory support 27 problems 68 specifications 5, 6 memory module - IBM HS40 | User Guide - Page 117
T thermal material heat sink 32 trademarks 96 troubleshooting 65 charts 68 turning off the blade server 17 turning on the blade server 17 U United States electronic emission Class A notice 98 United States FCC Class A notice 98 updating firmware 57 utility Configuration/Setup Utility program 51 PXE - IBM HS40 | User Guide - Page 118
104 BladeCenter HS40 Type 8839: Installation and User's Guide - IBM HS40 | User Guide - Page 119
- IBM HS40 | User Guide - Page 120
Part Number: 90P3102 Printed in USA (1P) P/N: 90P3102
-
 1
1 -
 2
2 -
 3
3 -
 4
4 -
 5
5 -
 6
6 -
 7
7 -
8
-
9
-
10
-
11
-
12
-
13
-
14
-
15
-
16
-
17
-
18
-
19
-
20
-
21
-
22
-
23
-
24
-
25
-
26
-
27
-
28
-
29
-
30
-
31
-
32
-
33
-
34
-
35
-
36
-
37
-
38
-
39
-
40
-
41
-
42
-
43
-
44
-
45
-
46
-
47
-
48
-
49
-
50
-
51
-
52
-
53
-
54
-
55
-
56
-
57
-
58
-
59
-
60
-
61
-
62
-
63
-
64
-
65
-
66
-
67
-
68
-
69
-
70
-
71
-
72
-
73
-
74
-
75
-
76
-
77
-
78
-
79
-
80
-
81
-
82
-
83
-
84
-
85
-
86
-
87
-
88
-
89
-
90
-
91
-
92
-
93
-
94
-
95
-
96
-
97
-
98
-
99
-
100
-
101
-
102
-
103
-
104
-
105
-
106
-
107
-
108
-
109
-
110
-
111
-
112
-
113
-
114
-
115
-
116
-
117
-
118
-
119
-
120
 |
 |
Welcome. . .
Thank you for buying an
IBM server.
This server
contains
information for setting up,
configuring, and using
your server.
For detailed information about
your server, view the publications
on the
You can also find the most
current information about your
server on the IBM Web site at:
Your server is based
on Enterprise X-Architecture,
and it features superior
performance, availability, and
scalability.
Documentation CD.
Installation
Guide
and User’s
Installation and
User’s Guide
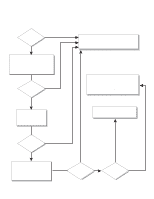
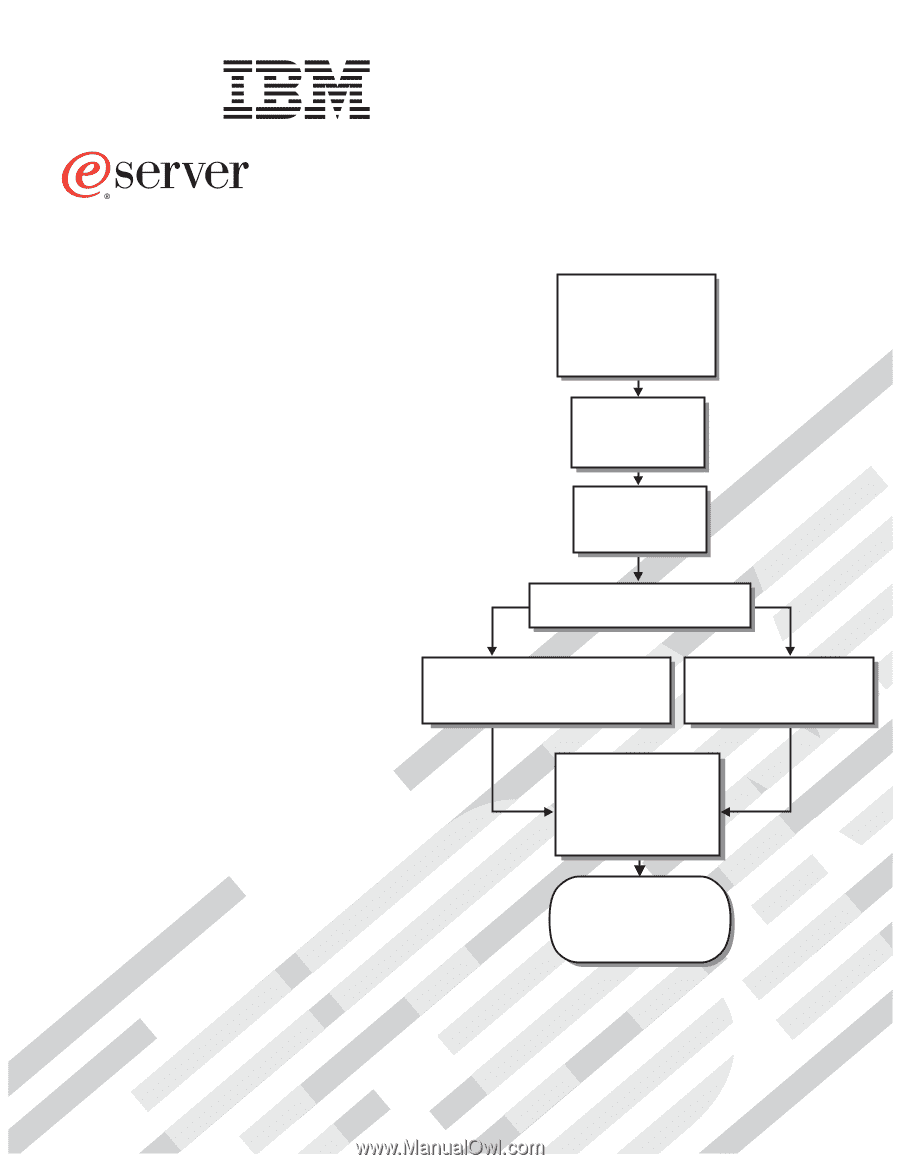
Install and start
the blade servers
Install addtional
applications, such as
IBM systems management
software and IBM
ServeRAID programs
Server is ready to use.
Go to the Server Support
flowchart to register
and profile your server.
Install options:
• Drives
• Microprocessors
• Storage expansion unit
• Memory
• I/O expansion
If the BladeCenter
or
is not installed in a
rack, install it now
BladeCenter T
BladeCenter HS40
Type 8839
Using Server Guide
Go to the Web for
www.ibm.com/pc/support.html
instructions
http://
Using the NOS
installation instructions
at www.ibm.com/pc/support
Install an operating system
(choose one method)