IBM HS40 User Guide - Page 46
Newton-meters
 |
UPC - 000435160188
View all IBM HS40 manuals
Add to My Manuals
Save this manual to your list of manuals |
Page 46 highlights
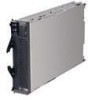
Attention: v Do not use excessive force when pressing the microprocessor into the socket. v Make sure that the microprocessor is oriented and aligned correctly in the socket before you try to close the lever. e. Carefully close the lever to secure the microprocessor in the socket. 10. Install a heat sink on the microprocessor: a. Remove the plastic protective cover from the bottom of the heat sink, if one is present. Attention: 1) Do not set down the heat sink after you remove the plastic cover. 2) Do not touch the thermal grease on the bottom of the heat sink. Touching the thermal grease will contaminate it. If the thermal grease becomes contaminated, contact your service technician. b. Align and place the heat sink on top of the microprocessor. Press firmly on the heat sink. 11. Lower the retention mechanism; then, screw down the captive mounting screw using a #2 Phillips screwdriver. Do not overtighten the screw. If you are using a torque wrench, tighten the screws to 8.5 to 13 Newton-meters (Nm) (6.3 to 9.6 foot-pounds). Attention: To help ensure proper cooling and system reliability the air baffle must be correctly positioned and fully seated. 12. Install the air baffle covering microprocessor 1 and microprocessor 4, making sure that the air baffle is positioned and pushed down so that both heat sink captive mounting screws are through the holes in the air baffle. Air baffle Microprocessor 1 and 4 heat sink captive mounting screws 13. If you have other options to install or remove, do so now; otherwise, go to "Completing the installation" on page 44. 32 BladeCenter HS40 Type 8839: Installation and User's Guide
-
 1
1 -
2
-
3
-
4
-
5
-
6
-
7
-
8
-
9
-
10
-
11
-
12
-
13
-
14
-
15
-
16
-
17
-
18
-
19
-
20
-
21
-
22
-
23
-
24
-
25
-
26
-
27
-
28
-
29
-
30
-
31
-
32
-
33
-
34
-
35
-
36
-
37
-
38
-
39
-
40
-
 41
41 -
 42
42 -
 43
43 -
 44
44 -
 45
45 -
 46
46 -
 47
47 -
 48
48 -
 49
49 -
 50
50 -
 51
51 -
52
-
53
-
54
-
55
-
56
-
57
-
58
-
59
-
60
-
61
-
62
-
63
-
64
-
65
-
66
-
67
-
68
-
69
-
70
-
71
-
72
-
73
-
74
-
75
-
76
-
77
-
78
-
79
-
80
-
81
-
82
-
83
-
84
-
85
-
86
-
87
-
88
-
89
-
90
-
91
-
92
-
93
-
94
-
95
-
96
-
97
-
98
-
99
-
100
-
101
-
102
-
103
-
104
-
105
-
106
-
107
-
108
-
109
-
110
-
111
-
112
-
113
-
114
-
115
-
116
-
117
-
118
-
119
-
120
 |
 |
