IBM HS40 User Guide - Page 59
Installing, blade, server, bezel, assembly
 |
UPC - 000435160188
View all IBM HS40 manuals
Add to My Manuals
Save this manual to your list of manuals |
Page 59 highlights
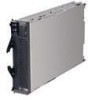
Statement 21: CAUTION: Hazardous energy is present when the blade server is connected to the power source. Always replace the blade cover before installing the blade server. 3. Reinstall the blade server into the BladeCenter unit (see "Installing the blade server in the BladeCenter unit" on page 47). 4. Turn on the blade server (see "Turning on the blade server" on page 17). Note: Reinstall the bezel assembly on the BladeCenter T unit after you have finished installing the blade servers (see the BladeCenter T Types 8720 and 8730 Installation and User's Guide for detailed instructions about reinstalling the bezel assembly). However, if you installed an option such as a PCI I/O Expansion Unit with PCI adapters that require cables, you will not be able to install the bezel assembly, which contains an air filter for the BladeCenter T unit. If you require an air filter, a filter must be provided on the rack. 5. For certain options, run the blade server Configuration/Setup Utility program (see "Updating your blade server configuration" on page 50). Note: If you have just connected the power cords of your BladeCenter unit to electrical outlets, you will have to wait until the power-on LED on the blade server flashes slowly before pressing the power-control button on a blade server. Installing the blade server bezel assembly Complete the following steps to install the blade server bezel assembly. 1. Read the safety information beginning on page vii and "Installation guidelines" on page 21. 2. Connect the control-panel cable to the control-panel connector on the processor board. Control-panel connector Control-panel cable Chapter 3. Installing options 45
-
 1
1 -
2
-
3
-
4
-
5
-
6
-
7
-
8
-
9
-
10
-
11
-
12
-
13
-
14
-
15
-
16
-
17
-
18
-
19
-
20
-
21
-
22
-
23
-
24
-
25
-
26
-
27
-
28
-
29
-
30
-
31
-
32
-
33
-
34
-
35
-
36
-
37
-
38
-
39
-
40
-
41
-
42
-
43
-
44
-
45
-
46
-
47
-
48
-
49
-
50
-
51
-
52
-
53
-
 54
54 -
 55
55 -
 56
56 -
 57
57 -
 58
58 -
 59
59 -
 60
60 -
 61
61 -
 62
62 -
 63
63 -
 64
64 -
65
-
66
-
67
-
68
-
69
-
70
-
71
-
72
-
73
-
74
-
75
-
76
-
77
-
78
-
79
-
80
-
81
-
82
-
83
-
84
-
85
-
86
-
87
-
88
-
89
-
90
-
91
-
92
-
93
-
94
-
95
-
96
-
97
-
98
-
99
-
100
-
101
-
102
-
103
-
104
-
105
-
106
-
107
-
108
-
109
-
110
-
111
-
112
-
113
-
114
-
115
-
116
-
117
-
118
-
119
-
120
 |
 |
