Insignia NS-R5101 User Manual (English) - Page 17
Modifying the settings - remote
 |
View all Insignia NS-R5101 manuals
Add to My Manuals
Save this manual to your list of manuals |
Page 17 highlights
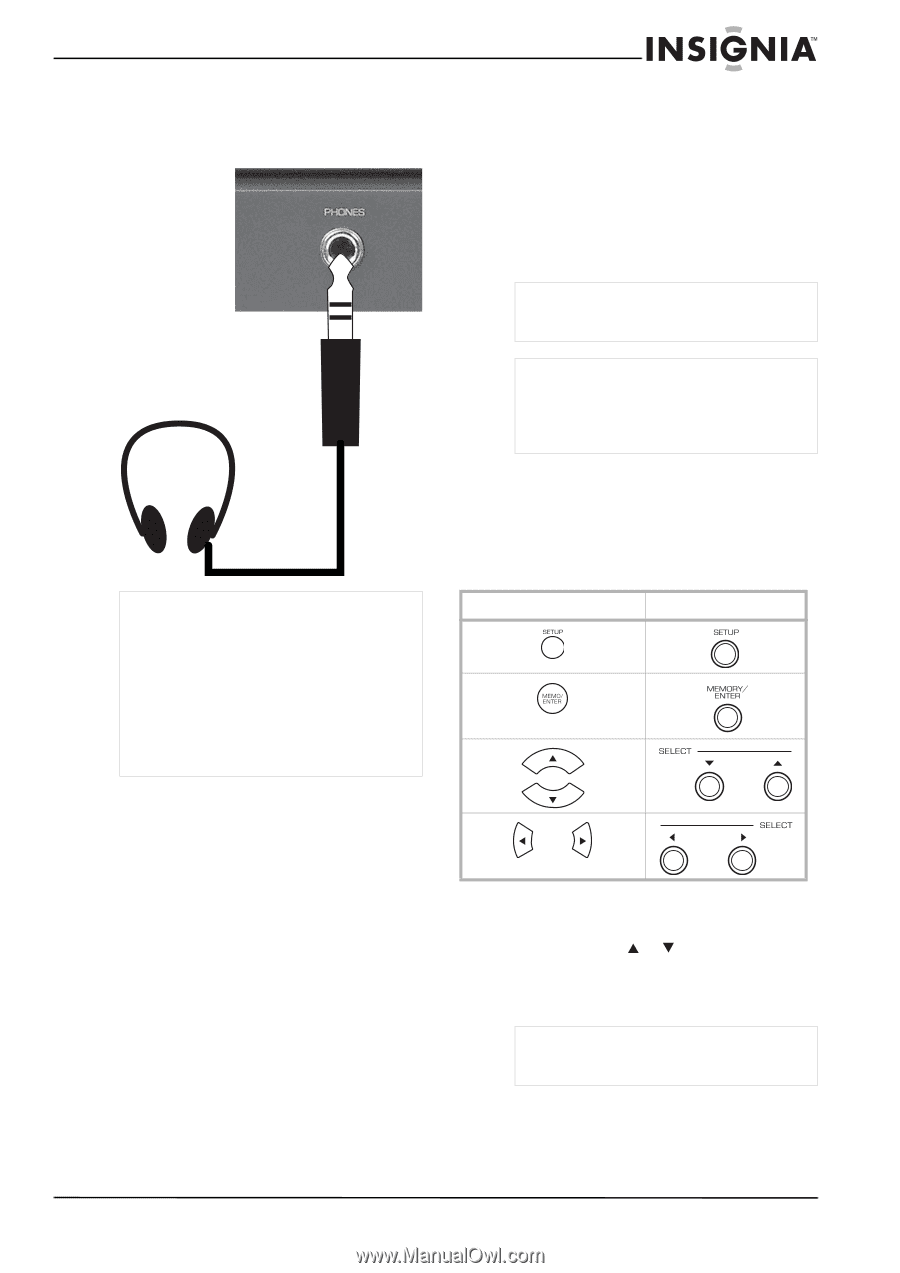
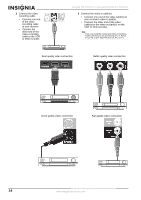
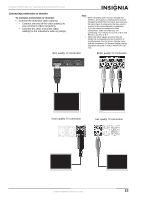
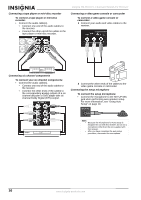
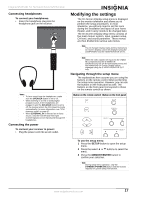
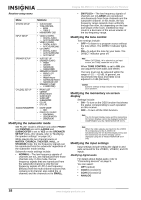
Insignia NS-R5101 5.1 Surround Sound A/V Receiver Connecting headphones To connect your headphones: • Insert the headphone plug into the headphone jack on the receiver. Notes • To hear sound from the headphones, make sure the SPEAKER button is set to off. • When listening to a DTS or Dolby Digital program source, if the headphones are plugged in and the SPEAKER button is set to off, the receiver enters the 2CH downmix mode automatically. For more information, see "2CH downmix mode" on page 27. • When EXTERNAL IN is selected as an input source, only the front left and front right channel signals can be reproduced through the headphones. Connecting the power To connect your receiver to power: • Plug the power cord into an AC outlet. Modifying the settings The On Screen Display setup menu is displayed on the monitor television and allows you to perform the setup procedures. In most situations, you will only need to set this once during the installation and layout of your home theater, and it rarely needs to be changed later. The On Screen Display setup menu consists of five main menus: system, input, speaker setup, CH level, and sound parameter. These menus are then divided into various sub-menus. Note The On Screen Display menu and the momentary On Screen Display cannot be displayed using the COMPONENT and the HDMI MONITOR OUTs. Note When the video signals are input into the VIDEO IN (composite) and the S-VIDEO IN simultaneously, the On Screen Display menu and the momentary On Screen Display can be displayed using the S-VIDEO MONITOR OUT only. Navigating through the setup menu The explanations here assume you are using the buttons on the remote control when performing the setup menu operation. However, you can use the buttons on the front panel as well. The buttons on the front panel correspond to those on the remote control as shown. Button on the remote control Button on the front panel To use the setup menu: 1 Press the SETUP button to open the setup menu. 2 Press the select or buttons to select the menu. 3 Press the MEMORY/ENTER button to confirm your selection. Note During setup menu operation, only the STANDBY(/POWER ON) button and the buttons required for system setup will function. www.insignia-products.com 17
-
 1
1 -
2
-
3
-
4
-
5
-
6
-
7
-
8
-
9
-
10
-
11
-
 12
12 -
 13
13 -
 14
14 -
 15
15 -
 16
16 -
 17
17 -
 18
18 -
 19
19 -
 20
20 -
 21
21 -
 22
22 -
23
-
24
-
25
-
26
-
27
-
28
-
29
-
30
-
31
-
32
-
33
-
34
-
35
-
36
-
37
-
38
-
39
-
40
-
41
-
42
-
43
-
44
-
45
-
46
-
47
-
48
-
49
-
50
-
51
-
52
-
53
-
54
-
55
-
56
-
57
-
58
-
59
-
60
-
61
-
62
-
63
-
64
-
65
-
66
-
67
-
68
-
69
-
70
-
71
-
72
-
73
-
74
-
75
-
76
-
77
-
78
-
79
-
80
-
81
-
82
-
83
-
84
-
85
-
86
-
87
-
88
-
89
-
90
-
91
-
92
-
93
-
94
-
95
-
96
-
97
-
98
-
99
-
100
-
101
-
102
-
103
-
104
-
105
-
106
-
107
-
108
 |
 |