Insignia NS-R5101 User Manual (English) - Page 24
Using your receiver - remote control
 |
View all Insignia NS-R5101 manuals
Add to My Manuals
Save this manual to your list of manuals |
Page 24 highlights
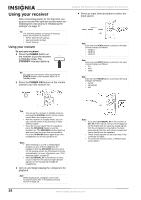
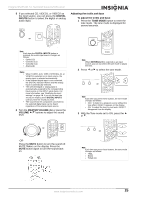
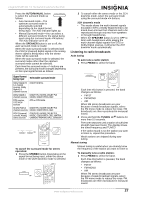
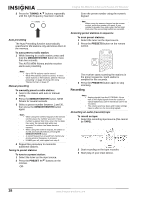
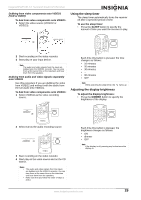
Using your receiver After connecting power for the first time, set up your receiver for optimum performance by following the instructions in "Modifying the settings" on page 17. Tip The following settings are stored in memory before the receiver is turned off: • INPUT SELECTOR settings • Surround mode settings • Preset stations. Using your receiver To use your receiver: 1 Press the POWER button on the receiver to put the receiver in Standby mode. The STANDBY indicator lights up. Tip You can turn the receiver off by pressing the POWER button on the receiver while it is in Standby mode. 2 Press the POWER ON button on the remote control to turn the receiver on. Insignia NS-R5101 5.1 Surround Sound A/V Receiver 4 Press an Input Selector button to select the input source. OR Note Each time the VIDEO button is pressed, the input source changes as follows: • VIDEO1 • VIDEO2 • VIDEO3 Note Each time the AUDIO button is pressed, the input source changes as follows: • CD • AUX • TAPE Note Each time the FM/AM button is pressed, the band changes as follows: • FM ST • FM MONO • AM PRESETS Tips • • • You can put the receiver in Standby mode by pressing the STANDBY button on the remote control when the receiver is on. With the receiver in Standby mode, you can also turn the power on by pressing an Input Selector button. If you do not hear sound from the speakers, press the SPEAKER button to turn the speakers on. The SPEAKER indicator lights up and sound can be heard from the speakers. Press the SPEAKER button again to turn the headphones on and the speakers off. Notes • When listening to a DTS or Dolby Digital program source, if the headphones are plugged in and the SPEAKER button is set to off, the receiver enters the 2CH downmix mode automatically. For more information, see "2CH downmix mode" on page 27. • When EXTERNAL IN is selected as an input source, only front left and front right channel signals can be reproduced through the headphones. 3 Turn on and begin playing the component for playback. Note When playing back a program source with surround sound, refer to "Enjoying surround sound" on page 26. OR Notes • If you press EXTERNAL IN on the receiver or EXT IN on the remote control, EXT IN appears on the display and six separate analog signals from the component connected to this input pass through the tone and volume circuits and can be heard from the speakers. • These analog signals can be heard only. They cannot be recorded. • To cancel this function, press a different input source button. 24 www.insignia-products.com
-
 1
1 -
2
-
3
-
4
-
5
-
6
-
7
-
8
-
9
-
10
-
11
-
12
-
13
-
14
-
15
-
16
-
17
-
18
-
 19
19 -
 20
20 -
 21
21 -
 22
22 -
 23
23 -
 24
24 -
 25
25 -
 26
26 -
 27
27 -
 28
28 -
 29
29 -
30
-
31
-
32
-
33
-
34
-
35
-
36
-
37
-
38
-
39
-
40
-
41
-
42
-
43
-
44
-
45
-
46
-
47
-
48
-
49
-
50
-
51
-
52
-
53
-
54
-
55
-
56
-
57
-
58
-
59
-
60
-
61
-
62
-
63
-
64
-
65
-
66
-
67
-
68
-
69
-
70
-
71
-
72
-
73
-
74
-
75
-
76
-
77
-
78
-
79
-
80
-
81
-
82
-
83
-
84
-
85
-
86
-
87
-
88
-
89
-
90
-
91
-
92
-
93
-
94
-
95
-
96
-
97
-
98
-
99
-
100
-
101
-
102
-
103
-
104
-
105
-
106
-
107
-
108
 |
 |