Insignia NS-R5101 User Manual (English) - Page 23
Installing batteries, Using the remote control
 |
View all Insignia NS-R5101 manuals
Add to My Manuals
Save this manual to your list of manuals |
Page 23 highlights
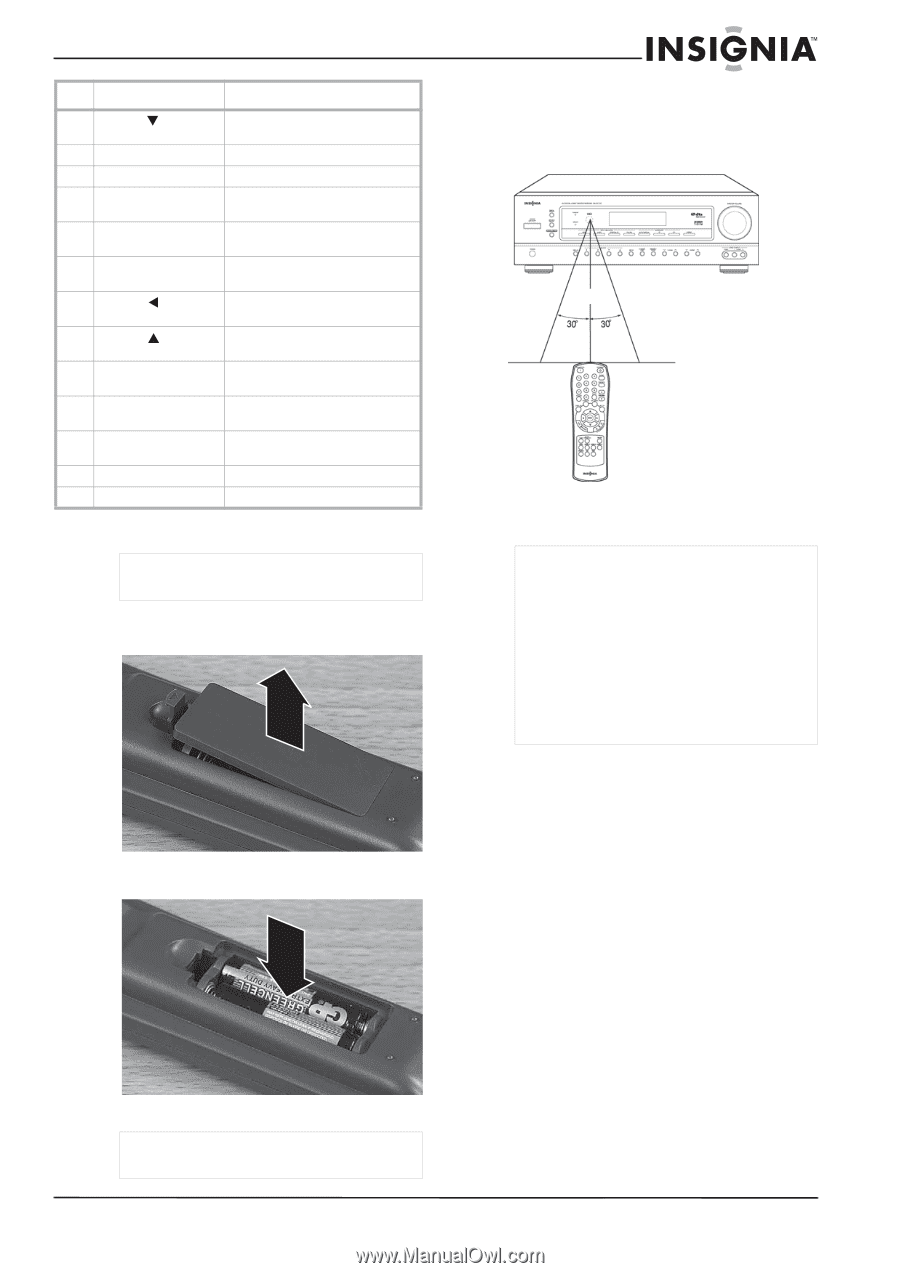
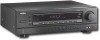
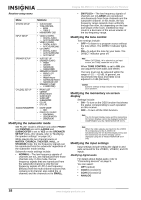
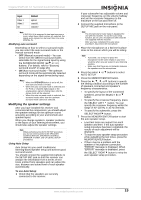
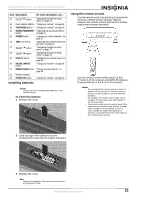
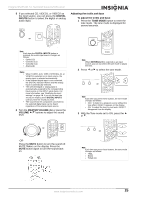
Insignia NS-R5101 5.1 Surround Sound A/V Receiver Item Description For more information, see... 11 SELECT button "Navigating through the setup menu" on page 17. 12 Input selector buttons "Using your receiver" on page 24. 13 TONE MODE button "Using your receiver" on page 24. 14 SOUND PARAMETER "Adjusting the sound parameters" button on page 21. 15 STEREO button "Listening to radio broadcasts" on page 27. 16 TEST tone button "Adjusting each channel level with test tone" on page 22. 17 SELECT button "Navigating through the setup menu" on page 17. 18 SELECT button "Navigating through the setup menu" on page 17. 19 DISPLAY button "Displaying the receiver status" on page 30. 20 DIGITAL INPUTS button "Using your receiver" on page 24. 21 PRESET SCAN button "Tuning to preset stations" on page 28. 22 Numeric keypad 23 POWER ON button "Using your receiver" on page 24. Installing batteries Caution Do not use Ni-Cd rechargeable batteries in this remote control. To install the batteries: 1 Remove the cover. Using the remote control Use the remote control by pointing it towards the receiver's remote sensor window. Objects between the remote control and sensor window may prevent proper operation. 23' (7m) Use the remote control within about 23 feet (7 meters) of the receiver and within 30 degrees of perpendicular to the front of the receiver. Caution • Do not expose the remote control to shock. In addition, do not expose the remote control to liquids, and do not place in an area with high humidity. • Do not place the remote control under direct sunlight. The heat may cause deformation of the remote control. • The remote control may not work properly if the remote sensor window of the receiver is under direct sunlight or strong lighting. In such a case, change the angle of the lighting or receiver, or operate the remote control closer to the remote sensor window. 2 Load two type AAA batteries into the compartment matching the polarity indicated. 3 Replace the cover. Note Remove the batteries if they are not to be used for a long period of time. www.insignia-products.com 23
-
 1
1 -
2
-
3
-
4
-
5
-
6
-
7
-
8
-
9
-
10
-
11
-
12
-
13
-
14
-
15
-
16
-
17
-
 18
18 -
 19
19 -
 20
20 -
 21
21 -
 22
22 -
 23
23 -
 24
24 -
 25
25 -
 26
26 -
 27
27 -
 28
28 -
29
-
30
-
31
-
32
-
33
-
34
-
35
-
36
-
37
-
38
-
39
-
40
-
41
-
42
-
43
-
44
-
45
-
46
-
47
-
48
-
49
-
50
-
51
-
52
-
53
-
54
-
55
-
56
-
57
-
58
-
59
-
60
-
61
-
62
-
63
-
64
-
65
-
66
-
67
-
68
-
69
-
70
-
71
-
72
-
73
-
74
-
75
-
76
-
77
-
78
-
79
-
80
-
81
-
82
-
83
-
84
-
85
-
86
-
87
-
88
-
89
-
90
-
91
-
92
-
93
-
94
-
95
-
96
-
97
-
98
-
99
-
100
-
101
-
102
-
103
-
104
-
105
-
106
-
107
-
108
 |
 |