JVC HR-S9911U Instructions - Page 12
Recording, Basic Recording - reviews
 |
UPC - 046838160684
View all JVC HR-S9911U manuals
Add to My Manuals
Save this manual to your list of manuals |
Page 12 highlights
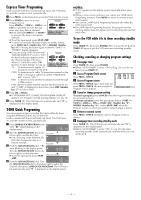
Locating beginning of timer recordings - Instant Review After ensuring that the VCR is turned off and that the timer mode is disengaged, press REVIEW. ● The VCR turns on, and rewinds to the index code indicating the beginning of the last timer-recorded program, then begins playback automatically. ● You can access a program of 2 to 9 index codes away from the current position on the tape. If, for example, you have 5 programs recorded and you want to watch the third one, press REVIEW three times. ● The Instant Review function will also operate if the VCR is turned on. Skipping unwanted portions - Skip Search Press SKIP SEARCH on the Remote once to 4 times during playback. Each press initiates a 30-second period of high speed playback (up to 2 minutes). When the specified portion of the tape is skipped, normal playback resumes automatically. To return to normal playback during Skip Search, press PLAY (4). Adjusting picture condition - Digital TBC/NR The Digital TBC/NR (Time Base Corrector/Noise Reduction) function removes jitter from fluctuating video signals to deliver a stable picture even with old tapes and rental tapes. The Digital R3 function (੬ pg. 20) which cuts noise and reproduces clear pictures is also linked to this function. We recommend that you use the Digital TBC/NR function when - - playing back a tape recorded on a camcorder. - playing back a tape repeatedly used. - using this VCR as the playback VCR for editing. Press DIGITAL TBC/NR on the VCR so that the DIGITAL TBC/NR lamp lights up. Each time you press the button, this function turns on and off. NOTES: ● If you play back a tape on which certain types of signals (using a PC or some character generators) have been recorded with Digital TBC/NR activated, the playback picture may be distorted. In this case, deactivate Digital TBC/NR. ● Digital TBC/NR and Video Stabilizer (੬ pg. 20) cannot be used at the same time. If you activate Digital TBC/NR when "VIDEO STABILIZER" is set to "ON", "VIDEO STABILIZER" will be automatically set to "OFF". Make sure Digital TBC/NR is deactivated when you want to use Video Stabilizer. Recording It may be unlawful to record or play back copyrighted material without the consent of the copyright owner. Accidental erasure prevention To prevent accidental recording on a recorded cassette, remove its record safety tab. To record on it later, cover the hole with adhesive tape. Record safety tab Basic Recording ● Turn on the VCR and TV, and select the VCR channel (or AV mode). ● Set the VCR/TV/CABLE/DBS selector on the Remote to "VCR". ● When you record the programs on this VCR, the tapes are automatically numberd so that every tape recorded on this VCR has a different tape number if "NAVIGATION" is set to "ON" (੬ pg. 16). The program information such as recording date, start time, channel number, and recording speed are also automatically stored in the VCR's memory. For details, refer to "Video Navigation" (੬ pg. 16). A Load a cassette Make sure the record safety tab is intact. If not, cover the hole with adhesive tape before inserting the cassette. ● The VCR turns on automatically. ● The tape will run for a few seconds while the VCR searches for the tape number. B Select recording channel On the VCR Press CH+/-. Or push the ADVANCED JOG dial, then turn it to the left or right. On the Remote Press CH+/- or the Number keys. ● If you connect the TV and the VCR only using the RF connection, press TV/VCR on the Remote so that the VCR mode indicator lights on the display panel, to view the program to be recorded. C Set tape speed Press SP/EP (p). The selected tape speed will appear on the display panel and on the TV screen. NOTE: You can select tape speed in the stop mode or during recording pause mode. D Start recording On the VCR Press REC (7). On the Remote While holding REC (7), press PLAY (4). NOTES: ● If "VIDEO CALIBRATION" is set to "ON" (੬ pg. 19) (default setting), the VCR takes about 7 seconds to assess the quality of the tape in use, then recording begins with the picture level optimized. ● If "MEMORY FULL" appears on the TV screen when you start recording, the VCR's memory for the Video Navigation function is full. This is not related to actual recording, but the program information will not be stored in the VCR's memory. (੬ pg. 16, "Video Navigation") - 12 -
-
 1
1 -
2
-
3
-
4
-
5
-
6
-
 7
7 -
 8
8 -
 9
9 -
 10
10 -
 11
11 -
 12
12 -
 13
13 -
 14
14 -
 15
15 -
 16
16 -
 17
17 -
18
-
19
-
20
-
21
-
22
-
23
-
24
-
25
-
26
-
27
-
28
-
29
-
30
-
31
-
32
 |
 |
