JVC VN-C205U Instructions - Page 10
Name and Function of Parts Continued, ALARM IN/OUT] Alarm Input/Output
 |
UPC - 046838021497
View all JVC VN-C205U manuals
Add to My Manuals
Save this manual to your list of manuals |
Page 10 highlights
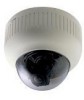
Introduction Name and Function of Parts (Continued) Body Surface View when the dome cover is removed. For instructions on removing the dome cover, see step 4 of "Mounting the Camera to the Ceiling". (☞page 17) 8 9 0 ! Video setting switch & * ^ ( ) ⁄ ¤ ‹ › fi @ #$ % 8 Head ! MONITOR terminal (RCA pin) For adjusting the lens, focus, or camera angle. For connecting a monitor when mounting the (☞ page 23 to 24) camera for adjusting the lens or determining 9 Tilt lock screws the camera angle. (High impedance) Use when adjusting the angle of view of the @ Wire clamp camera. (☞ Page 23) When pulling out the cables from the side of 0 [IRIS LEVEL] Iris level adjustment For adjusting the level of the automatic aperture control lens. This adjustment only needs camera unit without opening a hole on the ceiling, arrange the all the cables by bundling them into this wire clamp. to be made when required. Use this to accom- # [ALARM IN/OUT] Alarm Input/Output modate particular shooting conditions. Terminals To darken image To brighten image Note Turning direction of level Counterclockwise (L side) Clockwise (H side) Terminals for alarm input and output. (☞ Page 18) $ CF card Slot Insert the CF card. (☞ Page 19) ● When adjusting the iris level, set the AGC switch to "OFF". Otherwise, when the level is turned too far toward L, the AGC function activates increasing sensitivity and the picture may look uneven. 10
-
 1
1 -
2
-
3
-
4
-
 5
5 -
 6
6 -
 7
7 -
 8
8 -
 9
9 -
 10
10 -
 11
11 -
 12
12 -
 13
13 -
 14
14 -
 15
15 -
16
-
17
-
18
-
19
-
20
-
21
-
22
-
23
-
24
-
25
-
26
-
27
-
28
-
29
-
30
-
31
-
32
-
33
-
34
-
35
-
36
-
37
-
38
-
39
-
40
 |
 |
