JVC VN-C205U Instructions - Page 34
Step 3 Setting Using the V.Networks Controller, 3-1 Starting Up V.Networks Controller
 |
UPC - 046838021497
View all JVC VN-C205U manuals
Add to My Manuals
Save this manual to your list of manuals |
Page 34 highlights
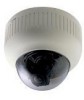
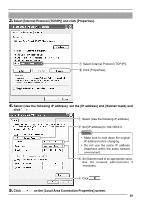
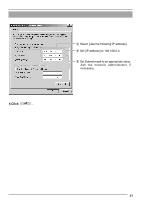
Settings (Step 3 Setting Using the V.Networks Controller) 3-1 Starting Up V.Networks Controller The installed "V.Networks Controller" can be used to monitor camera images. In addition, recording/playback operations and setting of frame rate for camera images are also possible. 1. Select [Start] † [Programs] † [V. NETWORKS] † [V.Networks Controller] to start up the "V.Networks Controller". 1 Select the camera to connect to from the pull-down menu for the camera. 22 Live images from the camera will be displayed. Notes ● Enter the correct password if a password has been set. ● This controller can be connected to VN-C1, VN-C2, VN-C3, VN-C30 (JPEG only), VN-A1, VN-C10 (JPEG and MPEG), VN-C655 and VN-C625 as well VN-C205. 34
-
 1
1 -
2
-
3
-
4
-
5
-
6
-
7
-
8
-
9
-
10
-
11
-
12
-
13
-
14
-
15
-
16
-
17
-
18
-
19
-
20
-
21
-
22
-
23
-
24
-
25
-
26
-
27
-
28
-
 29
29 -
 30
30 -
 31
31 -
 32
32 -
 33
33 -
 34
34 -
 35
35 -
 36
36 -
 37
37 -
 38
38 -
 39
39 -
40
 |
 |

34
3-1 Starting Up V.Networks Controller
Settings (Step 3 Setting Using the V.Networks Controller)
The installed "V.Networks Controller" can be used to monitor camera images.
In addition, recording/playback operations and setting of frame rate for camera
images are also possible.
1.
Select [Start]
†
[Programs]
†
[V. NETWORKS]
†
[V.Networks Controller] to
start up the "V.Networks Controller".
2
Live images from the camera will be
displayed.
2
1
Select the camera to connect to from the
pull-down menu for the camera.
Notes
●
Enter the correct password if a password has been set.
●
This controller can be connected to VN-C1, VN-C2, VN-C3, VN-C30 (JPEG only), VN-A1,
VN-C10 (JPEG and MPEG), VN-C655 and VN-C625 as well VN-C205.