Kenmore 7755 Installation Instructions - Page 12
Range, installations
 |
View all Kenmore 7755 manuals
Add to My Manuals
Save this manual to your list of manuals |
Page 12 highlights
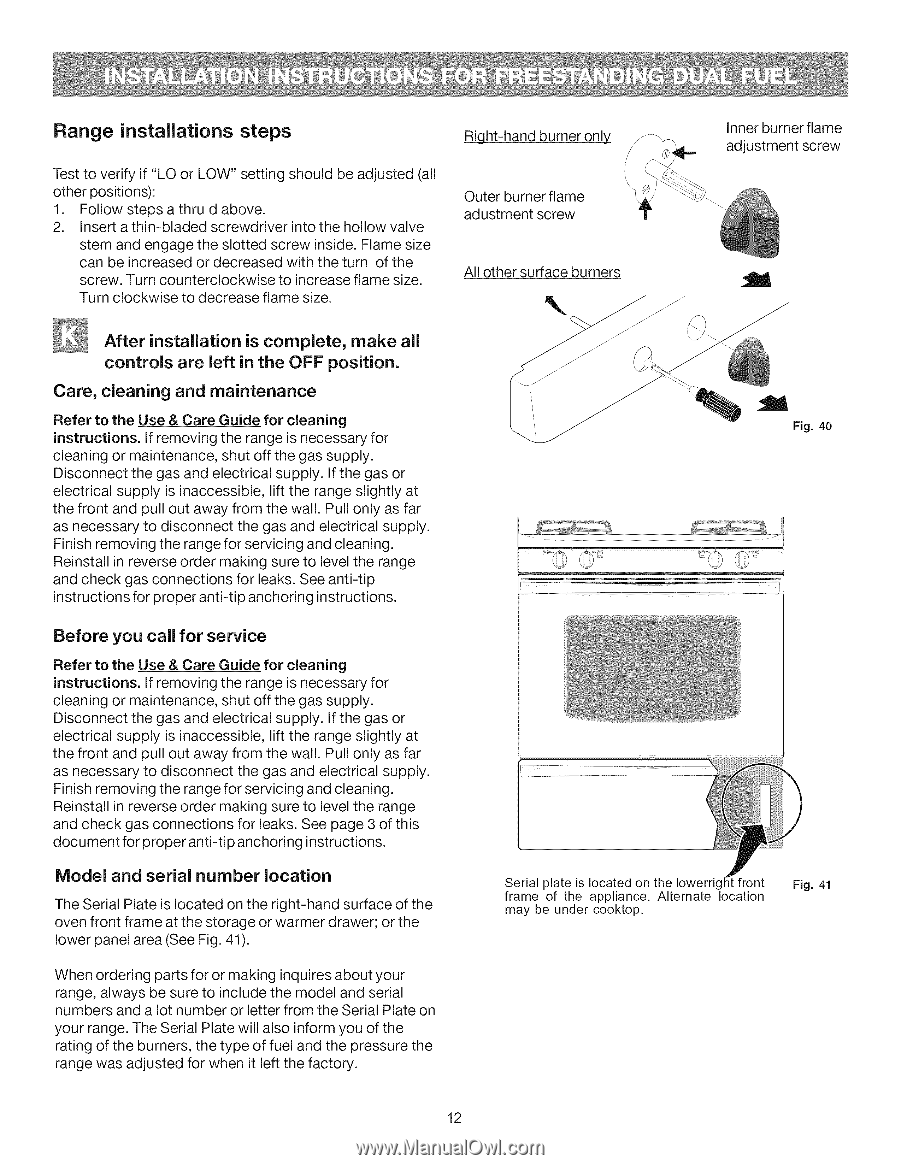
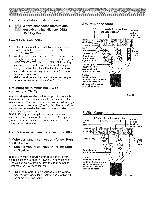
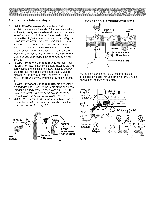
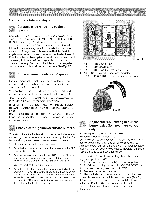
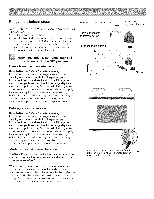
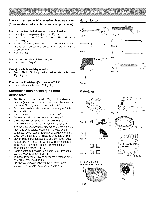
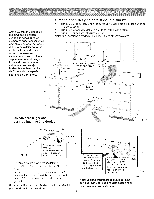
Range installations steps Ri__ght-handburner only_ Test to verify if "LO or LOW" setting should be adjusted (all other positions): 1. Follow steps a thru d above. 2. Insert a thin-bladed screwdriver into the hollow valve stem and engage the slotted screw inside. Flame size can be increased or decreased with the turn of the screw. Turn counterclockwise to increase flame size. Turn clockwise to decrease flame size. Outer burner flame adustment screw All other surface burners % Inner burner flame adjustment screw After installation is complete, make all controls are left in the OFF position. Care, cleaning and maintenance Refer to the Use & Care Guide for cleaning instructions. If removing the range is necessary for cleaning or maintenance, shut off the gas supply. Disconnect the gas and electrical supply. If the gas or electrical supply is inaccessible, lift the range slightly at the front and pull out away from the wall. Pull only as far as necessary to disconnect the gas and electrical supply. Finish removing the range for servicing and cleaning. Reinstall in reverse order making sure to level the range and check gas connections for leaks. See anti-tip instructions for proper anti-tip anchoring instructions. Before you call for service Refer to the Use & Care Guide for cleaning instructions. If removing the range is necessary for cleaning or maintenance, shut off the gas supply. Disconnect the gas and electrical supply. If the gas or electrical supply is inaccessible, lift the range slightly at the front and pull out away from the wall. Pull only as far as necessary to disconnect the gas and electrical supply. Finish removing the range for servicing and cleaning. Reinstall in reverse order making sure to level the range and check gas connections for leaks. See page 3 of this document for proper anti-ti p anchoring instructions. Model and serial number location The Serial Plate is located on the right-hand surface of the oven front frame at the storage or warmer drawer; or the lower panel area (See Fig. 41). When ordering parts for or making inquires about your range, always be sure to include the model and serial numbers and a lot number or letter from the Serial Plate on your range. The Serial Plate will also inform you of the rating of the burners, the type of fuel and the pressure the range was adjusted for when it left the factory. Serial plate is located on the Iowerrig front frame of the appliance. Alternate location may be under cooktop. 12
-
 1
1 -
2
-
3
-
4
-
5
-
6
-
 7
7 -
 8
8 -
 9
9 -
 10
10 -
 11
11 -
 12
12 -
 13
13 -
 14
14 -
 15
15 -
 16
16 -
 17
17 -
18
-
19
-
20
-
21
-
22
-
23
-
24
 |
 |