Kenwood DDX7019BT Instruction Manual - Page 7
Adjusting the volume, Attenuating the sound, Monitor panel operations
 |
View all Kenwood DDX7019BT manuals
Add to My Manuals
Save this manual to your list of manuals |
Page 7 highlights
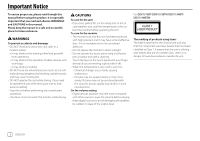
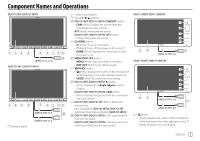
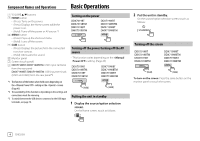
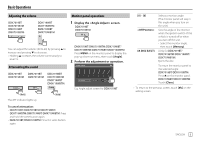
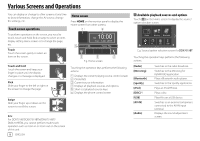
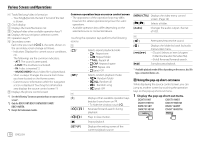
Basic Operations Adjusting the volume DDX7019BT DDX7019BTM DMX7019BT DMX7019BTM DDX719WBT DDX719WBTM DMX719WBT DMX719WBTM Monitor panel operations 1 Display the screen. DDX7019BT DDX7019BTM You can adjust the volume (00 to 40) by pressing J to increase and pressing K to decrease. • Holding J increases the volume continuously to level 15. Attenuating the sound DMX7019BT/DMX7019BTM/DDX719WBT/ DDX719WBTM/DMX719WBT/DMX719WBTM: Press MENU on the monitor panel to display the pop-up short-cut menu, then touch [Angle]. 2 Perform the adjustment or operation. DDX7019BT DDX7019BTM DMX7019BT DMX7019BTM DDX719WBT DDX719WBTM DMX719WBT DMX719WBTM (Hold) The ATT indicator lights up. (Hold) E.g. Angle adjust screen for DDX7019BT To cancel attenuation: • DDX7019BT/DDX7019BTM/DDX719WBT/ DDX719WBTM/DMX719WBT/DMX719WBTM: Press and hold the same button again. • DMX7019BT/DMX7019BTM: Press the same button again. [0] - [6] [M DISC EJECT] Selects a monitor angle. (The monitor panel will stay in this angle when you turn on the unit.) Sets the angle of the monitor when the ignition switch of the vehicle is turned off or when you turn off the unit. • Select the monitor angle, then touch [Memory]. (Only for DDX7019BT/ DDX7019BTM/DDX719WBT/ DDX719WBTM) Ejects the disc. To return the monitor panel to the selected angle: DDX7019BT/DDX7019BTM: Press M on the monitor panel. DDX719WBT/DDX719WBTM: Touch [Close]. • To return to the previous screen, touch [ ] on the setting screen. ENGLISH 5
-
 1
1 -
 2
2 -
 3
3 -
 4
4 -
 5
5 -
 6
6 -
 7
7 -
 8
8 -
 9
9 -
 10
10 -
 11
11 -
 12
12 -
13
-
14
-
15
-
16
-
17
-
18
-
19
-
20
-
21
-
22
-
23
-
24
-
25
-
26
-
27
-
28
-
29
-
30
-
31
-
32
-
33
-
34
-
35
-
36
-
37
-
38
-
39
-
40
-
41
-
42
-
43
-
44
-
45
-
46
-
47
-
48
-
49
-
50
-
51
-
52
-
53
-
54
-
55
-
56
-
57
-
58
-
59
-
60
-
61
-
62
-
63
-
64
-
65
-
66
-
67
-
68
 |
 |
