Kenwood DPX501 Instruction Manual
Kenwood DPX501 Manual
 |
View all Kenwood DPX501 manuals
Add to My Manuals
Save this manual to your list of manuals |
Kenwood DPX501 manual content summary:
- Kenwood DPX501 | Instruction Manual - Page 1
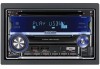
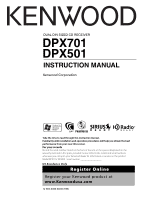
DUAL DIN SIZED CD RECEIVER DPX701 DPX501 INSTRUCTION MANUAL Take the time to read through this instruction manual. Familiarity with installation and operation procedures will help you obtain the best performance from your new CD-receiver. For your records Record the serial number, found on the back - Kenwood DPX501 | Instruction Manual - Page 2
26 5 Radio Text Scroll PTY (Program Type) 7 Registration of a station as a PTY Program Type preset 8 CD/USB device/Audio file/External disc control features 28 10 Playing CD & Audio file 11 Playing USB device Playing External Disc Fast Forwarding and Reversing Track/File Search Disc - Kenwood DPX501 | Instruction Manual - Page 3
Security Code Touch Sensor Tone Manual Clock Adjustment Date Adjustment Date Mode Setting Text Scroll Built-in Auxiliary input Setting CD Read Setting Voice Index ACDrive firmware version display Installation 56 Removing the Unit 58 Troubleshooting Guide 59 Specifications 63 The "AAC" logo - Kenwood DPX501 | Instruction Manual - Page 4
specifications of your vehicle. (DPX701 only) • Mounting and wiring CDs in the CD slot If you try to load a 3 in. CD with its adapter into the unit, the adapter might separate from the CD and damage the unit. About CD players/disc changers connected to this unit Kenwood disc changers/ CD players - Kenwood DPX501 | Instruction Manual - Page 5
-1 character set can be displayed. (DPX701 only) • The characters which can be displayed by this unit are A-Z 0-9 DPX501 only) • The RDS feature won't work where the service is not supported by any broadcasting station. • There are places in this manual where lit indicators are described; however - Kenwood DPX501 | Instruction Manual - Page 6
to DPX701/DPX501 • "Media Manager" is recorded in the CD-ROM attached to this unit. • Refer to the attached installation manual safety. Kenwood Corporation 2967-3, ISHIKAWA-MACHI, HACHIOJI-SHI TOKYO, JAPAN KENWOOD CORP. and used in accordance with the instructions. However, there is no guarantee - Kenwood DPX501 | Instruction Manual - Page 7
which do not have the mark. • You cannot play a CD-R or CD-RW that has not been finalized. (For the finalization process refer to your CD-R/CD-RW writing software, and your CDR/CD-RW recorder instruction manual.) CD storage • Do not place CDs in direct sunlight (On the seat or dashboard etc.) or - Kenwood DPX501 | Instruction Manual - Page 8
Joliet • Romeo • Long file name. Playable file format of USB device • For the formats supported by USB devices, refer to http://www.kenwood.mediamanager.jp/. The maximum number of characters for display (CD-R/RW) File/Folder name: 128 characters MP3 ID3 Tag/ WMA Contents property: 30 characters AAC - Kenwood DPX501 | Instruction Manual - Page 9
can specify the order of playback by numbering files in a folder and writing them by folder. (USB device) Example CD (1) ¡! ^: Folddeerr ¡: Auddiiooffiilele 2 3 ¡" ¡# 4 ¡$ 5 ¡% ¡P • Playing order Playing order after ¡! play • File search Forward file search during ¡" play. Push the Control - Kenwood DPX501 | Instruction Manual - Page 10
stored in the flash memory and digital audio player that have a USB port (these devices are less. For the supported formats and USB device types, refer to http://www.kenwood.mediamanager.jp/. • is indicated. • USB source is recognized as CD source on the connected unit. About the Connection of - Kenwood DPX501 | Instruction Manual - Page 11
General features DISP VOL ATT Q SRC Control knob DPX701 LOUD indicator DPX501 ATT indicator Power Turning ON the Display "SIRIUS" "TUNER" or "HD Radio"/ "HD RADIO" "USB" "Compact Disc"/ "CD" "CD Changer"/ "CD CH" "AUX" "AUX EXT" "STANDBY" Attenuator Turning the volume down quickly. Press the - Kenwood DPX501 | Instruction Manual - Page 12
(page 13) is set to "OFF". • *5 You can adjust these items in detail. Refer to (Page12). (Function of the DPX701) • *5 Source tone memory: Puts the set up value in the memory per source. (Detail Audio item is included) 5 Exit Audio Control mode Press any button - Kenwood DPX501 | Instruction Manual - Page 13
3 Select the Detail Audio item to adjust Press the [VOL] knob. Each time you press the knob, the item to be adjusted alternates between the items shown in the table below. 4 Adjust the Detail Audio item Turn the [VOL] knob. Bass level Adjustment Item Bass Center Frequency Bass Q Factor Bass - Kenwood DPX501 | Instruction Manual - Page 14
the display switches as shown below. In Tuner source Information Program Service name or Frequency (FM) Radio text, Program Service name or Frequency (FM) Frequency (AM) Clock Display "FREQ/PS" "R-TEXT" "FREQ" "CLOCK" In CD & External disc source Information Disc title Track title Track number - Kenwood DPX501 | Instruction Manual - Page 15
In Audio file source Information Song title & Artist name Album name & Artist name Folder name File name Track number & Play time Clock Display "TITLE"* "ALBUM"* "FOLDER" "FILE" "P-TIME" "CLOCK" In HD Radio source Information Station name Song title/ Artist name/ Album name/ Genre Frequency Clock - Kenwood DPX501 | Instruction Manual - Page 16
to the page on the following table for the methods to alternate by the Display Type. Display Type A B CD E Graphic 1 16 16 - - - Text 2 - 18 - - - Upper 4 - - 20 B mode. Press the [DISP] button. Function of the DPX701 Display Type A/ Display Type B Graphic part Display Switching Changing - Kenwood DPX501 | Instruction Manual - Page 17
Function of the DPX701 Display Type A/ Display Type B Wallpaper selecting Selecting a "SCAN" is displayed. When scan is ON, each wallpaper is displayed every several seconds. Select wallpaper manually 1 Turn the wallpaper scan OFF. Press the Control knob. Each time you press the button, the - Kenwood DPX501 | Instruction Manual - Page 18
General features Function of the DPX701 Display Type B Text Selection for Display Selecting the text display. 1 Station name or Program Service name Radio text or Program Service name (FM) Frequency Clock Date Display "SNPS"* "Radio Text"* "Frequency" "Clock" "Date" In CD & External disc source - Kenwood DPX501 | Instruction Manual - Page 19
Function of the DPX701 Display Type C/ Display Type D Text Display Switching Changing the text display. 1 Select the display Type Press the [DISP] button. Select the Display Type C/Display Type D. 2 - Kenwood DPX501 | Instruction Manual - Page 20
Upper text display part In Tuner source Information Station name or Program Service name Radio text or Program Service name (FM) Frequency Clock Date Display "SNPS"* "Radio Text"* "Frequency" "Clock" "Date" In CD & External disc source Information Disc title Track title Track number & Play time - Kenwood DPX501 | Instruction Manual - Page 21
"Clock" "Date" "Blank" "Channel Name" "Song Title" "Artist Name" "Composer Name" "Category Name" "Label Name" "Comment" • * If the contents of the information cannot be displayed, Kenwood Logo is displayed. However, in HD Radio source, the display becomes blank. English | 21 - Kenwood DPX501 | Instruction Manual - Page 22
) Display "Status" "Clock" "Date" "Blank" "Radio Text"* In CD & External disc source Information Indicator Clock Date Blank Disc title Track title Disc , in HD Radio source, the display becomes blank. Function of the DPX701 Display Type B/ Display Type C/ Display Type D Font Color Select Selecting - Kenwood DPX501 | Instruction Manual - Page 23
font color. • The "Status" item of Display type C/D can be set; however, the actual display color does not change. Function of the DPX701 Display Type E G-Analyzer display Switching Alternates G-Analyzer display when the Display type is set to Display Type E. (G: gravity) • Before alternating - Kenwood DPX501 | Instruction Manual - Page 24
display 1 - 6 Band display Frequency display ST indicator DPX701 ST indicator DPX501 Preset station number Tuning Selecting the station. seek Preset station seek Manual Display "Seek Mode Auto1"/ "AUTO1" "Seek Mode Auto2"/ "AUTO2" "Seek Mode Manual"/ "MANUAL" Operation Automatic search for - Kenwood DPX501 | Instruction Manual - Page 25
Function of remote control Direct Access Tuning Entering the frequency and tuning. 1 Select the band Press the [FM] or [AM] button. 2 Enter Direct Access Tuning mode Press the [DIRECT] button on the remote control. "- - - -" is displayed. 3 Enter the frequency Press the number buttons on the - Kenwood DPX501 | Instruction Manual - Page 26
RDS features Band display Program Service name 1 - 6 Radio text Control knob Radio text DPX701 RDS indicator TI indicator DPX501 PTY a station. 1 Enter PTY mode Press the Control knob. "PTY Select" is displayed.(DPX701 only) During PTY mode the "PTY" indicator is ON. (DPX501 only) • The PTY - Kenwood DPX501 | Instruction Manual - Page 27
20. Language 21. Religious Music 22. Religious Talk 23. Personality 24. Public 25. College 26. Weather "Foreign Language" "LANGUAGE" "Religious Music" "REL MUSC" "Religious Talk" "REL TALK" "Personality" "PERSNLTY" "Public" "PUBLIC" "College" "COLLEGE" "Weather" "WEATHER" • Speech and - Kenwood DPX501 | Instruction Manual - Page 28
SEL M.RDM A.RDM/3 Play time Track number Play time IN indicator DPX701 IN indicator DPX501 Play mode Disc number Playing CD & Audio file When a disc is inserted Press the [SRC] button. Select the "Compact Disc"/ "CD" display. • When a CD is inserted, the "IN" indicator is ON. Pause and play - Kenwood DPX501 | Instruction Manual - Page 29
connected to this unit. Press the [SRC] button. Select the display for the disc player you want. Display examples: Display "CD Changer"/ "CD CH" "MD Changer"/ "MD CH" Disc player CD changer MD changer Pause and play Press the Control knob. Each time you press the knob, the audio pauses or plays - Kenwood DPX501 | Instruction Manual - Page 30
listening to. Press the [REP] button. Each time you press the button, the Repeat Play alternates between the modes shown in the tables below. In CD & External disc source Repeat play Track Repeat Disc Repeat (In Disc Changer) OFF Display "Track Repeat ON"/ "TRAC REP" "Disc Repeat ON"/ "DISC REP - Kenwood DPX501 | Instruction Manual - Page 31
• When you push the Control knob toward [¢], the next random song starts. Function of Audio file All Random Play Playing randomly from all of the Audio files recorded in the media. Press the [A.RDM] button for at least 1 second. When the random mode is ON, "All Random ON"/ "ALL RDM" is displayed. - Kenwood DPX501 | Instruction Manual - Page 32
CD/USB device/Audio file/External disc control features Function of Audio file File Select mode You can select an audio file in the folder currently - Kenwood DPX501 | Instruction Manual - Page 33
The Folder Select mode releases, and the Audio file in the folder being displayed plays. Function of Audio file Folder Select 2 mode Select the target folder within the folders containing audio files. The folder which contains playable audio files is only displayed. 1 Enter Folder Select 2 mode - Kenwood DPX501 | Instruction Manual - Page 34
CD/USB device/Audio file/External disc control features Function of ACDrive 1 Enter the Letter Seek mode Press the [S.MODE] button for at least 1 second. Text/Title Scroll Scrolling the displayed CD text, Audio file text, or MD title. Push the Control knob toward [FM] for at least 2 seconds. • - Kenwood DPX501 | Instruction Manual - Page 35
HD Radio control features AUTO/AME Band display Frequency display Control knob SRC 1 - 6 Band display Frequency display DPX701 ST indicator DPX501 Preset station number About HD Radio • When you connect an HD Radio, Tuner features of the unit are disabled and changed to - Kenwood DPX501 | Instruction Manual - Page 36
system Menu display MENU SRC Control knob DPX701 Menu display DPX501 Menu System Setting beep of the chart is the original setting.) Also, the explanation for items that are not applicable ( etc.) are entered step by step. • Three menu items appear on the display. - Kenwood DPX501 | Instruction Manual - Page 37
In Standby mode Activating Security Code Activating the Security Code disables the usage of audio unit by someone else. Once the Security Code is activated, the entry of authorized Security Code is required to turn on the audio unit when it is removed from the vehicle. Indication of this Security - Kenwood DPX501 | Instruction Manual - Page 38
is heard. "Beep : OFF"/ "BEEP OFF" Beep canceled. In Standby mode Manual Clock Adjustment 3 Selecting the item (day, month, or year) to adjust Push knob for at least 1 second. The date display blinks. Function of the DPX701 In Standby mode Date Mode Setting the date format. 1 Select Date Mode - Kenwood DPX501 | Instruction Manual - Page 39
ON"/ "AMP ON" "AMP : OFF"/ "AMP OFF" Setting The built-in amplifier activates. The built-in amplifier deactivates. Function of the DPX701 In Standby mode G-Counter Level set Calibrating G-Point. Setting the level according to the kinds of vehicles. Display "G-Counter : Level1" "G-Counter : Level2 - Kenwood DPX501 | Instruction Manual - Page 40
" is displayed. In such a case, repeat steps 1 through 6. 6 Exit G-Analyzer Calibration setup mode Press the [MENU] button. Function of the DPX701 In Standby mode G-Analyzer Horsepower Gauge setup Enter vehicle class and weight to calculate horsepower. 1 Select the G-Analyzer Horsepower Gauge setup - Kenwood DPX501 | Instruction Manual - Page 41
Gauge setup mode Press the [MENU] button. Function of the DPX701 G-Analyzer Horsepower Analysis This measures the horsepower and displays graph and the measurement. To prevent danger, push the control knob before starting the car. 5 To display the maximum power in the section: Push the Control - Kenwood DPX501 | Instruction Manual - Page 42
input source) is to be front channel. Function of the DPX701 Other than Standby mode B.M.S. (Bass Management System) Adjust the bass 12dB). Bass boost level is high (+18dB). • Refer to the catalog or instruction manual for power amplifiers that can be controlled from this unit. • For amplifiers, - Kenwood DPX501 | Instruction Manual - Page 43
central frequency. Drop the normal central frequency 20%. Function of the DPX701 When LX AMP unit connecting AMP Control You can control the LX AMP or [AM]. • For the details on the AMP Control item, see the Instruction manual attached to the LX AMP. 4 Adjust the AMP Control item Push the Control - Kenwood DPX501 | Instruction Manual - Page 44
to retain the unit serial number and the electronic SIRIUS Identification number for service activation and potential service changes. Function of the DPX701 Station/Disc Naming (SNPS/DNPS) Attaching a title to a Station or CD. 1 Receive/play the station/disc you want to attach a title to • A title - Kenwood DPX501 | Instruction Manual - Page 45
Set mode closes. • Memory numbers - FM/ AM: 30 stations - Internal CD player: 10 discs - External CD changer/ player: Varies according to the CD changer/ player. Refer to the CD changer/ player manual. • Change the title of station/CD by the same operation used to name it. • When operation stops - Kenwood DPX501 | Instruction Manual - Page 46
. In Standby mode CD Read Setting When there is a problem with playing a CD with special format, this setting plays the CD by force. Display Setting "CD Read : 1"/ "CD READ 1" Play CD and Audio file. "CD Read : 2"/ "CD READ 2" Play CD by force. • Setting "CD Read : 2"/ "CD READ 2" cannot play - Kenwood DPX501 | Instruction Manual - Page 47
towards [FM] or [AM]. Select the "ACD F/W Version"/ "ACD VER" display. 2 Display the ACDrive firmware version Push the Control knob towards [4] or [¢]. In CD/ USB mode Unique ID display Displaying the serial number for each product. 1 Select the unique ID display mode Push the Control knob towards - Kenwood DPX501 | Instruction Manual - Page 48
Menu system Other than Standby mode Audio Preset Recall Recalling the sound setup registered by (page 47). 1 Select the source Press the [SRC] button. 2 Enter Menu mode Press the [MENU] button for at least 1 second. "MENU" is displayed. 3 Select Audio Preset mode Push the - Kenwood DPX501 | Instruction Manual - Page 49
English | 49 - Kenwood DPX501 | Instruction Manual - Page 50
Basic Operations of remote control VOL AUD FM/AM/+/- Not Used 2-ZONE [0] - [9] SRC ATT VOL AUD 38 FM+ 4 ¢ AM- DIRECT 2-ZONE /OK ABC DEF GHI JKL MNO PRS TUV WXY QZ R.VOL SRC ATT 38 4/¢ DIRECT Loading and Replacing the battery Use two "AA"/ "R6"-size batteries. Slide the cover - Kenwood DPX501 | Instruction Manual - Page 51
Audio Control [AUD] button Selects the Audio item to be adjusted. [VOL] buttons Adjusts the Audio item. • Refer to (page 12) for the operation method, such as the procedures for Audio control and others operations. • The remote control can only select and adjust the Basic Audio item. - Kenwood DPX501 | Instruction Manual - Page 52
Basic Operations of remote control In HD Radio source [FM] button Selects the HD FM band. Each time you press the [FM] button, the band alternates between the HF1, HF2, and HF3 bands. [AM] button Selects the HD AM band. [4]/ [¢] buttons Tunes up or down bands. [0] - [9] buttons Press buttons [1] - - Kenwood DPX501 | Instruction Manual - Page 53
each unit. 3. Connect the speaker wires of the wiring harness. 4. Connect the wiring harness wires in the following order: ground, battery, ignition. 5. Connect the wiring harness connector to the unit. 6. Install the unit in your car. 7. Reconnect the - battery. 8. Press the reset button. 2WARNING - Kenwood DPX501 | Instruction Manual - Page 54
to the relevant instruction manuals. Steering remote control To Kenwood disc (Light Blue/Yellow) changer/ External (DPX701 only) optional accessory REMO.CONT To use the steering wheel remote control feature, you need to an exclusive remote adapter (not supplied) matches your car is required - Kenwood DPX501 | Instruction Manual - Page 55
Installing the Escutcheon For General Motors 1 Refer to the section (page 58) and then remove the hard rubber frame. 2 Cut out accessory 2 to meet the shape of the opening of the center console. 3 Attach accessory 2 to the unit. For TOYOTA/ SCION 1 Refer to the - Kenwood DPX501 | Instruction Manual - Page 56
Installation Installing the Unit Firewall or metal support Screw (M4X8) (commercially available) Bend the Metal mounting strap (commercially available) Accessory6 Installing in Japanese-Made Cars and General Motors Cars Install onto the car bracket using the supplied screws (M5 × 6 mm, M5 × - Kenwood DPX501 | Instruction Manual - Page 57
USB Device Connection 1 Remove the cap and connect the USB cable (Accessory8). 2 Connect the USB device to the unit using the supplied cable. English | 57 - Kenwood DPX501 | Instruction Manual - Page 58
Removing the Unit Removing the Hard Rubber Frame (escutcheon) 1 Engage the catch pins on the removal tool 7 and remove the two locks on the lower level. Lower the frame and pull it forward as shown in the figure. 2 When the lower level is removed, remove the upper two locations. • The frame can be - Kenwood DPX501 | Instruction Manual - Page 59
Troubleshooting Guide What might seem to be a malfunction in your unit may just be the result of slight misoperation or miswiring. Before calling service, first check the following table for possible problems wires is being pinched by a screw in the car. ☞ Check the speaker wiring. ✔ The speakers - Kenwood DPX501 | Instruction Manual - Page 60
Troubleshooting Guide Tuner source ? Radio reception is poor. ✔ The car antenna is not extended. ☞ Pull the antenna Unsupported disc changer is connected. ☞ Use the disc changer mentioned in the (page 4) of the section on - Kenwood DPX501 | Instruction Manual - Page 61
referring to www. kenwood.mediamanager.jp. If the error message is still displayed, initialize the USB device or use other USB devices. Error 05/ E-05: The CD is upside-down. ➪ Load the CD correctly. Blank Error 77/ E-77" code does not disappear, consult your nearest service center. English | 61 - Kenwood DPX501 | Instruction Manual - Page 62
the disc. IN (Blink): The CD player section is not operating properly. ➪ Reinsert the CD. If the CD cannot be ejected or the display continues to flash even when the CD has been properly reinserted, please switch off the power and consult your nearest service center. Protect/ PROTECT (Blink): The - Kenwood DPX501 | Instruction Manual - Page 63
530 kHz - 1700 kHz Usable sensitivity (S/N = 20dB) : 28 dBμ (25 μV) CD player section Laser diode : GaAlAs Digital filter (D/A) : 8 Times Over Sampling D/A Converter : distortion (1 kHz) : 0.008 % Signal to Noise ratio (1 kHz) DPX701: 110 dB DPX501: 105 dB Dynamic range : 93 dB MP3 decode : - Kenwood DPX501 | Instruction Manual - Page 64
-
 1
1 -
 2
2 -
 3
3 -
 4
4 -
 5
5 -
 6
6 -
 7
7 -
8
-
9
-
10
-
11
-
12
-
13
-
14
-
15
-
16
-
17
-
18
-
19
-
20
-
21
-
22
-
23
-
24
-
25
-
26
-
27
-
28
-
29
-
30
-
31
-
32
-
33
-
34
-
35
-
36
-
37
-
38
-
39
-
40
-
41
-
42
-
43
-
44
-
45
-
46
-
47
-
48
-
49
-
50
-
51
-
52
-
53
-
54
-
55
-
56
-
57
-
58
-
59
-
60
-
61
-
62
-
63
-
64
 |
 |

DUAL DIN SIZED CD RECEIVER
DPX701
DPX501
INSTRUCTION MANUAL
©
B64-3396-00/00 (KW)
Take the time to read through this instruction manual.
Familiarity with installation and operation procedures will help you obtain the best
performance from your new CD-receiver.
For your records
Record the serial number, found on the back of the unit, in the spaces designated on the
warranty card, and in the space provided
below. Refer to the model and serial numbers
whenever you call upon your Kenwood dealer for information or service on the product.
Model DPX701/ DPX501
Serial number
US Residence Only
Register Online
Register your Kenwood product at
www.Kenwoodusa.com