Kenwood DPX501 Instruction Manual - Page 38
Manual Clock Adjustment, Date Adjustment, Date Mode, Synchronize Clock, Touch Sensor Tone
 |
View all Kenwood DPX501 manuals
Add to My Manuals
Save this manual to your list of manuals |
Page 38 highlights
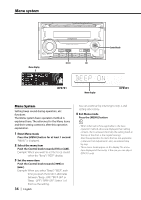
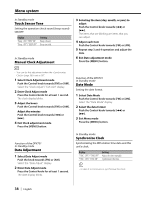
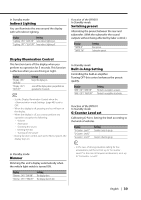
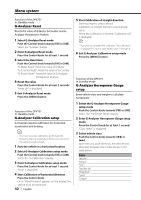
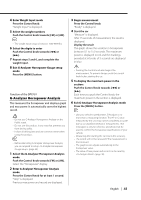
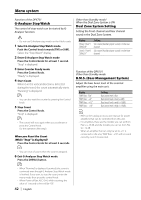
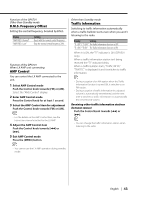
Menu system In Standby mode Touch Sensor Tone Setting the operation check sound (beep sound) ON/OFF. Display Setting "Beep : ON"/ "BEEP ON" Beep is heard. "Beep : OFF"/ "BEEP OFF" Beep canceled. In Standby mode Manual Clock Adjustment 3 Selecting the item (day, month, or year) to adjust Push the Control knob towards [4] or [¢]. The items that are blinking are items that you can adjust. 4 Adjust each item Push the Control knob towards [FM] or [AM]. 5 Repeat step 3 and 4 operation and adjust the date. 6 Exit Date adjustment mode Press the [MENU] button. • You can do this adjustment when the (page 38) is set as OFF. 1 Select Clock Adjustment mode Push the Control knob towards [FM] or [AM]. Select the "Clock Adjust"/ "CLK ADJ" display. 2 Enter Clock Adjust mode Press the Control knob for at least 1 second. The clock display blinks. 3 Adjust the hours Push the Control knob towards [FM] or [AM]. Adjust the minutes Push the Control knob towards [4] or [¢]. 4 Exit Clock adjustment mode Press the [MENU] button. Function of the DPX701 In Standby mode Date Adjustment 1 Select Date Adjust mode Push the knob towards [FM] or [AM]. Select the "Date Adjust" display. 2 Enter Date Adjust mode Press the Control knob for at least 1 second. The date display blinks. Function of the DPX701 In Standby mode Date Mode Setting the date format. 1 Select Date Mode Push the Control knob towards [FM] or [AM]. Select the "Date Mode" display. 2 Select the date format Push the Control knob towards [4] or [¢]. 3 Exit Menu mode Press the [MENU] button. In Standby mode Synchronize Clock Synchronizing the RDS station time data and this unit's clock. Display Setting "SYNC : OFF"/ "SYNC OFF" Adjust the time manually. "SYNC : ON"/ "SYNC ON" Synchronizes the time. • It takes 3 to 4 minutes to synchronize the clock. 38 | English
-
 1
1 -
2
-
3
-
4
-
5
-
6
-
7
-
8
-
9
-
10
-
11
-
12
-
13
-
14
-
15
-
16
-
17
-
18
-
19
-
20
-
21
-
22
-
23
-
24
-
25
-
26
-
27
-
28
-
29
-
30
-
31
-
32
-
 33
33 -
 34
34 -
 35
35 -
 36
36 -
 37
37 -
 38
38 -
 39
39 -
 40
40 -
 41
41 -
 42
42 -
 43
43 -
44
-
45
-
46
-
47
-
48
-
49
-
50
-
51
-
52
-
53
-
54
-
55
-
56
-
57
-
58
-
59
-
60
-
61
-
62
-
63
-
64
 |
 |