Konica Minolta bizhub 501 bizhub 361/421/501 Security Function User Manual - Page 82
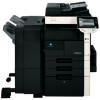
Enter the correct Image Data Encryption Passphrase. For details of the Password Rules, see
 |
View all Konica Minolta bizhub 501 manuals
Add to My Manuals
Save this manual to your list of manuals |
Page 82 highlights
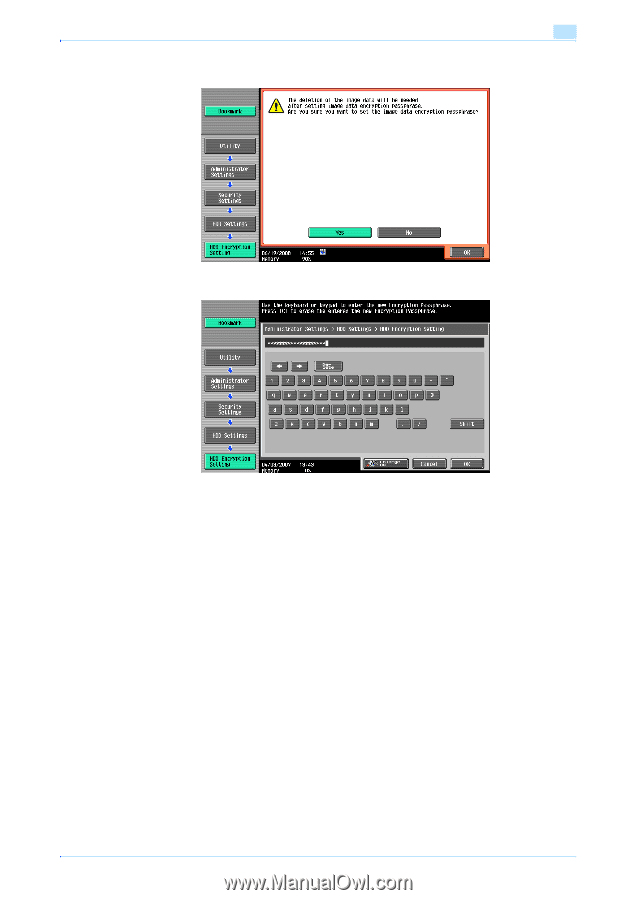
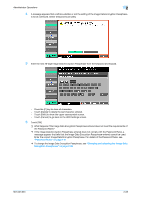
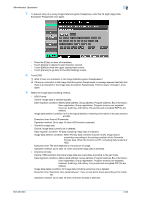
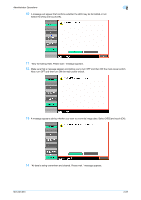
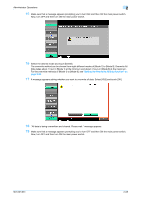
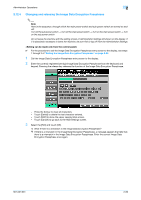
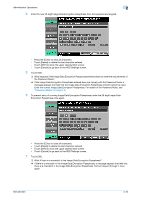
Administrator Operations 2 4 A message appears that confirms whether or not the setting of the Image Data Encryption Passphrase is to be continued. Select [Yes] and touch [OK]. 5 Enter the new 20-digit Image Data Encryption Passphrase from the keyboard and keypad. - Press the [C] key to clear all characters. - Touch [Delete] to delete the last character entered. - Touch [Shift] to show the upper case/symbol screen. - Touch [Cancel] to go back to the HDD Settings screen. 6 Touch [OK]. ? What happens if the Image Data Encryption Passphrase entered does not meet the requirements of the Password Rules? % If the Image Data Encryption Passphrase entered does not comply with the Password Rules, a message appears that tells that the Image Data Encryption Passphrase entered cannot be used. Enter the correct Image Data Encryption Passphrase. For details of the Password Rules, see "Password Rules" on page 1-9. % To change the Image Data Encryption Passphrase, see "Changing and releasing the Image Data Encryption Passphrase" on page 2-69. 501/421/361 2-65
-
 1
1 -
2
-
3
-
4
-
5
-
6
-
7
-
8
-
9
-
10
-
11
-
12
-
13
-
14
-
15
-
16
-
17
-
18
-
19
-
20
-
21
-
22
-
23
-
24
-
25
-
26
-
27
-
28
-
29
-
30
-
31
-
32
-
33
-
34
-
35
-
36
-
37
-
38
-
39
-
40
-
41
-
42
-
43
-
44
-
45
-
46
-
47
-
48
-
49
-
50
-
51
-
52
-
53
-
54
-
55
-
56
-
57
-
58
-
59
-
60
-
61
-
62
-
63
-
64
-
65
-
66
-
67
-
68
-
69
-
70
-
71
-
72
-
73
-
74
-
75
-
76
-
 77
77 -
 78
78 -
 79
79 -
 80
80 -
 81
81 -
 82
82 -
 83
83 -
 84
84 -
 85
85 -
 86
86 -
 87
87 -
88
-
89
-
90
-
91
-
92
-
93
-
94
-
95
-
96
-
97
-
98
-
99
-
100
-
101
-
102
-
103
-
104
-
105
-
106
-
107
-
108
-
109
-
110
-
111
-
112
-
113
-
114
-
115
-
116
-
117
-
118
-
119
-
120
-
121
-
122
-
123
-
124
-
125
-
126
-
127
-
128
-
129
-
130
-
131
-
132
-
133
-
134
-
135
-
136
-
137
-
138
-
139
-
140
-
141
-
142
-
143
-
144
-
145
-
146
-
147
-
148
-
149
-
150
-
151
-
152
-
153
-
154
-
155
-
156
-
157
-
158
-
159
-
160
-
161
-
162
-
163
-
164
-
165
-
166
-
167
-
168
-
169
-
170
-
171
-
172
-
173
-
174
-
175
-
176
-
177
-
178
-
179
-
180
-
181
-
182
-
183
-
184
-
185
-
186
-
187
-
188
-
189
-
190
-
191
-
192
-
193
-
194
-
195
-
196
-
197
-
198
-
199
-
200
-
201
-
202
-
203
-
204
-
205
-
206
-
207
-
208
-
209
-
210
-
211
-
212
-
213
-
214
-
215
-
216
-
217
 |
 |