Konica Minolta bizhub PRESS C1070/C1070P bizhub PRESS C1070/C1070P/C1060/bizhu - Page 26
In a Macintosh environment, Installation
 |
View all Konica Minolta bizhub PRESS C1070/C1070P manuals
Add to My Manuals
Save this manual to your list of manuals |
Page 26 highlights
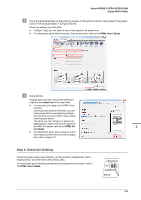
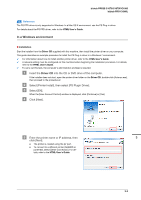
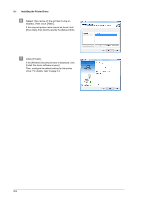
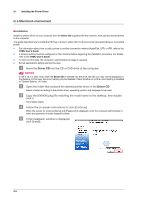
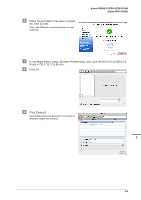
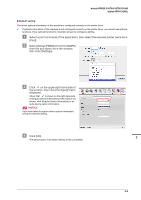
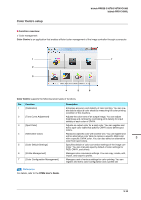
3.1 Installing the Printer Driver In a Macintosh environment )Installation Install the printer driver on your computer from the Driver CD supplied with this machine, then add the desired printer to the computer. This guide describes how to install the PS Plug-in driver in a Mac OS X 10.6 environment and add a Bonjour-connected printer. 0 For information about how to add a printer in another connection method (AppleTalk, LPR, or IPP), refer to the HTML User's Guide. 0 A network setting must be configured on this machine before beginning the installation procedure. For details, refer to the HTML User's Guide. 0 To carry out this task, the computer's administrator privilege is required. 0 Exit all applications before starting this task. " Insert the Driver CD into the CD or DVD drive of the computer. NOTICE In OS X 10.7 or later, even when the Driver CD is inserted into the drive, the CD icon may not be displayed on the desktop. In this case, the mount setting may be disabled. Check whether or not the mount setting is disabled in "System Setting" of Finder. # Open the folder that contains the desired printer driver in the Driver CD. Select a folder according to the printer driver, operating system, and language to be used. $ Copy the [XXXXXX.pkg] file matching the model name to the desktop, then double- click it. The installer starts. % Follow the on-screen instructions to click [Continue]. When the screen for entering [Name] and [Password] is displayed, enter the computer administrator's name and password into the respective fields. & If the installation window is displayed, click [Install]. 3-5
-
 1
1 -
2
-
3
-
4
-
5
-
6
-
7
-
8
-
9
-
10
-
11
-
12
-
13
-
14
-
15
-
16
-
17
-
18
-
19
-
20
-
 21
21 -
 22
22 -
 23
23 -
 24
24 -
 25
25 -
 26
26 -
 27
27 -
 28
28 -
 29
29 -
 30
30 -
 31
31 -
32
-
33
-
34
-
35
-
36
-
37
-
38
-
39
-
40
-
41
-
42
-
43
-
44
-
45
-
46
-
47
-
48
-
49
-
50
-
51
-
52
-
53
-
54
-
55
-
56
-
57
-
58
-
59
-
60
-
61
-
62
-
63
-
64
-
65
-
66
-
67
-
68
-
69
-
70
-
71
-
72
-
73
-
74
-
75
-
76
-
77
-
78
-
79
-
80
-
81
-
82
-
83
-
84
-
85
-
86
-
87
-
88
-
89
-
90
-
91
-
92
-
93
-
94
-
95
-
96
-
97
-
98
-
99
-
100
-
101
-
102
-
103
-
104
-
105
-
106
-
107
-
108
-
109
-
110
-
111
-
112
-
113
-
114
-
115
-
116
-
117
-
118
-
119
-
120
-
121
-
122
-
123
-
124
-
125
-
126
-
127
-
128
-
129
-
130
-
131
-
132
-
133
-
134
-
135
-
136
-
137
-
138
-
139
 |
 |
