Kyocera K132 User Guide - Page 9
Installing the battery, Charging the battery - charger
 |
View all Kyocera K132 manuals
Add to My Manuals
Save this manual to your list of manuals |
Page 9 highlights
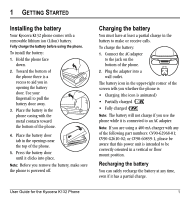
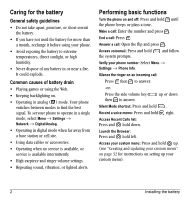
1 GETTING STARTED Installing the battery Your Kyocera K132 phone comes with a removable lithium ion (LiIon) battery. Fully charge the battery before using the phone. To install the battery: 1. Hold the phone face down. 2. Toward the bottom of the phone there is a recess to aid you in opening the battery door. Use your fingernail to pull the battery door away. 3. Place the battery in the phone casing with the metal contacts toward the bottom of the phone. 4. Place the battery door tab in the openings near the top of the phone. 5. Press the battery door until it clicks into place. Note: Before you remove the battery, make sure the phone is powered off. Charging the battery You must have at least a partial charge in the battery to make or receive calls. To charge the battery: 1. Connect the AC adapter to the jack on the bottom of the phone. 2. Plug the adapter into a wall outlet. The battery icon in the upper-right corner of the screen tells you whether the phone is: • Charging (the icon is animated) • Partially charged • Fully charged Note: The battery will not charge if you use the phone while it is connected to an AC adapter. Note: If you are using a 400 mA charger with any of the following part numbers: CV90-G2968-01; CV90-G2610-02; or CV90-60859-1, please be aware that this power unit is intended to be correctly oriented in a vertical or floor mount position. Recharging the battery You can safely recharge the battery at any time, even if it has a partial charge. User Guide for the Kyocera K132 Phone 1
-
 1
1 -
2
-
3
-
 4
4 -
 5
5 -
 6
6 -
 7
7 -
 8
8 -
 9
9 -
 10
10 -
 11
11 -
 12
12 -
 13
13 -
 14
14 -
15
-
16
-
17
-
18
-
19
-
20
-
21
-
22
-
23
-
24
-
25
-
26
-
27
-
28
-
29
-
30
-
31
-
32
-
33
-
34
-
35
-
36
-
37
-
38
-
39
-
40
-
41
-
42
-
43
-
44
-
45
-
46
-
47
-
48
-
49
-
50
-
51
-
52
-
53
-
54
-
55
-
56
-
57
-
58
-
59
-
60
-
61
-
62
-
63
-
64
 |
 |
