Kyocera TASKalfa 620 Scan System (H) Operation Guide Rev-1 (Functions Edition) - Page 35
Extension, File name Input
 |
View all Kyocera TASKalfa 620 manuals
Add to My Manuals
Save this manual to your list of manuals |
Page 35 highlights
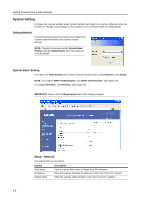
Extension The setting items are as follows. Setting Item Full scan Value On, Off Centering On, Off Uncompress scanning On, Off Continuous sending On, Off File name Input Manual, Auto/Manual Skip sender (user) On, Off select Enter E-mail address On, Off One page per file On, Offf Setting Scanner from a Web Browser Description With this mode, you can scan the entire area of the selected original size as image when this function is set to "On". You can scan the original to one size smaller when this function is set to "Off". If you scan the original that is filled its corner with the contents, a photo and so on, this function is set to "On". When scanning with zoom, by specifying the Original size and the Send size, blank borders around the bottom or left and right will be shown depending on the sizes. When setting Auto Center, the image is moved to the center so that blank borders around the top and bottom or left and right become even. This scanner uses MMR compression when scanning image data. In this case, when compressing the dots (especially the closely spaced dots which make up the more dense areas of, for example, photographs in printed material, and can be seen when looking closely with a magnifying glass) such as in photographs and grayscale images, the resulting data volume may actually be greater than before it was compressed. You can select whether or not to have compression performed automatically in cases such as these when the compressed data is greater that the original data. Use the same settings from a previously completed transmission for the next transmission. The scan function screen is returned with the sender (user), destination and other settings remaining from the previous operation. Displays the filename input box without displaying the auto/manual selection screen. When using this scanner, a sender (user) must be first selected. Set to On to force the sender (user) to User No. 001 and skip sender (user) selection. When Send E-mail, specify whether to directly enter the mail address when selecting recipients. Creates and sends a separate file for each page of a scanned original. 2-11
-
 1
1 -
2
-
3
-
4
-
5
-
6
-
7
-
8
-
9
-
10
-
11
-
12
-
13
-
14
-
15
-
16
-
17
-
18
-
19
-
20
-
21
-
22
-
23
-
24
-
25
-
26
-
27
-
28
-
29
-
 30
30 -
 31
31 -
 32
32 -
 33
33 -
 34
34 -
 35
35 -
 36
36 -
 37
37 -
 38
38 -
 39
39 -
 40
40 -
41
-
42
-
43
-
44
-
45
-
46
-
47
-
48
-
49
-
50
-
51
-
52
-
53
-
54
-
55
-
56
-
57
-
58
-
59
-
60
-
61
-
62
-
63
-
64
-
65
-
66
-
67
-
68
-
69
-
70
-
71
-
72
-
73
-
74
-
75
-
76
-
77
-
78
-
79
-
80
-
81
-
82
-
83
-
84
-
85
-
86
-
87
-
88
-
89
-
90
-
91
-
92
-
93
-
94
-
95
-
96
-
97
-
98
-
99
-
100
-
101
-
102
-
103
-
104
-
105
-
106
-
107
-
108
-
109
-
110
-
111
-
112
-
113
-
114
-
115
-
116
-
117
-
118
-
119
-
120
-
121
-
122
-
123
-
124
 |
 |
