Lenovo ThinkPad X121e (English) User Guide - Page 121
Installing Windows Vista, Startup, UEFI/Legacy Boot, Legacy Only, UEFI Only
 |
View all Lenovo ThinkPad X121e manuals
Add to My Manuals
Save this manual to your list of manuals |
Page 121 highlights
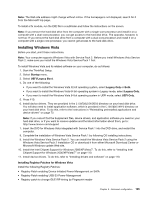
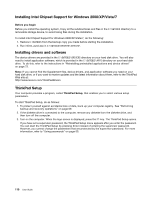
Note: The Web site address might change without notice. If the homepage is not displayed, search for it from the Microsoft top page. To install a fix module, run the EXE file in a subfolder and follow the instructions on the screen. Note: If you remove the hard disk drive from the computer with a single-core processor and install it on a computer with a dual-core processor, you can get access to the hard disk drive. The opposite, however, is not true: If you remove the hard disk drive from a computer with a dual-core processor and install it on a computer with a single-core processor, you cannot get access to the hard disk drive. Installing Windows Vista Before you start, print these instructions. Note: Your computer supports Windows Vista with Service Pack 2. Before you install Windows Vista Service Pack 2, make sure you install the Windows Vista Service Pack 1 first. To install Windows Vista and its related software on your computer, do as follows: 1. Start the ThinkPad Setup. 2. Select Startup menu. 3. Select UEFI/Legacy Boot. 4. Do one of the following: • If you want to install the Windows Vista 32 bit operating system, select Legacy Only or Both. • If you want to install the Windows Vista 64 bit operating system in Legacy mode, select Legacy Only. • If you want to install the Windows Vista 64 bit operating system in UEFI mode, select UEFI Only. 5. Press F10. 6. Install device drivers. They are provided in the C:\SWTOOLS\DRIVERS directory on your hard disk drive. You will also need to install application software, which is provided in the C:\SWTOOLS\APPS directory on your hard disk drive. To do this, refer to the instructions in "Reinstalling preinstalled applications and device drivers" on page 72. Note: If you cannot find the Supplement files, device drivers, and application software you need on your hard disk drive, or if you want to receive updates and the latest information about them, go to: http://www.lenovo.com/support 7. Insert the DVD for Windows Vista integrated with Service Pack 1 into the DVD drive, and restart the computer. 8. Complete the installation of Windows Vista Service Pack 1 by following OS installing instructions. 9. Install the Windows Vista Service Pack 2. You can install the Windows Vista Service Pack 2 using the Windows Vista Service Pack 2 Installation CD or download it from either Microsoft Download Center or Microsoft Windows update Web site. 10. Install the Intel Chipset Support for Windows 2000/XP/Vista/7. To do this, refer to "Installing Intel Chipset Support for Windows 2000/XP/Vista/7" on page 110. 11. Install device drivers. To do this, refer to "Installing drivers and software" on page 110. Installing Registry Patches for Windows Vista Install the following Registry Patches: • Registry Patch enabling Device Initiated Power Management on SATA • Registry Patch enabling USB S3 Power Management • Registry patch to change IDLE IRP timing by Fingerprint reader Chapter 8. Advanced configuration 105
-
 1
1 -
2
-
3
-
4
-
5
-
6
-
7
-
8
-
9
-
10
-
11
-
12
-
13
-
14
-
15
-
16
-
17
-
18
-
19
-
20
-
21
-
22
-
23
-
24
-
25
-
26
-
27
-
28
-
29
-
30
-
31
-
32
-
33
-
34
-
35
-
36
-
37
-
38
-
39
-
40
-
41
-
42
-
43
-
44
-
45
-
46
-
47
-
48
-
49
-
50
-
51
-
52
-
53
-
54
-
55
-
56
-
57
-
58
-
59
-
60
-
61
-
62
-
63
-
64
-
65
-
66
-
67
-
68
-
69
-
70
-
71
-
72
-
73
-
74
-
75
-
76
-
77
-
78
-
79
-
80
-
81
-
82
-
83
-
84
-
85
-
86
-
87
-
88
-
89
-
90
-
91
-
92
-
93
-
94
-
95
-
96
-
97
-
98
-
99
-
100
-
101
-
102
-
103
-
104
-
105
-
106
-
107
-
108
-
109
-
110
-
111
-
112
-
113
-
114
-
115
-
 116
116 -
 117
117 -
 118
118 -
 119
119 -
 120
120 -
 121
121 -
 122
122 -
 123
123 -
 124
124 -
 125
125 -
 126
126 -
127
-
128
-
129
-
130
-
131
-
132
-
133
-
134
-
135
-
136
-
137
-
138
-
139
-
140
-
141
-
142
-
143
-
144
-
145
-
146
-
147
-
148
-
149
-
150
-
151
-
152
-
153
-
154
-
155
-
156
-
157
-
158
-
159
-
160
-
161
-
162
-
163
-
164
-
165
-
166
-
167
-
168
-
169
-
170
-
171
-
172
-
173
-
174
-
175
-
176
-
177
-
178
-
179
-
180
-
181
-
182
-
183
-
184
-
185
-
186
-
187
-
188
-
189
-
190
 |
 |