Lenovo ThinkPad X220i (English) User Guide - Page 150
Replacing a PCI Express Mini Card with three connectors
 |
View all Lenovo ThinkPad X220i manuals
Add to My Manuals
Save this manual to your list of manuals |
Page 150 highlights
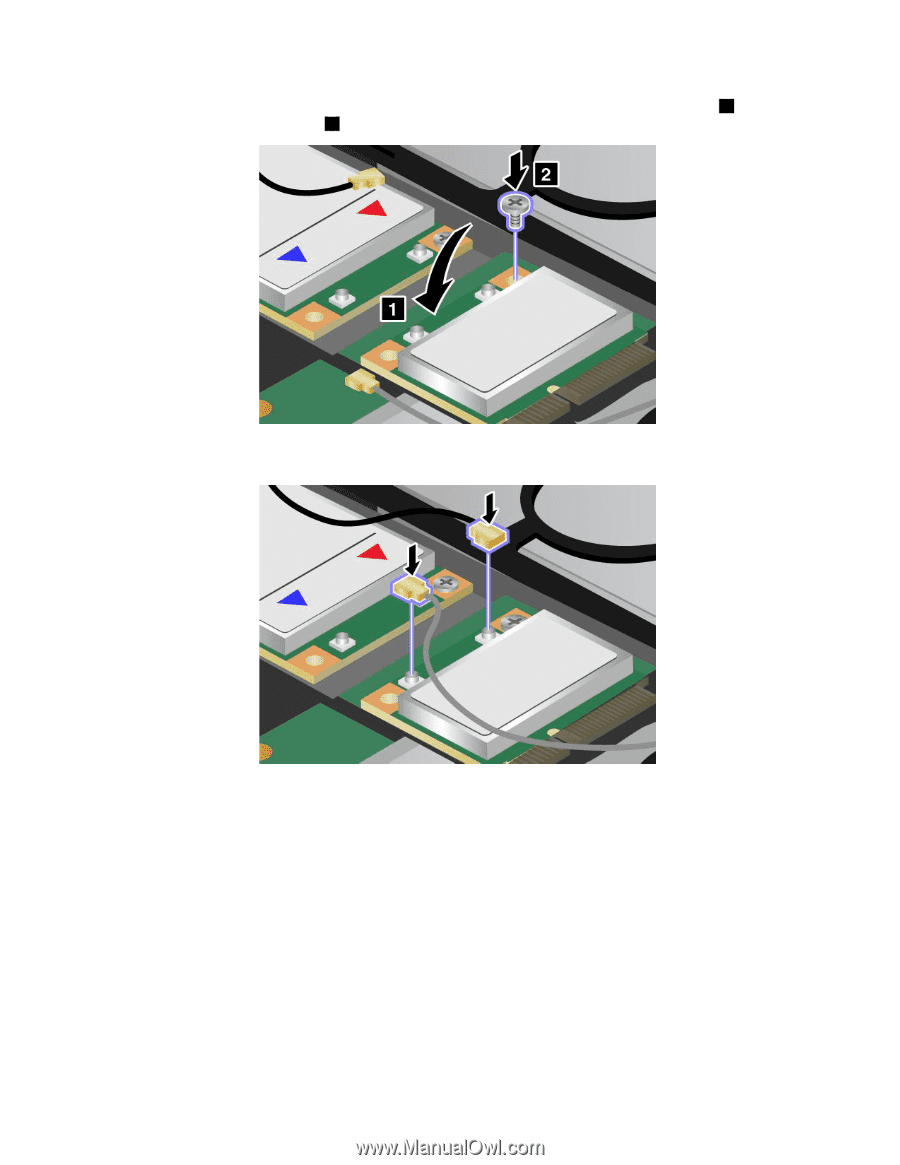
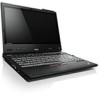
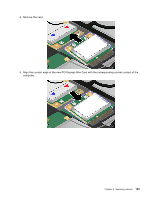
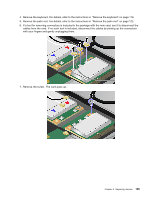
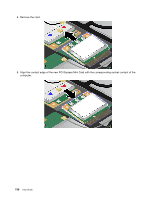
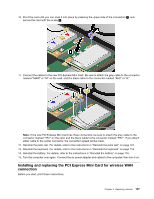
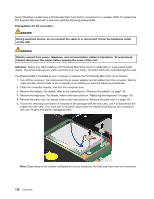
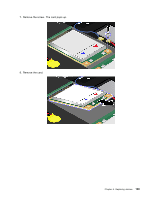
10. Pivot the card until you can snap it into place by pressing the upper side of the connectors 1 , and secure the card with the screw 2 . 11. Connect the cables to the new PCI Express Mini Card. Be sure to attach the gray cable to the connector marked "MAIN" or "M" on the card, and the black cable to the connector marked "AUX" or "A." Note: If the new PCI Express Mini Card has three connectors, be sure to attach the gray cable to the connector marked "TR1" on the card, and the black cable to the connector marked "TR2". If you attach either cable to the center connector, the connection speed will be lower. 12. Reinstall the palm rest. For details, refer to the instructions in "Reinstall the palm rest" on page 122. 13. Reinstall the keyboard. For details, refer to the instructions in "Reinstall the keyboard" on page 118. 14. Reinstall the battery. For details, refer to the instructions in "Reinstall the battery" on page 116. 15. Turn the computer over again. Connect the ac power adapter and cables to the computer; then turn it on. Replacing a PCI Express Mini Card with three connectors 1. Turn off the computer; then disconnect the ac power adapter and all cables from the computer. Wait for a few minutes, till the inside of the computer cools, before you start the following procedures. 2. Close the computer display, and turn the computer over. 3. Remove the battery. For details, refer to the instructions in "Remove the battery" on page 116. 134 User Guide
-
 1
1 -
2
-
3
-
4
-
5
-
6
-
7
-
8
-
9
-
10
-
11
-
12
-
13
-
14
-
15
-
16
-
17
-
18
-
19
-
20
-
21
-
22
-
23
-
24
-
25
-
26
-
27
-
28
-
29
-
30
-
31
-
32
-
33
-
34
-
35
-
36
-
37
-
38
-
39
-
40
-
41
-
42
-
43
-
44
-
45
-
46
-
47
-
48
-
49
-
50
-
51
-
52
-
53
-
54
-
55
-
56
-
57
-
58
-
59
-
60
-
61
-
62
-
63
-
64
-
65
-
66
-
67
-
68
-
69
-
70
-
71
-
72
-
73
-
74
-
75
-
76
-
77
-
78
-
79
-
80
-
81
-
82
-
83
-
84
-
85
-
86
-
87
-
88
-
89
-
90
-
91
-
92
-
93
-
94
-
95
-
96
-
97
-
98
-
99
-
100
-
101
-
102
-
103
-
104
-
105
-
106
-
107
-
108
-
109
-
110
-
111
-
112
-
113
-
114
-
115
-
116
-
117
-
118
-
119
-
120
-
121
-
122
-
123
-
124
-
125
-
126
-
127
-
128
-
129
-
130
-
131
-
132
-
133
-
134
-
135
-
136
-
137
-
138
-
139
-
140
-
141
-
142
-
143
-
144
-
 145
145 -
 146
146 -
 147
147 -
 148
148 -
 149
149 -
 150
150 -
 151
151 -
 152
152 -
 153
153 -
 154
154 -
 155
155 -
156
-
157
-
158
-
159
-
160
-
161
-
162
-
163
-
164
-
165
-
166
-
167
-
168
-
169
-
170
-
171
-
172
-
173
-
174
-
175
-
176
-
177
-
178
-
179
-
180
-
181
-
182
-
183
-
184
-
185
-
186
-
187
-
188
-
189
-
190
-
191
-
192
-
193
-
194
-
195
-
196
-
197
-
198
-
199
-
200
-
201
-
202
-
203
-
204
-
205
-
206
-
207
-
208
-
209
-
210
-
211
-
212
-
213
-
214
-
215
-
216
-
217
-
218
-
219
-
220
-
221
-
222
-
223
-
224
-
225
-
226
-
227
-
228
-
229
-
230
-
231
-
232
-
233
-
234
-
235
-
236
-
237
-
238
-
239
-
240
-
241
-
242
-
243
-
244
-
245
-
246
-
247
-
248
-
249
-
250
-
251
-
252
-
253
-
254
-
255
-
256
-
257
-
258
-
259
-
260
-
261
-
262
-
263
-
264
-
265
-
266
-
267
-
268
-
269
-
270
 |
 |