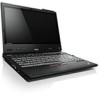
Lenovo ThinkPad X220i (English) User Guide - Page 196
Installing Intel Chipset Support for Windows 2000/XP/Vista/7, do the following
 |
View all Lenovo ThinkPad X220i manuals
Add to My Manuals
Save this manual to your list of manuals |
Page 196 highlights
11. Click OK. 12. Confirm the correct display type, then click Next. 13. Windows has finished installing. Click Close. 14. Click Close for Display Properties. 15. Click OK in the Monitor tab. 16. Click OK and close the Display Settings window. For Windows XP 1. Right-click on the desktop and select Properties from the pop-up menu. 2. Select the Settings tab. 3. Click the Advanced tab. 4. Select the Monitor tab. 5. Select Plug and Play Monitor from the monitor type list. 6. Click Properties. 7. Select the Driver tab and click Update Driver. The Hardware Update Wizard starts. 8. Select No, not this time for Windows Update connection, and then click Next. 9. Select Install from a list or specific location (Advanced). 10. Click Next. 11. Select Don't search, I will choose the driver to install. 12. Click Next. 13. Click Have Disk. 14. Click Browse. 15. Specify "C:\SWTOOLS\DRIVERS\MONITOR" as location directory and select TPLCD.INF. 16. Click OK. 17. System will show ThinkPad Display. Click Next. System will copy ThinkPad Monitor INF file and color profile. 18. Click Finish and then Close. 19. Click the Color Management tab. 20. Click Add. 21. Select TPFLX.ICM or TPLCD.ICM and click Add. 22. Click OK and close the Display Properties window. Installing Intel Chipset Support for Windows 2000/XP/Vista/7 Before you begin Before you install the operating system, Copy all the subdirectories and files in the C:\SWTOOLS directory to a removable storage device, to avoid losing files during the installation. To install Intel Chipset Support for Windows 2000/XP/Vista/7, do the following: 1. Restore C:\SWTOOLS from the backup copy you made before starting the installation. 2. Run infinst_autol.exe in C:\SWTOOLS\DRIVERS\INTELINF. 180 User Guide
-
 1
1 -
2
-
3
-
4
-
5
-
6
-
7
-
8
-
9
-
10
-
11
-
12
-
13
-
14
-
15
-
16
-
17
-
18
-
19
-
20
-
21
-
22
-
23
-
24
-
25
-
26
-
27
-
28
-
29
-
30
-
31
-
32
-
33
-
34
-
35
-
36
-
37
-
38
-
39
-
40
-
41
-
42
-
43
-
44
-
45
-
46
-
47
-
48
-
49
-
50
-
51
-
52
-
53
-
54
-
55
-
56
-
57
-
58
-
59
-
60
-
61
-
62
-
63
-
64
-
65
-
66
-
67
-
68
-
69
-
70
-
71
-
72
-
73
-
74
-
75
-
76
-
77
-
78
-
79
-
80
-
81
-
82
-
83
-
84
-
85
-
86
-
87
-
88
-
89
-
90
-
91
-
92
-
93
-
94
-
95
-
96
-
97
-
98
-
99
-
100
-
101
-
102
-
103
-
104
-
105
-
106
-
107
-
108
-
109
-
110
-
111
-
112
-
113
-
114
-
115
-
116
-
117
-
118
-
119
-
120
-
121
-
122
-
123
-
124
-
125
-
126
-
127
-
128
-
129
-
130
-
131
-
132
-
133
-
134
-
135
-
136
-
137
-
138
-
139
-
140
-
141
-
142
-
143
-
144
-
145
-
146
-
147
-
148
-
149
-
150
-
151
-
152
-
153
-
154
-
155
-
156
-
157
-
158
-
159
-
160
-
161
-
162
-
163
-
164
-
165
-
166
-
167
-
168
-
169
-
170
-
171
-
172
-
173
-
174
-
175
-
176
-
177
-
178
-
179
-
180
-
181
-
182
-
183
-
184
-
185
-
186
-
187
-
188
-
189
-
190
-
 191
191 -
 192
192 -
 193
193 -
 194
194 -
 195
195 -
 196
196 -
 197
197 -
 198
198 -
 199
199 -
 200
200 -
 201
201 -
202
-
203
-
204
-
205
-
206
-
207
-
208
-
209
-
210
-
211
-
212
-
213
-
214
-
215
-
216
-
217
-
218
-
219
-
220
-
221
-
222
-
223
-
224
-
225
-
226
-
227
-
228
-
229
-
230
-
231
-
232
-
233
-
234
-
235
-
236
-
237
-
238
-
239
-
240
-
241
-
242
-
243
-
244
-
245
-
246
-
247
-
248
-
249
-
250
-
251
-
252
-
253
-
254
-
255
-
256
-
257
-
258
-
259
-
260
-
261
-
262
-
263
-
264
-
265
-
266
-
267
-
268
-
269
-
270
 |
 |
