Lenovo ThinkPad X23 English - ThinkPad X23 Service and Troubleshooting guide - Page 36
Solution, Problem, Config, Disable, Refer to the Startup menu of the IBM BIOS Setup Utility. Make sure
 |
View all Lenovo ThinkPad X23 manuals
Add to My Manuals
Save this manual to your list of manuals |
Page 36 highlights
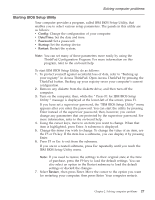
Solving computer problems Solution: Your computer might lock when it enters standby mode during a communication operation. Disable the standby timer when you are working on the network. To turn off the computer, press and hold the power switch for 4 seconds or more. Problem: The computer does not turn off with the power switch. Solution: Turn off the computer by pressing and holding the power switch for 4 seconds or more. If the computer is still not reset, remove the ac adapter and the battery. Problem: The computer does not start from a device you want, such as a diskette drive. Solution: Refer to the Startup menu of the IBM BIOS Setup Utility. Make sure that the startup sequence in the IBM BIOS Setup Utility is set so that the computer starts from the device you want. Also make sure that the device from which the computer starts is enabled by checking that there is no ! mark preceding the device name. Problem: The computer does not respond. Solution: IRQs for the PCI are all set as 11. The computer does not respond because it cannot share the IRQ with other devices. Refer to the ThinkPad Configuration Program. Problem: Windows NT does not start; however, the message saying that Windows NT is loading remains on the screen. Solution: The USB setting might have been changed to Enabled. If so, it might cause a conflict in allocating memory resources during startup. Disable the setting, using the BIOS Setup Utility as follows: 1. Turn your computer off and then on again; then, while the message, "Press F1 for IBM BIOS Setup Utility," is displayed at the lower left of the screen, press the F1 key to start the BIOS Setup Utility. The BIOS Setup Utility menu appears. 2. With the cursor key, select Config; then press Enter. 3. Select USB by pressing Enter. 4. With the cursor key, select Disable; then press Enter. 5. Press F10 and Enter to save this setting and exit this utility. 26 ThinkPad® X Series Service and Troubleshooting Guide
-
 1
1 -
2
-
3
-
4
-
5
-
6
-
7
-
8
-
9
-
10
-
11
-
12
-
13
-
14
-
15
-
16
-
17
-
18
-
19
-
20
-
21
-
22
-
23
-
24
-
25
-
26
-
27
-
28
-
29
-
30
-
 31
31 -
 32
32 -
 33
33 -
 34
34 -
 35
35 -
 36
36 -
 37
37 -
 38
38 -
 39
39 -
 40
40 -
 41
41 -
42
-
43
-
44
-
45
-
46
-
47
-
48
-
49
-
50
-
51
-
52
-
53
-
54
-
55
-
56
-
57
-
58
-
59
-
60
-
61
-
62
-
63
-
64
-
65
-
66
-
67
-
68
-
69
-
70
-
71
-
72
-
73
-
74
-
75
-
76
-
77
-
78
-
79
-
80
-
81
-
82
-
83
-
84
-
85
-
86
-
87
-
88
-
89
-
90
-
91
-
92
-
93
-
94
-
95
-
96
-
97
-
98
 |
 |