Lexmark CS310 User's Guide - Page 27
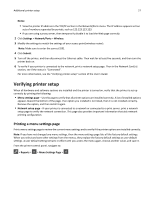
Verifying printer setup, Printing a menu settings - review
 |
View all Lexmark CS310 manuals
Add to My Manuals
Save this manual to your list of manuals |
Page 27 highlights
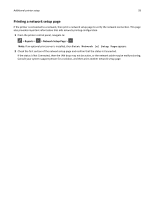
Additional printer setup 27 Notes: • View the printer IP address in the TCP/IP section in the Network/Ports menu. The IP address appears as four sets of numbers separated by periods, such as 123.123.123.123. • If you are using a proxy server, then temporarily disable it to load the Web page correctly. 2 Click Settings > Network/Ports > Wireless. 3 Modify the settings to match the settings of your access point (wireless router). Note: Make sure to enter the correct SSID. 4 Click Submit. 5 Turn off the printer, and then disconnect the Ethernet cable. Then wait for at least five seconds, and then turn the printer back on. 6 To verify if your printer is connected to the network, print a network setup page. Then in the Network Card [x] section, see if the status is "Connected". For more information, see the "Verifying printer setup" section of the User's Guide. Verifying printer setup When all hardware and software options are installed and the printer is turned on, verify that the printer is set up correctly by printing the following: • Menu settings page-Use this page to verify that all printer options are installed correctly. A list of installed options appears toward the bottom of the page. If an option you installed is not listed, then it is not installed correctly. Remove the option, and then install it again. • Network setup page-If your printer is connected to a network or connected to a print server, print a network setup page to verify the network connection. This page also provides important information that aids network printing configuration. Printing a menu settings page Print a menu settings page to review the current menu settings and to verify if the printer options are installed correctly. Note: If you have not changed any menu settings, then the menu settings page lists all the factory default settings. When you select and save other settings from the menus, they replace the factory default settings as user default settings. A user default setting remains in effect until you access the menu again, choose another value, and save it. From the printer control panel, navigate to: > Reports > > Menu Settings Page >
-
 1
1 -
2
-
3
-
4
-
5
-
6
-
7
-
8
-
9
-
10
-
11
-
12
-
13
-
14
-
15
-
16
-
17
-
18
-
19
-
20
-
21
-
 22
22 -
 23
23 -
 24
24 -
 25
25 -
 26
26 -
 27
27 -
 28
28 -
 29
29 -
 30
30 -
 31
31 -
 32
32 -
33
-
34
-
35
-
36
-
37
-
38
-
39
-
40
-
41
-
42
-
43
-
44
-
45
-
46
-
47
-
48
-
49
-
50
-
51
-
52
-
53
-
54
-
55
-
56
-
57
-
58
-
59
-
60
-
61
-
62
-
63
-
64
-
65
-
66
-
67
-
68
-
69
-
70
-
71
-
72
-
73
-
74
-
75
-
76
-
77
-
78
-
79
-
80
-
81
-
82
-
83
-
84
-
85
-
86
-
87
-
88
-
89
-
90
-
91
-
92
-
93
-
94
-
95
-
96
-
97
-
98
-
99
-
100
-
101
-
102
-
103
-
104
-
105
-
106
-
107
-
108
-
109
-
110
-
111
-
112
-
113
-
114
-
115
-
116
-
117
-
118
-
119
-
120
-
121
-
122
-
123
-
124
-
125
-
126
-
127
-
128
-
129
-
130
-
131
-
132
-
133
-
134
-
135
-
136
-
137
-
138
-
139
-
140
-
141
-
142
-
143
-
144
-
145
-
146
-
147
-
148
-
149
-
150
-
151
-
152
-
153
-
154
-
155
-
156
-
157
-
158
-
159
-
160
-
161
-
162
-
163
-
164
-
165
-
166
-
167
-
168
-
169
-
170
-
171
-
172
-
173
-
174
-
175
-
176
-
177
-
178
-
179
-
180
-
181
-
182
-
183
-
184
-
185
-
186
-
187
-
188
-
189
-
190
-
191
-
192
-
193
-
194
-
195
-
196
-
197
-
198
 |
 |
