Linksys WRT54GS-FR User's Manual - Page 15
Static or Fixed IP Address, Automatic Configuration - DHCP - router setup
 |
UPC - 745883560028
View all Linksys WRT54GS-FR manuals
Add to My Manuals
Save this manual to your list of manuals |
Page 15 highlights
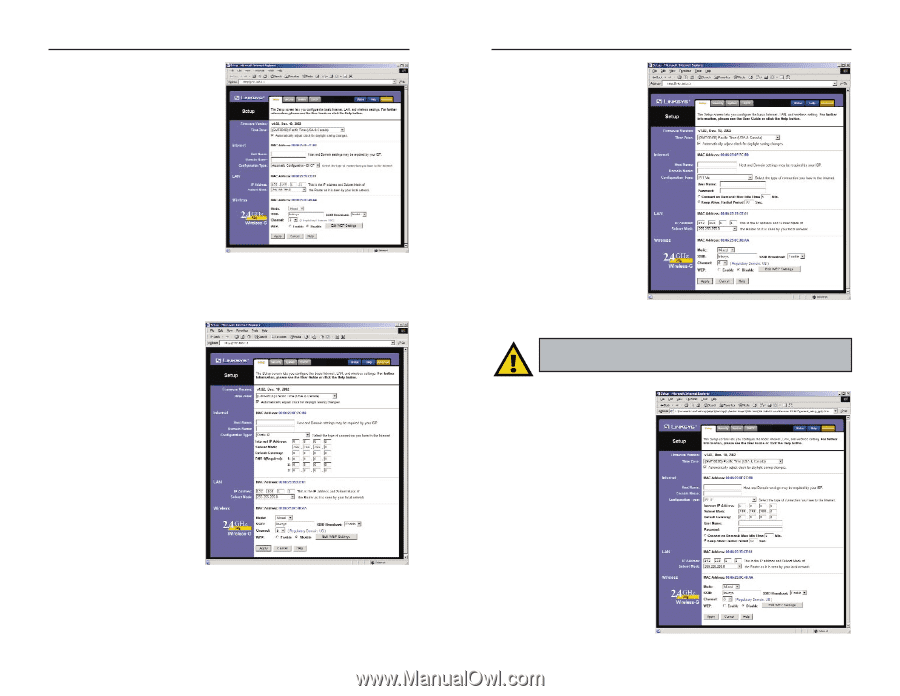
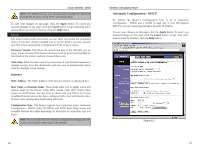
Automatic Configuration - DHCP If you are connecting through DHCP or a dynamic IP address from your ISP, perform these steps: A. Keep the default setting, Automatic Configuration DHCP, as the Configuration Type. B. Click the Apply button to save the setting, or click the Cancel button to clear the setting and start over. When you are finished, proceed to step 6. Instant Wireless® Series Figure 5-3 Static (or Fixed) IP Address If you are connecting through a static or fixed IP address from your ISP, perform these steps: A. Select Static IP as the Configuration Type. B. Enter the Internet IP Address. C. Enter the Subnet Mask. D. Enter the Default Gateway. E. Enter the DNS in the 1, 2, and/or 3 fields. You need to enter at least one DNS address. Figure 5-4 F. Click the Apply button to save the settings, or click the Cancel button to clear the settings and start over. When you are finished, proceed to step 6. 22 Wireless-G Broadband Router PPPoE If your DSL provider says that you are connecting through PPPoE (you use a user name and password to access the Internet), perform these steps: A. Select PPPoE as the Configuration Type. B. Enter the User Name. C. Enter the Password. D. Click the Apply button to save the settings, or click the Cancel button to clear the settings and start over. When you are finished, proceed to step 6. Figure 5-5 Important: If you enable PPPoE, remember to remove any PPPoE applications already installed on any of your PCs. PPTP PPTP is a service used in Europe only. If you are using a PPTP connection, check with your ISP for the necessary setup information. After you have entered your setup information, click the Apply button to save the settings, or click the Cancel button to clear the settings and start over. When you are finished, proceed to step 6. Figure 5-6 23
-
 1
1 -
2
-
3
-
4
-
5
-
6
-
7
-
8
-
9
-
 10
10 -
 11
11 -
 12
12 -
 13
13 -
 14
14 -
 15
15 -
 16
16 -
 17
17 -
 18
18 -
 19
19 -
 20
20 -
21
-
22
-
23
-
24
-
25
-
26
-
27
-
28
-
29
-
30
-
31
-
32
-
33
-
34
-
35
-
36
-
37
-
38
-
39
-
40
-
41
-
42
-
43
-
44
-
45
-
46
-
47
-
48
-
49
-
50
-
51
-
52
-
53
-
54
-
55
-
56
-
57
-
58
-
59
-
60
-
61
 |
 |