Makita LS1016L Owners Manual - Page 10
Assembly - 10 miter saw w laser
 |
View all Makita LS1016L manuals
Add to My Manuals
Save this manual to your list of manuals |
Page 10 highlights
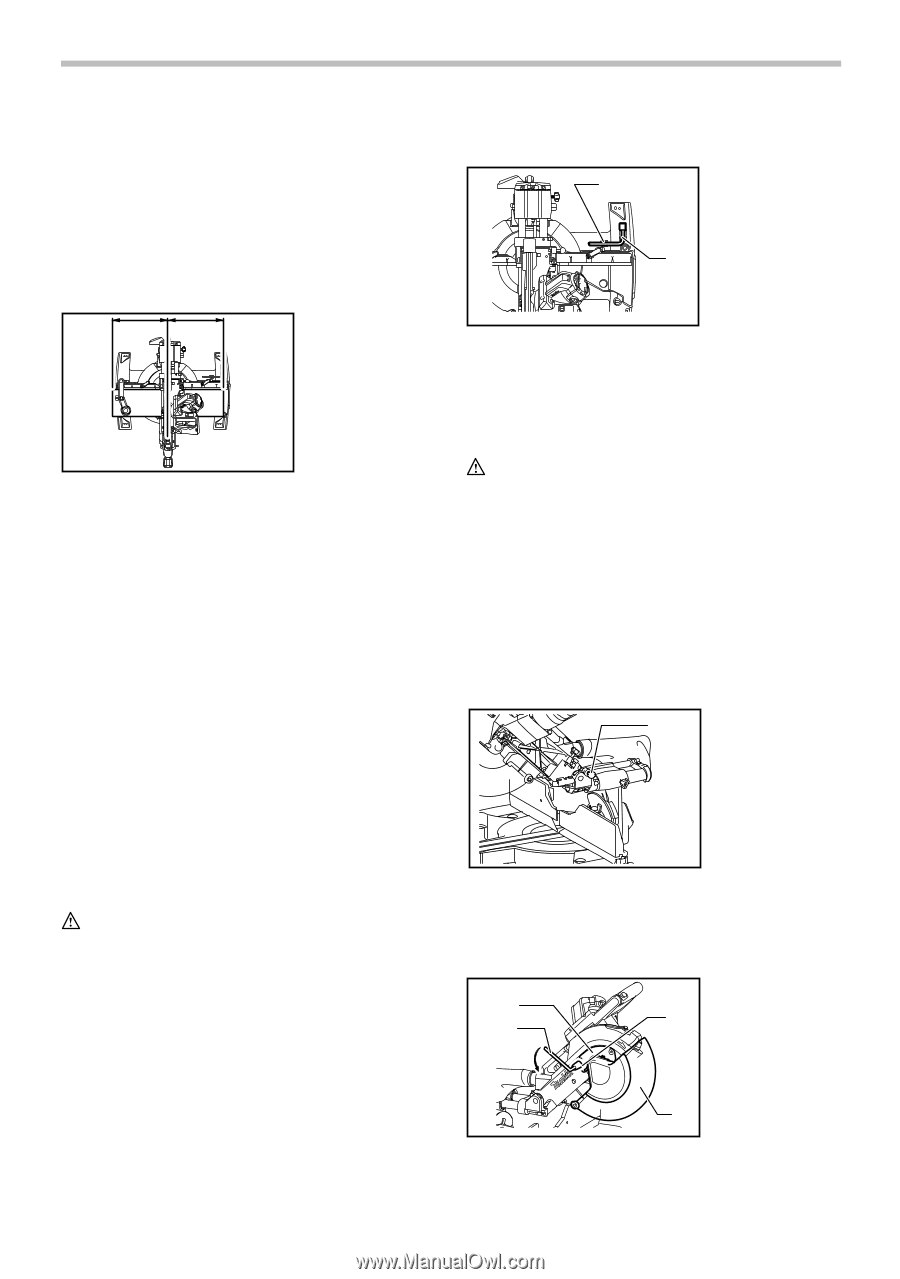
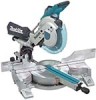
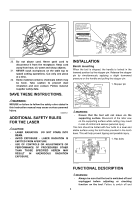
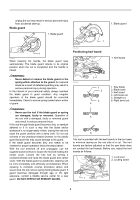
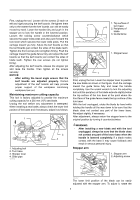
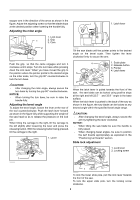
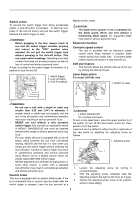
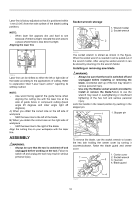
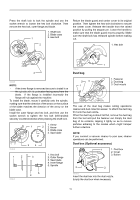
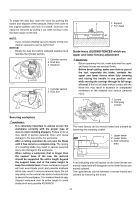
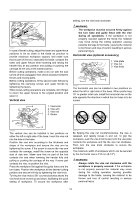
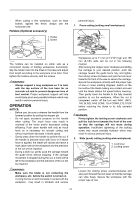
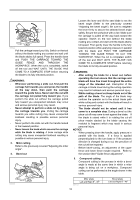
Laser line is factory adjusted so that it is positioned within 1 mm (0.04") from the side surface of the blade (cutting position). NOTE: • When laser line appears dim and hard to see because of direct sunlight, relocate the work area to a place where there is less direct sunlight. Aligning the laser line Socket wrench storage 1 2 1. Wrench holder 2. Socket wrench A B 009494 Laser line can be shifted to either the left or right side of the blade according to the applications of cutting. Refer to explanation titled "Laser beam action" regarding its shifting method. NOTE: • Use wood facing against the guide fence when aligning the cutting line with the laser line at the side of guide fence in compound cutting (bevel angle 45 degrees and miter angle right 45 degrees). A) When you obtain the correct size on the left side of workpiece • Shift the laser line to the left of the blade. B) When you obtain the correct size on the right side of workpiece • Shift the laser line to the right of the blade. Align the cutting line on your workpiece with the laser line. ASSEMBLY WARNING: • Always be sure that the tool is switched off and unplugged before working on the tool. Failure to switch off and unplug the tool may result in serious personal injury. 009495 The socket wrench is stored as shown in the figure. When the socket wrench is needed it can be pulled out of the wrench holder. After using the socket wrench it can be stored by returning it to the wrench holder. Installing or removing saw blade WARNING: • Always be sure that the tool is switched off and unplugged before installing or removing the blade. Accidental start up of the tool may result in serious personal injury. • Use only the Makita socket wrench provided to install or remove the blade.Failure to use the wrench may result in overtightening or insufficient tightening of the hex bolt and serious personal injury. Lock the handle in the raised position by pushing in the stopper pin. 1 1. Stopper pin 009483 To remove the blade, use the socket wrench to loosen the hex bolt holding the center cover by turning it counterclockwise. Raise the blade guard and center cover. 1. Center cover 1 2. Socket wrench 2 3 3. Hex bolt 4. Blade guard 4 009497 10
-
 1
1 -
2
-
3
-
4
-
 5
5 -
 6
6 -
 7
7 -
 8
8 -
 9
9 -
 10
10 -
 11
11 -
 12
12 -
 13
13 -
 14
14 -
 15
15 -
16
-
17
-
18
-
19
-
20
-
21
-
22
-
23
-
24
-
25
-
26
-
27
-
28
-
29
-
30
-
31
-
32
-
33
-
34
-
35
-
36
-
37
-
38
-
39
-
40
-
41
-
42
-
43
-
44
-
45
-
46
-
47
-
48
-
49
-
50
-
51
-
52
-
53
-
54
-
55
-
56
-
57
-
58
-
59
-
60
-
61
-
62
-
63
-
64
-
65
-
66
-
67
-
68
-
69
-
70
-
71
-
72
-
73
-
74
-
75
-
76
 |
 |