Makita LS1016L Owners Manual - Page 14
Operation - crown stops
 |
View all Makita LS1016L manuals
Add to My Manuals
Save this manual to your list of manuals |
Page 14 highlights
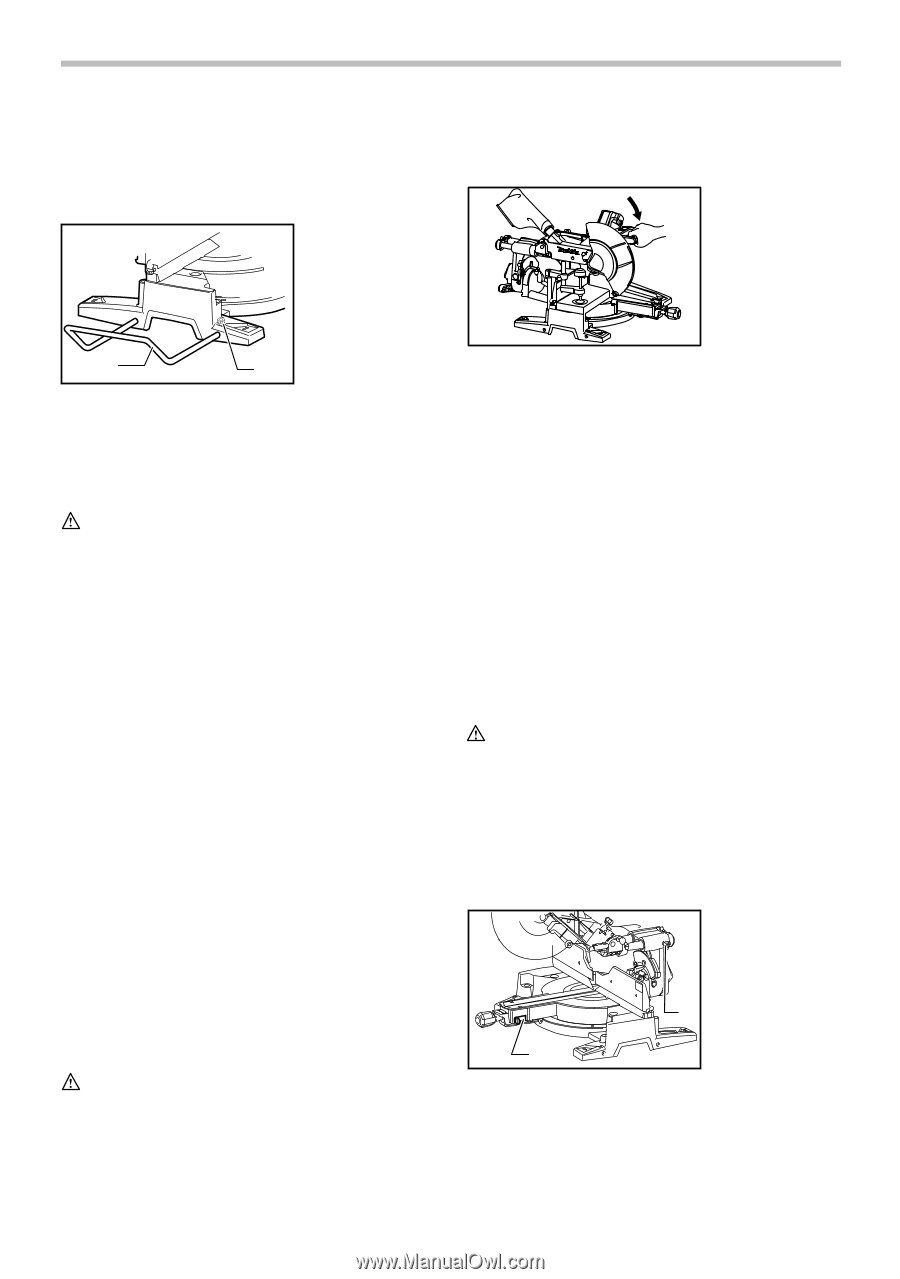
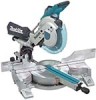
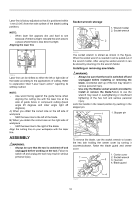
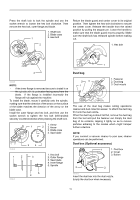
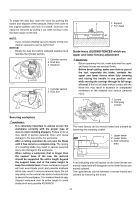
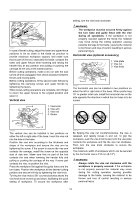
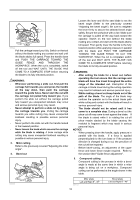
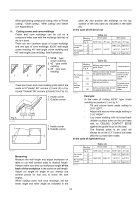
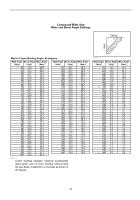
• When cutting a thin workpiece, such as base boards, against the fence, always use the horizontal vise. Holders (Optional accessory) 1. Holder 2. Screw personal injury. 1. Press cutting (cutting small workpieces) 1 2 009607 The holders can be installed on either side as a convenient means of holding workpieces horizontally. Slip the holder rods into the holes in the base and adjust their length according to the workpiece to be held. Then tighten the holders securely with the screws. WARNING: • Always support a long workpiece so it is level with the top surface of the turn base for an accurate cut and to prevent dangerous loss of tool control. Proper workpiece support will help avoid blade pinch and possible kickback which may result in serious personal injury. OPERATION NOTICE: • Before use, be sure to release the handle from the lowered position by pulling the stopper pin. • Do not apply excessive pressure on the handle when cutting. Too much force may result in overload of the motor and/or decreased cutting efficiency. Push down handle with only as much force as is necessary for smooth cutting and without significant decrease in blade speed. • Gently press down the handle to perform the cut. If the handle is pressed down with force or if lateral force is applied, the blade will vibrate and leave a mark (saw mark) in the workpiece and the precision of the cut will be impaired. • During a slide cut, gently push the carriage toward the guide fence without stopping. If the carriage movement is stopped during the cut, a mark will be left in the workpiece and the precision of the cut will be impaired. WARNING: • Make sure the blade is not contacting the workpiece, etc. before the switch is turned on. Turning the tool on with the blade in contact with the workpiece may result in kickback and serious 009503 Workpieces up to 71 mm (2-13/16") high and 155 mm (6-1/8") wide can be cut in the following manner. After turning the stopper lever clockwise and sliding the carriage to your desired position, push the carriage toward the guide fence fully and tighten the locking screw clockwise and pull the lock lever towards the front of the saw to secure the carriage. Secure the workpiece correctly with the proper type of vise or crown molding stoppers. Switch on the tool without the blade making any contact and wait until the blade attains full speed before lowering. Then gently lower the handle to the fully lowered position to cut the workpiece. When the cut is completed, switch off the tool and WAIT UNTIL THE BLADE HAS COME TO A COMPLETE STOP before returning the blade to its fully elevated position. WARNING: • Firmly tighten the locking screw clockwise and pull the lock lever towards the front of the saw so that the carriage will not move during operation. Insufficient tightening of the locking screw may cause possible kickback which may result in serious personal injury. 2. Slide (push) cutting (cutting wide workpieces) 1. Lock lever 2. Locking screw 2 1 009496 Loosen the locking screw counterclockwise and also push forward the lock lever so that the carriage can slide freely. Secure the workpiece with the proper type of vise. 14
-
 1
1 -
2
-
3
-
4
-
5
-
6
-
7
-
8
-
 9
9 -
 10
10 -
 11
11 -
 12
12 -
 13
13 -
 14
14 -
 15
15 -
 16
16 -
 17
17 -
 18
18 -
 19
19 -
20
-
21
-
22
-
23
-
24
-
25
-
26
-
27
-
28
-
29
-
30
-
31
-
32
-
33
-
34
-
35
-
36
-
37
-
38
-
39
-
40
-
41
-
42
-
43
-
44
-
45
-
46
-
47
-
48
-
49
-
50
-
51
-
52
-
53
-
54
-
55
-
56
-
57
-
58
-
59
-
60
-
61
-
62
-
63
-
64
-
65
-
66
-
67
-
68
-
69
-
70
-
71
-
72
-
73
-
74
-
75
-
76
 |
 |