Makita LS1016L Owners Manual - Page 12
Securing workpiece, Guide fence SLIDING FENCES which are, upper and lower fences adjustment - dust collection
 |
View all Makita LS1016L manuals
Add to My Manuals
Save this manual to your list of manuals |
Page 12 highlights
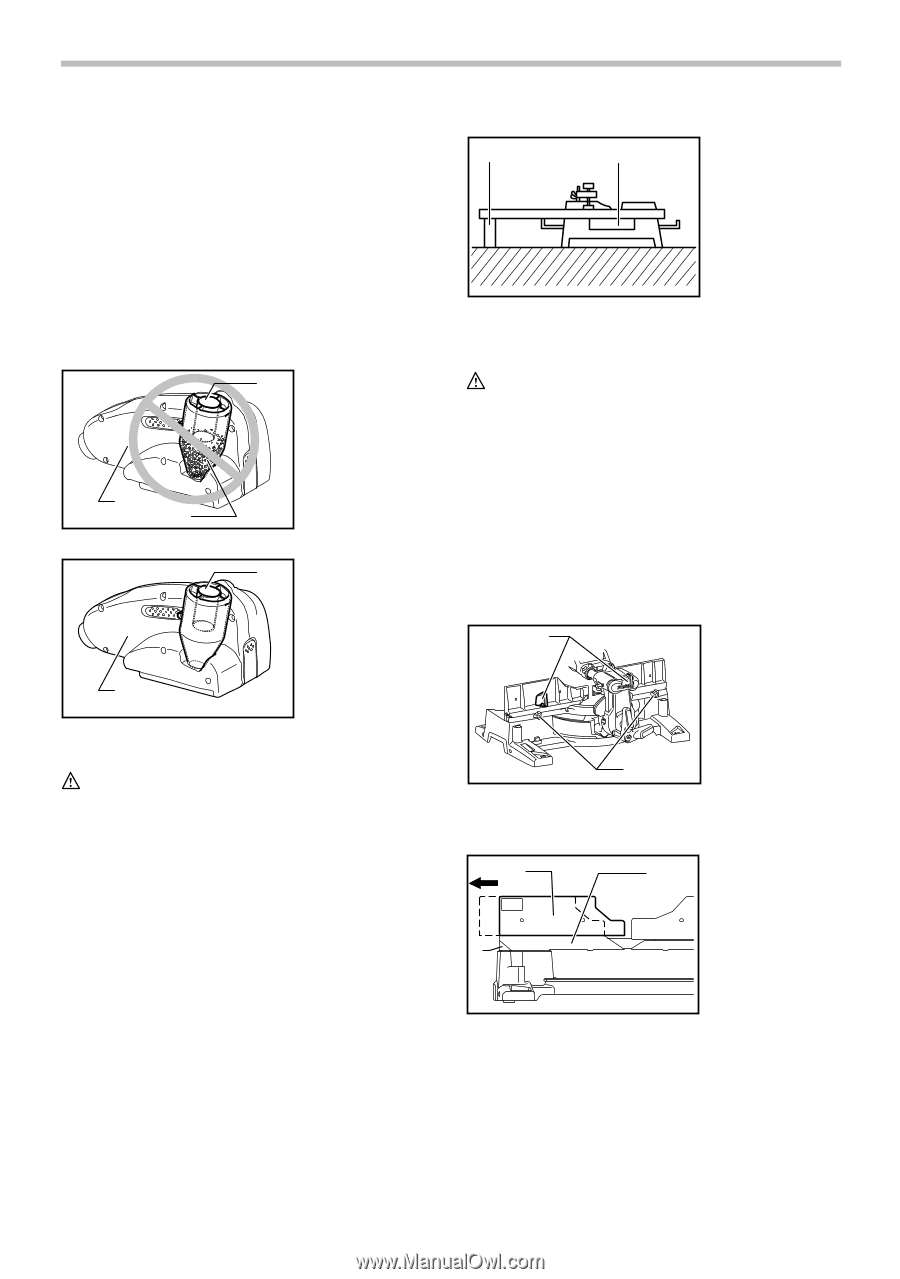
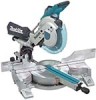
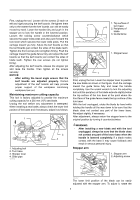
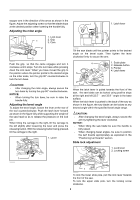
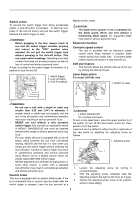
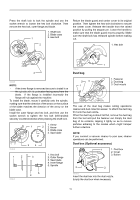
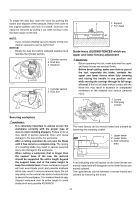
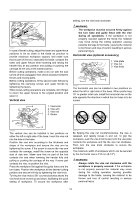
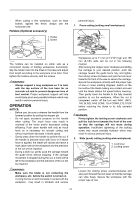
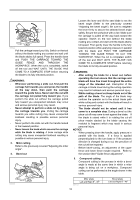
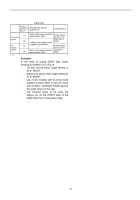
To empty the dust box, open the cover by pushing the button and dispose of the sawdust. Return the cover to 1 the original position and lock it in place. Dust box can easily be removed by pulling it out while turning it near the dust nozzle on the tool. 2 1. Support 2. Turn base NOTE: • If you connect a Makita vacuum cleaner to this tool, cleaner operations can be performed. NOTICE: • Empty the dust box before collected sawdust level reaches the cylinder section. 1 1. Cylinder section 2. Dust box 3. Sawdust 2 3 010592 1 1. Cylinder section 2. Dust box 001549 Guide fence (SLIDING FENCES which are upper and lower fences) adjustment WARNING: • Before operating the tool, make sure that the upper and lower fences are secured firmly. • Before bevel-cutting, make sure that no part of the tool, especially the blade, contacts the upper and lower fences when fully lowering and raising the handle in any position and while moving the carriage through its full range of travel. If the tool or blade makes contact with the fence this may result in kickback or unexpected movement of the material and serious personal injury. 1 1. Levers 2. Clamping screws 2 010591 Securing workpiece WARNING: • It is extremely important to always secure the workpiece correctly with the proper type of vise or crown molding stoppers. Failure to do so may result in serious personal injury and cause damage to the tool and/or the workpiece. • After a cutting operation do not raise the blade until it has come to a complete stop. The raising of a coasting blade may result in serious personal injury and damage to the workpiece. • When cutting a workpiece that is longer than the support base of the saw, the material should be supported the entire length beyond the support base and at the same height to keep the material level. Proper workpiece support will help avoid blade pinch and possible kickback which may result in serious personal injury. Do not rely solely on the vertical vise and/or horizontal vise to secure the workpiece. Thin material tends to sag. Support workpiece over its entire length to avoid blade pinch and possible KICKBACK. 2 009508 The lower fences can be moved inward and outward by loosening the clamping screws. 1 3 2 1. Upper fence 2. Lower fence 3. Red indicating area 010594 A red indicating area will appear as the lower fences are moved inward and will disappear as the lower fences are moved outward. The upper fences can be removed or moved inward and outward by loosening the levers. 12
-
 1
1 -
2
-
3
-
4
-
5
-
6
-
 7
7 -
 8
8 -
 9
9 -
 10
10 -
 11
11 -
 12
12 -
 13
13 -
 14
14 -
 15
15 -
 16
16 -
 17
17 -
18
-
19
-
20
-
21
-
22
-
23
-
24
-
25
-
26
-
27
-
28
-
29
-
30
-
31
-
32
-
33
-
34
-
35
-
36
-
37
-
38
-
39
-
40
-
41
-
42
-
43
-
44
-
45
-
46
-
47
-
48
-
49
-
50
-
51
-
52
-
53
-
54
-
55
-
56
-
57
-
58
-
59
-
60
-
61
-
62
-
63
-
64
-
65
-
66
-
67
-
68
-
69
-
70
-
71
-
72
-
73
-
74
-
75
-
76
 |
 |