Marantz SR5003 SR5003 User Manual - English - Page 33
AUTO SETUP Audyssey MultEQ - problems
 |
View all Marantz SR5003 manuals
Add to My Manuals
Save this manual to your list of manuals |
Page 33 highlights
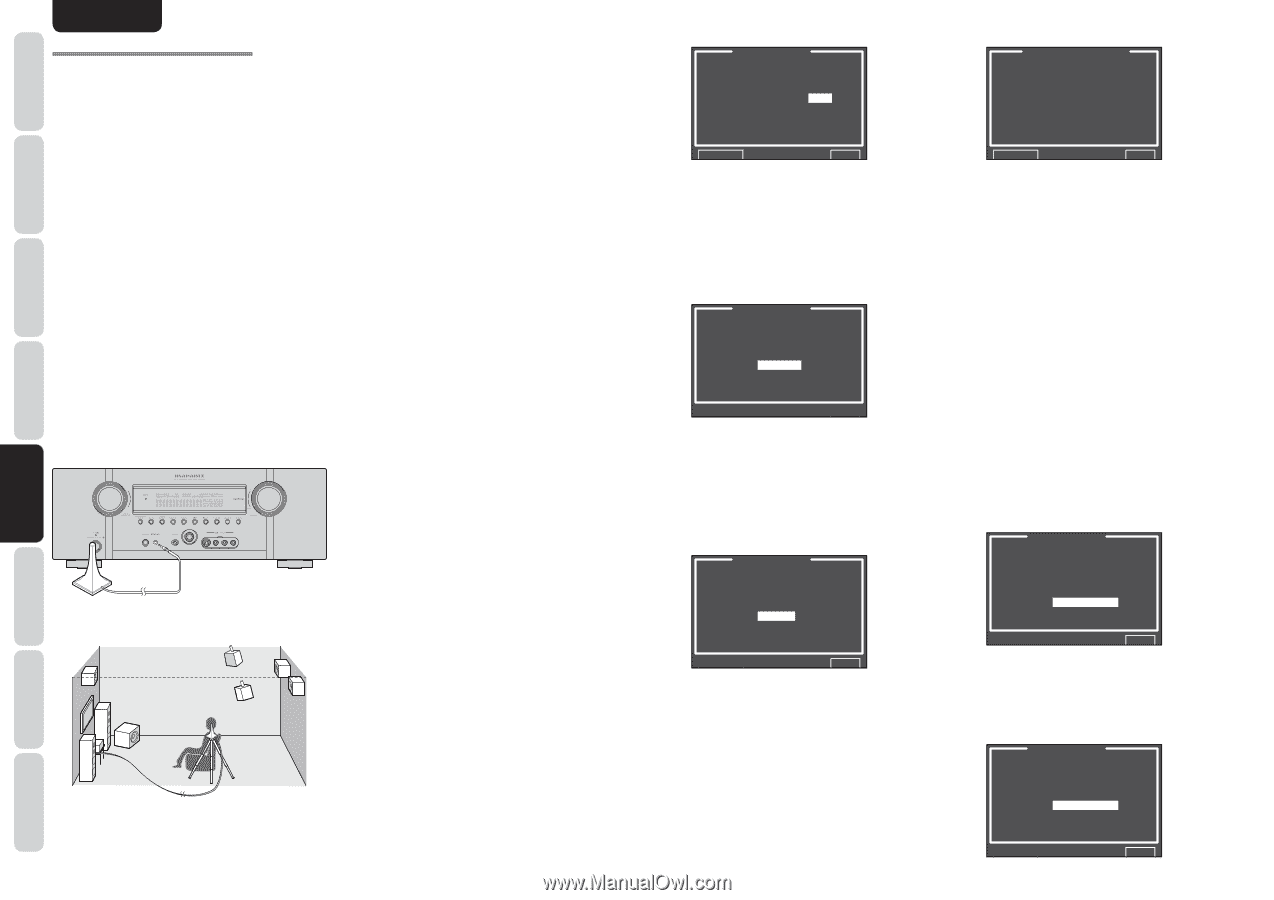
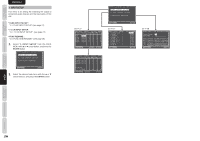
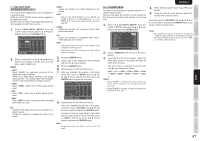
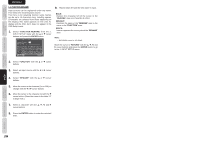
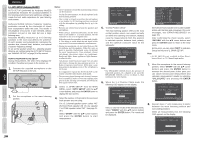
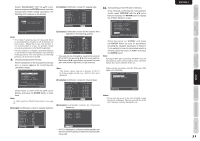
NAMES AND FUNCTION BASIC CONNECTIONS BASIC OPERATION ADVANCED CONNECTIONS ENGLISH 2-1 AUTO SETUP (Audyssey MultEQ®) AUTO SETUP (performed by Audyssey MultEQ) automatically measures the acoustical problems in the listening environment and optimizes settings to create the best audio experience for your listening environment. Audyssey MultEQ removes frequency response anomalies caused by the interaction of sound from loudspeakers within the room. This results in the playback of sound as it was intended, without coloration, not just in one seat, but over a large listening area. Audyssey MultEQ measures up to 6 listening positions in the room and detects the presence of each speaker and automatically calculates the speaker size, channel level, distance, and optimal crossover frequency settings. To set up the speaker system (i.e., adjusting speaker distance, etc.) without using the AUTO SETUP feature, see "MANUAL SETUP" on page 33 of the manual. HOW TO PERFORM AUTO SETUP During measurement, the OSD menu displays the condition, therefore turn power to the monitor on. 1. Connect the supplied microphone to the SETUP MIC jack on the unit. 2. Set the microphone in the main listening position. Notes: • Up to 6 positions around the main listening position can be measured. For the first measurement, set the microphone in the main listening position. • Use a stand or tripod to position the microphone at ear height for all listening positions measured with the microphone tip pointing directly up to the ceiling. • Remove any obstructions between the speakers and microphone. • When using a powered subwoofer, set the level knob to the middle or 12 o'clock position. Set the crossover to off, or to its highest value. If the subwoofer has a standby, or sleep mode, disable it. Not doing so could affect the test signal which may result in inaccurate subwoofer measurements. • During measurements, do not stand between the microphone and the speakers. Make the room as quiet as possible. Background noise can disrupt the room measurements. Close windows, silence cell phones, televisions, radios, air conditioners, fluorescent lights, home appliances, light dimmers, or other devices. Cell phones should be placed away from all audio electronics during the measurement process as Radio Frequency Interference (RFI) may cause measurement disruptions (even if the cell phone is not in use). It is suggested to operate the AUTO SETUP via the remote controller rather than by front panel. • The test tones played through each channel increase level as needed in order to overcome ambient noise present in the listening environment and obtain the best signal to noise ratio. 3. Select "2. SPKR SETUP" from the MAIN MENU, select "AUTO SETUP" with the 3/4 cursor buttons, and press the ENTER button to display the start screen. 4. Select the number of channels for the surround back speaker you are using. For a 5.1 channel speaker system, select "NO" (Surround Back speaker off). (To use speaker C or ZONE speaker, select "NO". See page 21, 39.) Select "START" with the 3/4 cursor buttons and press the ENTER button to start measurement. AUTO SETUP AUTO SETUP: START MAIN ZONE SURR BACK: 2CH Audyssey MultEQ RETURN EXIT 5. "1st Mic Position Check" The main listening position refers to the most central position where one would normally sit within the listening environment. MultEQ uses the measurements from this position to calculate speaker distance, level, polarity, and the optimum crossover value for the subwoofer. AUTO SETUP SPEAKERS CHECK:-1ST MIC POSITION!! NOW ANALYZING !! CANCEL Audyssey MultEQ Note: • The SPEAKERS CHECK detects the presence of connected speakers. If a channel is not used, the SPEAKERS CHECK will try to detect it, then continue to the next channel. 6. When the 1 st Position Check ends, the following OSD appears on the display. AUTO SETUP SPEAKERS CHECK:OK 2ND MIC POSITION!! START CHECK CALCULATE Audyssey MultEQ EXIT Here, to view the results of the detection check, select "CHECK" with the 3/4 cursor buttons and press the ENTER button. The results will be displayed. SPEAKER CONFIG CHECK !! SPEAKER FRONT : YES CENTER : NO FRONT R : YES SURR.R : YES SURR.B R : NO SURR.B L : NO SURR.L : YES SUB W : YES RETURN EXIT If the check results indicate an error, take suitable action with that item and remeasure. (For error messages, see "ERROR MESSAGES" on page 32.) After confirming the check results, select "RETURN" with the 3/4 cursor buttons and press the ENTER button to return to the OSD menu. At this point, you can select "EXIT" to end Auto Setup and return to "2. SPKR SETUP". Note: • AUTO SETUP is not available in Pure Direct, Source Direct, or 7.1 Channel Input modes. 7. Move the microphone to the second listening position, select "START" with the 3/4 cursor buttons and press the ENTER button to measure the second point. At this point, you can cancel second point measurement and calculate measurement results by selecting "CALCULATE" and pressing the ENTER button. AUTO SETUP SPEAKERS CHECK:OK 2ND MIC POSITION!! START CHECK CALCULATE Audyssey MultEQ EXIT 8. Repeat steps 7 until measuring 6 points between the main listening position and surrounding positions. When all measurements end, the following OSD appears on the display. AUTO SETUP SPEAKERS CHECK:OK SETUP ADVANCED OPERATION TROUBLESHOOTING OTHERS 30 CALCULATE Audyssey MultEQ EXIT
-
 1
1 -
2
-
3
-
4
-
5
-
6
-
7
-
8
-
9
-
10
-
11
-
12
-
13
-
14
-
15
-
16
-
17
-
18
-
19
-
20
-
21
-
22
-
23
-
24
-
25
-
26
-
27
-
 28
28 -
 29
29 -
 30
30 -
 31
31 -
 32
32 -
 33
33 -
 34
34 -
 35
35 -
 36
36 -
 37
37 -
 38
38 -
39
-
40
-
41
-
42
-
43
-
44
-
45
-
46
-
47
-
48
-
49
-
50
-
51
-
52
-
53
-
54
-
55
-
56
-
57
-
58
-
59
-
60
-
61
-
62
-
63
-
64
-
65
-
66
-
67
-
68
-
69
-
70
-
71
-
72
-
73
-
74
-
75
-
76
-
77
-
78
-
79
-
80
-
81
 |
 |