Netgear WAX220PA User Manual - Page 120
Changes are not saved in the device UI
 |
View all Netgear WAX220PA manuals
Add to My Manuals
Save this manual to your list of manuals |
Page 120 highlights
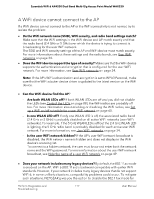
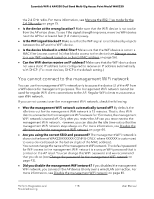
Essentials WiFi 6 AX4200 Dual Band Multi-Gig Access Point Model WAX220 • If the AP is connected to a network with a DHCP server and you do not know the IP address, determine the IP address that the DHCP server assigned to the AP by using one of the following methods: - Windows-based computer: If you use a Windows-based computer, open Windows Explorer, and click the Network link. If prompted, enable the Network Discovery feature. Under Network Infrastructure, locate and right-click the AP device icon, and select Properties. The AP IP address displays. Assuming that you did not change the device name, the AP is shown as NETGEARXXXXXX, in which XXXXXX represents the last six characters of the MAC address of the AP's LAN interface. - DHCP server: Access the DHCP server in your network and open the page that shows the network connections. - IP network scanner: Use an IP network scanner to scan for the IP address that is assigned to the AP. Note: For more information, see Find the IP address of the AP on page 24. • Try quitting the browser and launching it again. • Make sure that you are using the correct login information. The user name is admin and the password is the one that you specified the first time that you logged in. Make sure that Caps Lock is off when you enter this information. Changes are not saved in the device UI If you are logged in to the AP's device UI and the AP does not save the changes that you make on a page, do the following: • When entering configuration settings, always click the Save or Apply button before moving to another page or tab. If you clicked the Save button, when you are ready with entering configuration settings, click the Apply button to apply the configuration settings. Otherwise, your changes are lost. • Click the Refresh or Reload button in the web browser. It is possible that the changes occurred but that the old settings remain in the web browser's cache. Perform Diagnostics and 120 Troubleshooting User Manual
-
 1
1 -
2
-
3
-
4
-
5
-
6
-
7
-
8
-
9
-
10
-
11
-
12
-
13
-
14
-
15
-
16
-
17
-
18
-
19
-
20
-
21
-
22
-
23
-
24
-
25
-
26
-
27
-
28
-
29
-
30
-
31
-
32
-
33
-
34
-
35
-
36
-
37
-
38
-
39
-
40
-
41
-
42
-
43
-
44
-
45
-
46
-
47
-
48
-
49
-
50
-
51
-
52
-
53
-
54
-
55
-
56
-
57
-
58
-
59
-
60
-
61
-
62
-
63
-
64
-
65
-
66
-
67
-
68
-
69
-
70
-
71
-
72
-
73
-
74
-
75
-
76
-
77
-
78
-
79
-
80
-
81
-
82
-
83
-
84
-
85
-
86
-
87
-
88
-
89
-
90
-
91
-
92
-
93
-
94
-
95
-
96
-
97
-
98
-
99
-
100
-
101
-
102
-
103
-
104
-
105
-
106
-
107
-
108
-
109
-
110
-
111
-
112
-
113
-
114
-
 115
115 -
 116
116 -
 117
117 -
 118
118 -
 119
119 -
 120
120 -
 121
121 -
 122
122 -
 123
123 -
 124
124 -
 125
125 -
126
-
127
-
128
-
129
-
130
-
131
-
132
-
133
-
134
-
135
 |
 |
