Netgear WAX220PA User Manual - Page 16
Initial login process
 |
View all Netgear WAX220PA manuals
Add to My Manuals
Save this manual to your list of manuals |
Page 16 highlights
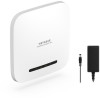
Essentials WiFi 6 AX4200 Dual Band Multi-Gig Access Point Model WAX220 Note: The LAN/PoE+ port supports Ethernet speeds up to 2.5 Gbps. The previous figure shows a NETGEAR MS510TXPP switch, which supports speeds of 2.5 Gbps. However, if your Internet connection, modem, or switch supports a maximum speed of 1 Gbps (which is a common speed), the AP LAN connection functions at 1 Gbps. To set up the AP with a non-PoE connection to your network: 1. Connect an Ethernet cable to the LAN/PoE+ port on the AP. 2. Connect the other end of the Ethernet cable to a switch that is connected to your network and to the Internet. 3. Connect the power adapter to the AP and plug it into an electrical outlet. 4. Check to see that the LEDs light. LED Power LED Description The Power LED lights blinking amber. LAN LED The LAN LED lights solid green or solid amber, depending on the speed of the link. 2.4 GHz WLAN LED The 2.4 GHz WLAN LED lights solid green. 5 GHz WLAN LED The 5 GHz WLAN LED lights solid green. You can now access the AP for initial configuration (see Initial login process on page 16). Initial login process During the initial login process, the AP presents its Welcome page. You must define the AP login password for the AP's device UI, set up the first user WiFi network, and select the country or region in which you are using the AP (see the warnings below). After you complete the initial-login process, if you want to log in to the device UI, the AP no longer presents its Welcome page but a regular login page that lets enter your AP login password. Installation and Initial Login 16 User Manual
-
 1
1 -
2
-
3
-
4
-
5
-
6
-
7
-
8
-
9
-
10
-
 11
11 -
 12
12 -
 13
13 -
 14
14 -
 15
15 -
 16
16 -
 17
17 -
 18
18 -
 19
19 -
 20
20 -
 21
21 -
22
-
23
-
24
-
25
-
26
-
27
-
28
-
29
-
30
-
31
-
32
-
33
-
34
-
35
-
36
-
37
-
38
-
39
-
40
-
41
-
42
-
43
-
44
-
45
-
46
-
47
-
48
-
49
-
50
-
51
-
52
-
53
-
54
-
55
-
56
-
57
-
58
-
59
-
60
-
61
-
62
-
63
-
64
-
65
-
66
-
67
-
68
-
69
-
70
-
71
-
72
-
73
-
74
-
75
-
76
-
77
-
78
-
79
-
80
-
81
-
82
-
83
-
84
-
85
-
86
-
87
-
88
-
89
-
90
-
91
-
92
-
93
-
94
-
95
-
96
-
97
-
98
-
99
-
100
-
101
-
102
-
103
-
104
-
105
-
106
-
107
-
108
-
109
-
110
-
111
-
112
-
113
-
114
-
115
-
116
-
117
-
118
-
119
-
120
-
121
-
122
-
123
-
124
-
125
-
126
-
127
-
128
-
129
-
130
-
131
-
132
-
133
-
134
-
135
 |
 |
