Netgear WAX220PA User Manual - Page 132
Twist the AP clockwise to lock it onto the mounting plate.
 |
View all Netgear WAX220PA manuals
Add to My Manuals
Save this manual to your list of manuals |
Page 132 highlights
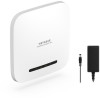
Essentials WiFi 6 AX4200 Dual Band Multi-Gig Access Point Model WAX220 6. Connect an Ethernet cable, or both an Ethernet cable and power adapter, to the AP before mounting. The AP is designed to be unobtrusive, so it sits flat on the ceiling surface when it is mounted. 7. Hold the AP upside down at approximately a 45-degree angle, and attach it to the mounting plate. When viewed from the front, the latch points towards the lower left corner of the AP. 8. Twist the AP clockwise to lock it onto the mounting plate. The opening at the bottom of the mounting plate latch locks onto the knob at the bottom of the AP. In final position, the latch points directly towards the center bottom edge of the AP. Mount the AP to a Wall or 132 Ceiling User Manual
-
 1
1 -
2
-
3
-
4
-
5
-
6
-
7
-
8
-
9
-
10
-
11
-
12
-
13
-
14
-
15
-
16
-
17
-
18
-
19
-
20
-
21
-
22
-
23
-
24
-
25
-
26
-
27
-
28
-
29
-
30
-
31
-
32
-
33
-
34
-
35
-
36
-
37
-
38
-
39
-
40
-
41
-
42
-
43
-
44
-
45
-
46
-
47
-
48
-
49
-
50
-
51
-
52
-
53
-
54
-
55
-
56
-
57
-
58
-
59
-
60
-
61
-
62
-
63
-
64
-
65
-
66
-
67
-
68
-
69
-
70
-
71
-
72
-
73
-
74
-
75
-
76
-
77
-
78
-
79
-
80
-
81
-
82
-
83
-
84
-
85
-
86
-
87
-
88
-
89
-
90
-
91
-
92
-
93
-
94
-
95
-
96
-
97
-
98
-
99
-
100
-
101
-
102
-
103
-
104
-
105
-
106
-
107
-
108
-
109
-
110
-
111
-
112
-
113
-
114
-
115
-
116
-
117
-
118
-
119
-
120
-
121
-
122
-
123
-
124
-
125
-
126
-
 127
127 -
 128
128 -
 129
129 -
 130
130 -
 131
131 -
 132
132 -
 133
133 -
 134
134 -
 135
135
 |
 |
