Nikon 25214 D70 User's Guide - Page 28
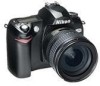
Attaching Lenses, If this step is omitted when attaching a CPU
 |
UPC - 018208252145
View all Nikon 25214 manuals
Add to My Manuals
Save this manual to your list of manuals |
Page 28 highlights
Attaching Lenses Nikon recommends using a type G or type D CPU lens to take full advantage of the features the camera offers. Introduction-First Steps CPU lenses have CPU contacts Type G lens 1 Turn the camera off Turn the camera off before attaching or removing lenses. 2 Attach a lens Keeping the mounting mark on the lens aligned with the mounting mark on the camera body, position the lens in the camera's bayonet mount. Being careful not to press the lens-release button, rotate the lens counter-clockwise until it clicks into place. 3 Lock aperture at the minimum setting This step is not necessary if you are using a type G lens not equipped with an aperture ring. If you are using a lens of another type, lock aperture at the minimum setting (highest f/-number). If this step is omitted when attaching a CPU lens, the aperture displays in the control panel and viewfinder will show a blinking when the camera is turned on. Photographs can not be taken until the camera is turned off and aperture locked at the highest f/-number. 18 Type D lens
-
 1
1 -
2
-
3
-
4
-
5
-
6
-
7
-
8
-
9
-
10
-
11
-
12
-
13
-
14
-
15
-
16
-
17
-
18
-
19
-
20
-
21
-
22
-
 23
23 -
 24
24 -
 25
25 -
 26
26 -
 27
27 -
 28
28 -
 29
29 -
 30
30 -
 31
31 -
 32
32 -
 33
33 -
34
-
35
-
36
-
37
-
38
-
39
-
40
-
41
-
42
-
43
-
44
-
45
-
46
-
47
-
48
-
49
-
50
-
51
-
52
-
53
-
54
-
55
-
56
-
57
-
58
-
59
-
60
-
61
-
62
-
63
-
64
-
65
-
66
-
67
-
68
-
69
-
70
-
71
-
72
-
73
-
74
-
75
-
76
-
77
-
78
-
79
-
80
-
81
-
82
-
83
-
84
-
85
-
86
-
87
-
88
-
89
-
90
-
91
-
92
-
93
-
94
-
95
-
96
-
97
-
98
-
99
-
100
-
101
-
102
-
103
-
104
-
105
-
106
-
107
-
108
-
109
-
110
-
111
-
112
-
113
-
114
-
115
-
116
-
117
-
118
-
119
-
120
-
121
-
122
-
123
-
124
-
125
-
126
-
127
-
128
-
129
-
130
-
131
-
132
-
133
-
134
-
135
-
136
-
137
-
138
-
139
-
140
-
141
-
142
-
143
-
144
-
145
-
146
-
147
-
148
-
149
-
150
-
151
-
152
-
153
-
154
-
155
-
156
-
157
-
158
-
159
-
160
-
161
-
162
-
163
-
164
-
165
-
166
-
167
-
168
-
169
-
170
-
171
-
172
-
173
-
174
-
175
-
176
-
177
-
178
-
179
-
180
-
181
-
182
-
183
-
184
-
185
-
186
-
187
-
188
-
189
-
190
-
191
-
192
-
193
-
194
-
195
-
196
-
197
-
198
-
199
-
200
-
201
-
202
-
203
-
204
-
205
-
206
-
207
-
208
-
209
-
210
-
211
-
212
-
213
-
214
-
215
-
216
-
217
-
218
 |
 |
