Nokia 1261 User Guide - Page 18
Contact deletions, Set PIM properties, Synchronizing for the first time, Exit PC Sync, Start PC Sync - sim card
 |
UPC - 844602105455
View all Nokia 1261 manuals
Add to My Manuals
Save this manual to your list of manuals |
Page 18 highlights
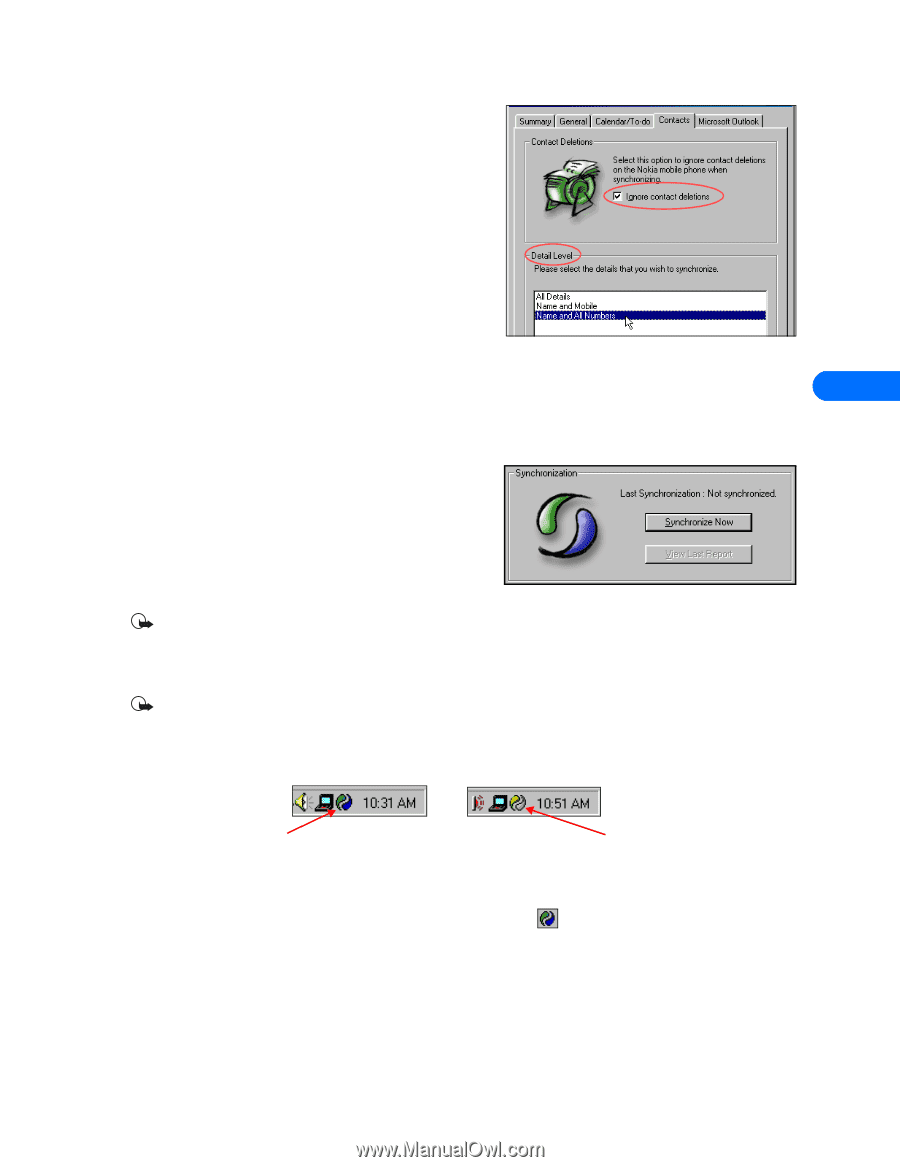
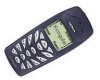
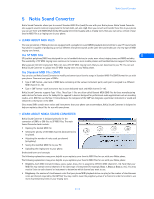
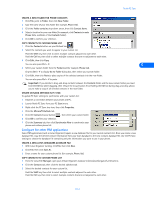
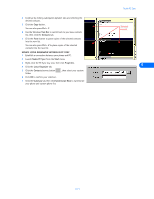
Nokia PC Sync 3 Click the Contacts tab. 4 Select the details you want synchronized with your phone. Contact deletions By default, contacts deleted from your phone are not deleted from your PIM when you synchronize. If you accidentally delete a contact from your phone, you can restore it by synchronizing again. Deselecting the Ignore contact deletions option instructs PC Sync to permanently delete the corresponding contact in your PIM. Choose this option only when you are certain you want PC Sync to delete the PIM contact (and all details) associated with the deleted contacts list entry. Deleting contacts list entries cannot be undone! Set PIM properties The last properties tab is labeled with the name of your PIM application. Use this properties tab to modify how PC Sync communicates with your PIM resources. For example, if your PC is configured for multiple users, the default location of the database with your information may be stored in a user profile directory instead of the default location for a single-user PC. PC 6 Sync returns an error message if it cannot find your PIM data. Use the PIM properties tab to select the correct location of your PIM databases containing current contacts, calendar, and to-do list information. Synchronizing for the first time Once you have customized PC Sync for your uses, you are ready to synchronize your phone and PIM. 1 Click the Summary tab. 2 Click the Synchronize Now button. 3 Observe the synchronization status indicator. 4 Click the OK button when synchronization is complete. Important: Please refer to the Troubleshooting document in the event synchronization is not successful or if PC Suite notifies you of errors. A link to this document can be found in the Nokia PC Suite 5 Program Group. • UNDERSTAND THE BASICS OF SYNCHRONIZATION Important: Synchronization occurs between numbers in your PIM application and contacts list memory only. Numbers stored on the SIM card are not synchronized with your PIM application. Nokia PC Sync remains running in the background after you synchronize for the first time. PC Sync places an icon in the task bar tray to indicate that the application is running. The colors of the icon change, depending on the status of the IR connection between your phone and PC, as shown in this example: Blue and green indicates a connection is present between your phone and PC. Yellow and gray indicates no connection is present between your phone and PC. Exit PC Sync Once you have completed setup and have synchronized for the first time, you can either leave the program running in the background, or exit PC Sync. To exit PC Sync, right-click the PC Sync tray icon , then click Exit. Start PC Sync You have two options for launching Nokia PC Sync: • As-needed from the Windows Start menu. • Automatically upon startup. [ 14 ]
-
 1
1 -
2
-
3
-
4
-
5
-
6
-
7
-
8
-
9
-
10
-
11
-
12
-
 13
13 -
 14
14 -
 15
15 -
 16
16 -
 17
17 -
 18
18 -
 19
19 -
 20
20 -
 21
21 -
 22
22 -
 23
23 -
24
-
25
-
26
-
27
-
28
-
29
-
30
-
31
-
32
-
33
-
34
-
35
-
36
-
37
-
38
-
39
-
40
-
41
-
42
-
43
-
44
-
45
-
46
-
47
-
48
-
49
-
50
-
51
-
52
-
53
-
54
-
55
 |
 |