Nokia 1261 User Guide - Page 23
Explore image options
 |
UPC - 844602105455
View all Nokia 1261 manuals
Add to My Manuals
Save this manual to your list of manuals |
Page 23 highlights
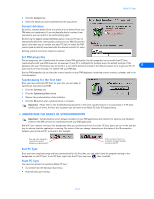
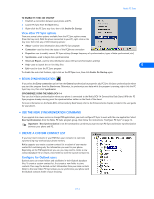
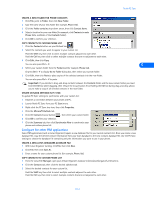
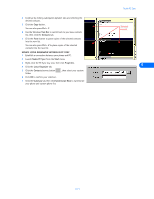
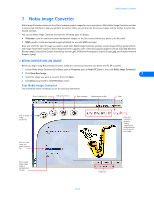
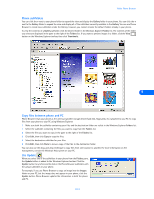
Nokia Image Converter Explore image options The Preferences screen is used to select which Nokia phone you wish to use with the current image, as well as resize the image prior to any additional edits. 1 Click the Select phone drop-down arrow, then select the model of your Nokia phone from the list. 2 Click Image resizing (optional), then drag the slider to resize your image. 3 Click OK to confirm the new image size. 4 Click Next to continue. CROPPING Images used for MMS messages or wallpaper must conform to a certain width and height ratio. Use the Cropping option to capture the portion of the image you want to use. 1 Click the button associated with the type of picture you are trying to create (for example, Wallpaper ). 7 2 Use your mouse to drag the highlighted area over the portion of the image you want to use. Note: If you select Free size image, click and hold your mouse button, then drag to highlight the portion of the image you want to use. 3 Use the adjustment handles on the corners (or on the sides) of the highlighted area to adjust the size of the area you want to crop. 4 Click the Crop button to complete the process (or double-click anywhere inside the highlighted area). 5 Click Next. EFFECTS Nokia Image Converter offers you several special effects similar to those found in industry standard imaging software programs. Each effect has its own set of optional settings you can use to customize how the effect is applied to your image. For example, use the Emboss effect to add 3-D effects to your image. 1 Click the desired effect (for example, Emboss). 2 Use the Emboss options screen to adjust the various effects settings. 3 Click OK to apply your changes. [ 19 ]
-
 1
1 -
2
-
3
-
4
-
5
-
6
-
7
-
8
-
9
-
10
-
11
-
12
-
13
-
14
-
15
-
16
-
17
-
 18
18 -
 19
19 -
 20
20 -
 21
21 -
 22
22 -
 23
23 -
 24
24 -
 25
25 -
 26
26 -
 27
27 -
 28
28 -
29
-
30
-
31
-
32
-
33
-
34
-
35
-
36
-
37
-
38
-
39
-
40
-
41
-
42
-
43
-
44
-
45
-
46
-
47
-
48
-
49
-
50
-
51
-
52
-
53
-
54
-
55
 |
 |
