Nokia 1261 User Guide - Page 41
Create a new connection Windows 98/ME, Create a new connection Windows 2000, Create a new connection
 |
UPC - 844602105455
View all Nokia 1261 manuals
Add to My Manuals
Save this manual to your list of manuals |
Page 41 highlights
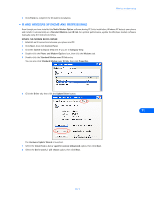
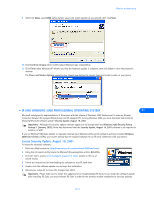
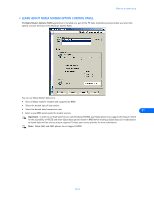
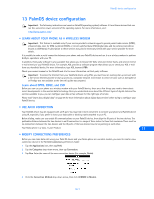
Configure your data and fax software • USE MICROSOFT DIAL-UP NETWORKING FOR GPRS/EDGE DATA You can use Microsoft Dial-up Networking to connect to the Internet through your wireless service provider's access point. To access the GPRS or EDGE data network, use the following dialing string instead of a traditional phone number: *99# Create a new connection (Windows 98/ME) 1 Double-click the My Computer icon, then double-click the Dial-up Networking folder. Windows ME users: Click Start, point to Settings, then click Dial-up Networking. 2 Double-click the Make New Connection icon. 3 Type a name for your new connection (for example, Internet-GPRS). 4 Click the drop-down arrow and select your Nokia phone as the modem to use, then click Next. 5 Enter the GPRS network access code, *99# , then click Finish. You may need to remove area code information so only the access code appears. Create a new connection (Windows 2000) 1 Click Start, point to Settings, then click Network and Dial-up Connections. 2 Double-click Make New Connection, then click Next to begin the Network Connection Wizard. 3 Verify that Dial-up to private network is selected, then click Next. 4 Select only your Nokia phone as the active modem, then click Next. 5 Enter the GPRS network access code, *99# , then click Next. 6 Select the connection availability, then click Next. 12 7 Type a name for your new connection (for example, Internet-GPRS), then click Finish. Your new Dial-up Networking connection is now ready for use. You may need to remove information found in the User name field prior to creating a GPRS or EDGE data connection. Create a new connection (Windows XP) 1 Click Start, then click Control Panel. 2 Double-click Network Connections. 3 Click Create a new connection in the Network Tasks pane, then click Next to begin the New Connection Wizard. 4 Verify that the Connect to the Internet option is selected, then click Next. [ 37 ]
-
 1
1 -
2
-
3
-
4
-
5
-
6
-
7
-
8
-
9
-
10
-
11
-
12
-
13
-
14
-
15
-
16
-
17
-
18
-
19
-
20
-
21
-
22
-
23
-
24
-
25
-
26
-
27
-
28
-
29
-
30
-
31
-
32
-
33
-
34
-
35
-
 36
36 -
 37
37 -
 38
38 -
 39
39 -
 40
40 -
 41
41 -
 42
42 -
 43
43 -
 44
44 -
 45
45 -
 46
46 -
47
-
48
-
49
-
50
-
51
-
52
-
53
-
54
-
55
 |
 |