Oki OKIPAGE14e English:OKIPAGE 14e Setup Guide - Page 21
USB Connection - Windows 2000, Install the Printer Driver and Status, Monitor - okipage 14e usb driver windows 7
 |
View all Oki OKIPAGE14e manuals
Add to My Manuals
Save this manual to your list of manuals |
Page 21 highlights
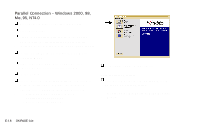
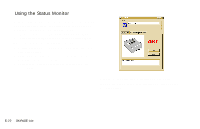
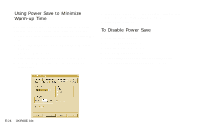
USB Connection - Windows 2000 G Turn on your computer and wait for it to boot up. G Turn on your printer. The USB driver will automatically load. G Found New Hardware Wizard appears. Click Cancel. ! To fully install all the necessary software, use the following install procedures with the OKIPAGE 14e CD. Install the Printer Driver and Status Monitor G Insert the OKIPAGE 14e CD into your CD-ROM drive. G Click Start → Run. G Browse to your CD-ROM drive and double-click INSTALL.EXE in the root directory. Click OK. G The OKI Menu Installer appears. Select a language. G Click the button beside Printer Software and follow the on-screen instructions, selecting the LPT1 port. You can change your port selection once the installation is completed. ! You can click a button on the Menu Installer to: • View Help Support and Information • Register your printer online • Select a different language G Click Finish. Exit the Menu Installer. Select the USB printer port: G From the Windows Taskbar, click Start → Settings → Printers. Right-click the OKIPAGE 14e icon, then click Properties\Ports. G Scroll down and select USB001 in the "Print to the Following port" list. Click Apply. Click OK. Open the Status Monitor: G Click Start →Programs → OKIPAGE 14e → OKIPAGE 14e Status Monitor. ! See page 22 for information on using the Status Monitor. | 14e Setup Guide E-21
-
 1
1 -
2
-
3
-
4
-
5
-
6
-
7
-
8
-
9
-
10
-
11
-
12
-
13
-
14
-
15
-
 16
16 -
 17
17 -
 18
18 -
 19
19 -
 20
20 -
 21
21 -
 22
22 -
 23
23 -
 24
24 -
 25
25 -
 26
26 -
27
-
28
 |
 |