Onkyo TX-NR3007 Owner Manual - Page 105
Notes, North American models, To correct a character, Game Mode, Picture Adjust
 |
View all Onkyo TX-NR3007 manuals
Add to My Manuals
Save this manual to your list of manuals |
Page 105 highlights
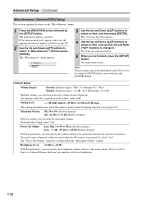
Advanced Setup-Continued Name Edit You can enter a custom name for each individual input selector (excluding TUNER) and radio preset for easy identification. When entered, the custom name will appear on the display. Notes: • To name a radio preset, use the [TUNER] button to select AM or FM, and then select the preset (see page 74). • (North American models) You cannot enter a custom name for SIRIUS radio presets. • To restore a custom name to the default, erase the custom name by entering an empty white space for each letter. 1 Use the arrow [R]/[X]/[F]/[S] buttons to select a character, and then press [ENTER]. Repeat this step to enter up to 10 characters. 2 When you've finished, to store a name, be sure to use the arrow [R]/[X]/[F]/[S] buttons to select "OK", and then press [ENTER]. Otherwise it will not be saved. Name input area 4 - 3. Name Edit Name DVD/BD ABCDEFGH I JKLM NOPQRS T UVWX Y Z abcde f gh i j k lm nopq r s t uvwxy z 1234567890- ` !@# $%^& ( )_ ~ {}|: [] Space Back Space OK (Left)/ (Right): Selected when the cursor is moved within the Name input area. Back Space: "Back Space" deletes one character to the left of the cursor. OK: Selects when the entry is complete. To correct a character: 1. Use the arrow [R]/[X]/[F]/[S] buttons to select " "(Left) or " "(Right) and then press [ENTER]. 2. Press [ENTER] several times to select the incorrect character (The cursor moves one letter each time [ENTER] is pressed). 3. Use the arrow [R]/[X]/[F]/[S] buttons to select the correct character, and then press [ENTER]. Picture Adjust Using Picture Adjust, you can adjust the picture quality and reduce any noise appearing on the screen. To view the TV picture while setting, press [ENTER]. To return to the previous screen, press the [RETURN] button. "Picture Adjust" is not operable when the input selector is set to "NET/USB". Tip: The "Picture Adjust" menus (excluding "Red Brightness" to "Blue Contrast") can also be set using the [VIDEO] button on the remote controller. 1. Press the [RECEIVER] button, followed by the [VIDEO] button. 2. Use the Up and Down [R]/[X] buttons to select item, and then use the Left and Right [F]/[S] buttons to change the setting. Game Mode Off: Game Mode off (default). On: Game Mode on. If video signal delay occurs during playback on a video component (i.e. game console), select the corresponding input source and set the "Game Mode" setting to "On". The delay will decrease but in return the picture quality will become poor. 105
-
 1
1 -
2
-
3
-
4
-
5
-
6
-
7
-
8
-
9
-
10
-
11
-
12
-
13
-
14
-
15
-
16
-
17
-
18
-
19
-
20
-
21
-
22
-
23
-
24
-
25
-
26
-
27
-
28
-
29
-
30
-
31
-
32
-
33
-
34
-
35
-
36
-
37
-
38
-
39
-
40
-
41
-
42
-
43
-
44
-
45
-
46
-
47
-
48
-
49
-
50
-
51
-
52
-
53
-
54
-
55
-
56
-
57
-
58
-
59
-
60
-
61
-
62
-
63
-
64
-
65
-
66
-
67
-
68
-
69
-
70
-
71
-
72
-
73
-
74
-
75
-
76
-
77
-
78
-
79
-
80
-
81
-
82
-
83
-
84
-
85
-
86
-
87
-
88
-
89
-
90
-
91
-
92
-
93
-
94
-
95
-
96
-
97
-
98
-
99
-
 100
100 -
 101
101 -
 102
102 -
 103
103 -
 104
104 -
 105
105 -
 106
106 -
 107
107 -
 108
108 -
 109
109 -
 110
110 -
111
-
112
-
113
-
114
-
115
-
116
-
117
-
118
-
119
-
120
-
121
-
122
-
123
-
124
-
125
-
126
-
127
-
128
-
129
-
130
-
131
-
132
-
133
-
134
-
135
-
136
-
137
-
138
-
139
-
140
-
141
-
142
-
143
-
144
-
145
-
146
-
147
-
148
-
149
-
150
-
151
-
152
-
153
-
154
-
155
-
156
-
157
-
158
-
159
-
160
-
161
-
162
-
163
-
164
 |
 |
