Onkyo TX-NR708 Owner Manual - Page 27
Changing the Input Display, Using Headphones, TV/CD, VCR/DVR, PHONES - remote control codes
 |
View all Onkyo TX-NR708 manuals
Add to My Manuals
Save this manual to your list of manuals |
Page 27 highlights
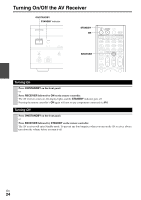
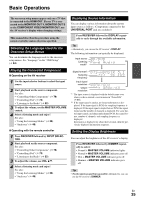
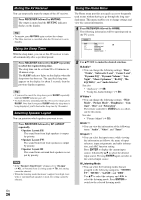
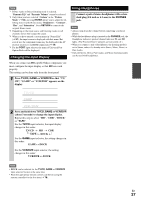
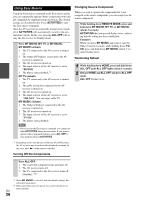
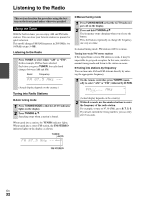
Note *1 If Pure Audio or Direct listening mode is selected, "Dynamic EQ" and "Dynamic Volume" cannot be selected. *2 Only when you have selected "Custom" in the "Picture Mode" (➔ 52), pressing ENTER allows you to adjust the following items via the Home menu; "Brightness", "Contrast", "Hue", and "Saturation". Press RETURN to return to the original Home menu. *3 Depending on the input source and listening mode, not all channels shown here output the sound. *4 When you have entered a custom name in "Name Edit" (➔ 51), the input source is displayed with that name. But even if not, the component name may be displayed if the AV receiver receives it via HDMI connection (➔ 18). *5 For the PORT input selector, the name of Universal Port Option Dock will be displayed. Changing the Input Display Using Headphones Connect a pair of stereo headphones with a standard plug (1/4 inch or 6.3 mm) to the PHONES jack. Note • Always turn down the volume before connecting your head- phones. • While the headphones plug is inserted in the PHONES jack, the Headphone indicator, speaker/channel indicator FL and FR lights. (The Powered Zone 2 speakers are not turned off.) • When you connect a pair of headphones, the listening mode is set to Stereo, unless it's already set to Stereo, Mono, Direct, or Pure Audio. • Only the Stereo, Direct, Pure Audio, and Mono listening modes can be used with headphones. When you connect an V-capable Onkyo component, you must configure the input display so that V can work properly. This setting can be done only from the front panel. 1 Press TV/CD, GAME or VCR/DVR so that "TV/ CD", "GAME" or "VCR/DVR" appears on the display. → → → 2 Press and hold down TV/CD, GAME or VCR/DVR (about 3 seconds) to change the input display. Repeat this step to select "MD", "CDR", "DOCK" or "TAPE". For the TV/CD input selector, the input display changes in this order: TV/CD → MD → CDR TAPE DOCK For the GAME input selector, the setting changes in this order: GAME ↔ DOCK For the VCR/DVR input selector, the setting changes in this order: VCR/DVR ↔ DOCK Note • DOCK can be selected for the TV/CD, GAME or VCR/DVR input selector, but not at the same time. • Enter the appropriate remote control code before using the remote controller for the first time (➔ 78). En 27
-
 1
1 -
2
-
3
-
4
-
5
-
6
-
7
-
8
-
9
-
10
-
11
-
12
-
13
-
14
-
15
-
16
-
17
-
18
-
19
-
20
-
21
-
 22
22 -
 23
23 -
 24
24 -
 25
25 -
 26
26 -
 27
27 -
 28
28 -
 29
29 -
 30
30 -
 31
31 -
 32
32 -
33
-
34
-
35
-
36
-
37
-
38
-
39
-
40
-
41
-
42
-
43
-
44
-
45
-
46
-
47
-
48
-
49
-
50
-
51
-
52
-
53
-
54
-
55
-
56
-
57
-
58
-
59
-
60
-
61
-
62
-
63
-
64
-
65
-
66
-
67
-
68
-
69
-
70
-
71
-
72
-
73
-
74
-
75
-
76
-
77
-
78
-
79
-
80
-
81
-
82
-
83
-
84
-
85
-
86
-
87
-
88
-
89
-
90
-
91
-
92
-
93
-
94
-
95
-
96
 |
 |