Onkyo TX SR674 Owner Manual - Page 37
Turning On the AV Receiver - hdmi problems
 |
UPC - 751398007118
View all Onkyo TX SR674 manuals
Add to My Manuals
Save this manual to your list of manuals |
Page 37 highlights
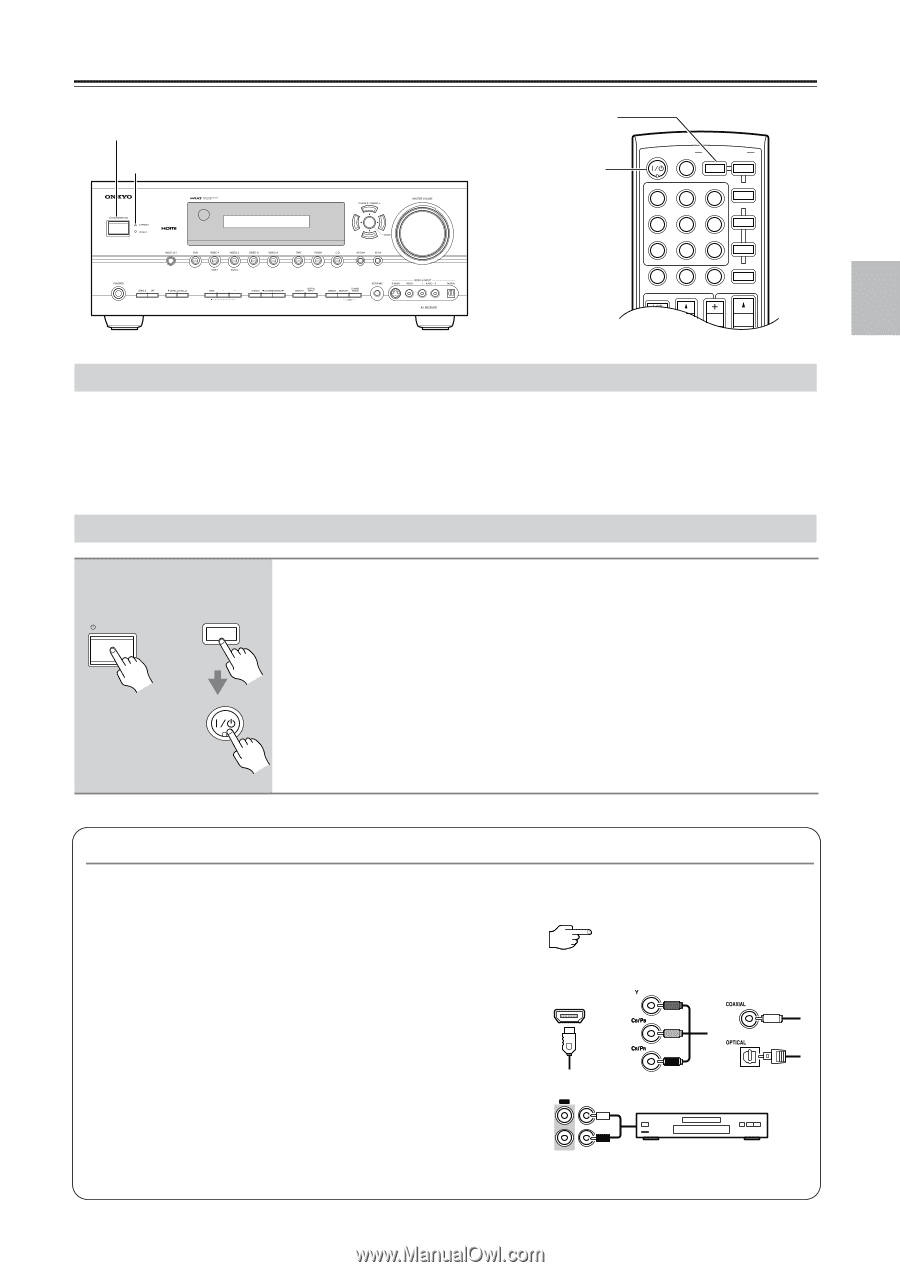
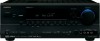
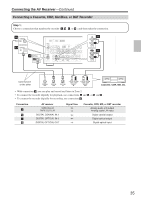
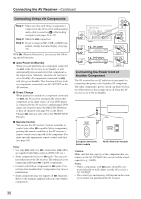
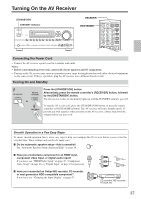
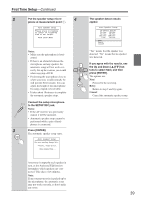
Turning On the AV Receiver STANDBY/ON STANDBY indicator RECEIVER ON/STANDBY ON/STANDBY ZONE2 REMOTE MODE RECEIVER TAPE INPUT SELECTOR 1 2 3 V1 V2 V3 DVD M D/CDR C D HDD 4 5 6 TV V4 MULTI CH DVD 7 8 9 VCR TAPE TUNER 10 11 +10 0 C D 12 CABLE CLR SAT D TUN --/--- ENT DIMMER SLEEP TV VOL INPUT CH DISC ALBUM VOL Connecting the Power Cord • Connect the AV receiver's power cord to a suitable wall outlet. Notes: • Before connecting the power cord, connect all of your speakers and AV components. • Turning on the AV receiver may cause a momentary power surge that might interfere with other electrical equipment on the same circuit. If this is a problem, plug the AV receiver into a different branch circuit. Turning On and Standby 1 AV receiver Remote controller STANDBY/ON RECEIVER or ON/STANDBY Press the [STANDBY/ON] button. Alternatively, press the remote controller's [RECEIVER] button, followed by the [ON/STANDBY] button. The AV receiver comes on, the display lights up, and the STANDBY indicator goes off. To turn the AV receiver off, press the [STANDBY/ON] button, or press the remote controller's [ON/STANDBY] button. The AV receiver will enter Standby mode. To prevent any loud surprises when you turn on the AV receiver, always turn down the volume before you turn it off. Smooth Operation in a Few Easy Steps To ensure smooth operation, here's a few easy steps to help you configure the AV receiver before you use it for the very first time. These settings only need to be made once. I Do the automatic speaker setup-this is essential! See "Automatic Speaker Setup (Audyssey2EQ)" on page 38. I Have you connected a component to an HDMI input, HDMI component video input, or digital audio input? If you have, see "HDMI Video Setup" on page 45, "Component Video Setup" on page 46, or "Digital Input" on page 44 respectively. I Have you connected an Onkyo MD recorder, CD recorder, OUT IN or next generation HDD-compatible component? If you have, see "Changing the Input Display" on page 47. TAPE CD recorder, MD recorder, RI Dock, etc. 37
-
 1
1 -
2
-
3
-
4
-
5
-
6
-
7
-
8
-
9
-
10
-
11
-
12
-
13
-
14
-
15
-
16
-
17
-
18
-
19
-
20
-
21
-
22
-
23
-
24
-
25
-
26
-
27
-
28
-
29
-
30
-
31
-
 32
32 -
 33
33 -
 34
34 -
 35
35 -
 36
36 -
 37
37 -
 38
38 -
 39
39 -
 40
40 -
 41
41 -
 42
42 -
43
-
44
-
45
-
46
-
47
-
48
-
49
-
50
-
51
-
52
-
53
-
54
-
55
-
56
-
57
-
58
-
59
-
60
-
61
-
62
-
63
-
64
-
65
-
66
-
67
-
68
-
69
-
70
-
71
-
72
-
73
-
74
-
75
-
76
-
77
-
78
-
79
-
80
-
81
-
82
-
83
-
84
-
85
-
86
-
87
-
88
-
89
-
90
-
91
-
92
 |
 |