Palsonic TFTV4355M Owners Manual - Page 10
System Connections
 |
View all Palsonic TFTV4355M manuals
Add to My Manuals
Save this manual to your list of manuals |
Page 10 highlights
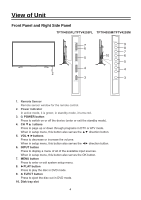
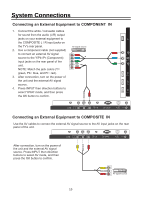
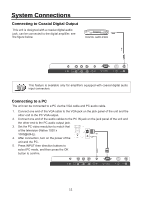
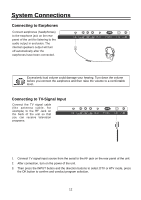
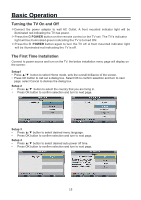
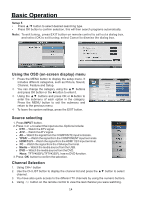
System Connections Do not connect the power cord until all other connections have been made. Ensure that you observe the color code when connecting audio and video cables. Connecting to the Power Supply Connect the plug of the power cord on the rear panel of the unit to the AC100~240V wall outlet. Connecting a USB Device This unit is designed with a USB port so that you can connect your USB device for media play, record or software upgrade. See the figure below: Make sure that the desired file for media play or software upgrade is stored in the USB device before connection. Connecting to an External HDMI Signal Source 1. Connect an HDMI signal source to one of the HDMI3 HDMI jacks on the rear panel of the unit. 2. After connection, turn on the power of the unit and the HDMI signal source. 3. Press INPUT then direction buttons to select HDMI 1, HDMI 2 or HDMI3 mode, and then press HDMI1 the OK button to confirm. HDMI HDMI signal source HDMI provides both audio and video signals and typically provides superior image quality to AV and YPbPr. 9
-
 1
1 -
2
-
3
-
4
-
 5
5 -
 6
6 -
 7
7 -
 8
8 -
 9
9 -
 10
10 -
 11
11 -
 12
12 -
 13
13 -
 14
14 -
 15
15 -
16
-
17
-
18
-
19
-
20
-
21
-
22
-
23
-
24
-
25
-
26
-
27
-
28
-
29
-
30
-
31
-
32
-
33
-
34
-
35
-
36
-
37
-
38
 |
 |
